Posted 08 July 2026
In this previous post, I describes my work with Grok Code to successfully demonstrate the use of vision processing with a Luxonis OAKD-Lite camera and a Raspberry Pi5 to generate ‘best clear direction’ advisories for robot motion control.
After achieving the above milestone, I started thinking about the next steps. Clearly I want to move on to achieve actual robot navigation utilizing the above ‘best direction’ information, but the current 2-wheel robot battery pack doesn’t really provide enough power for the Pi5, the OAKD-Lite camera, and the wheel motors. Consequently, I started thinking about moving the vision processing project from the 2-wheel robot onto my existing 4-wheel platform to take advantage of the latter’s larger battery pack. Looking at the pinouts for the Teensy 3.6 and Teensy 4.1 along with the 2-wheel and 4-wheel schematics, I developed the following pin assignment spreadsheet:
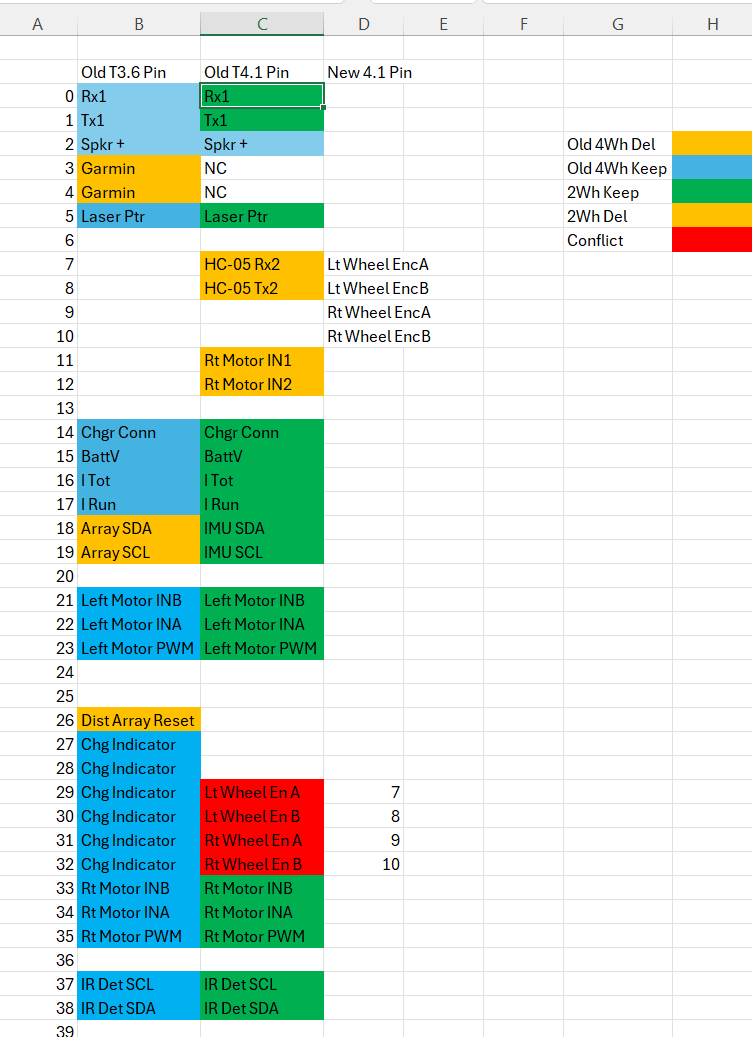
In the above (hopefully self-explanatory) spreadsheet there was only one significant conflict. On the current 2-wheel robot pins 29-32 are occupied by the four Hall-effect wheel encoders, and on the current 4-wheel robot these pins are used by four of the six battery charge indicator LED’s, and that function carries over into the new vision-enhanced robot. Easy enough resolution, just move the wheel encoder pins to 7-10 (actually even easier, I don’t need to move the encoders over until I actually have software/firmware that needs them, and that might be a while).
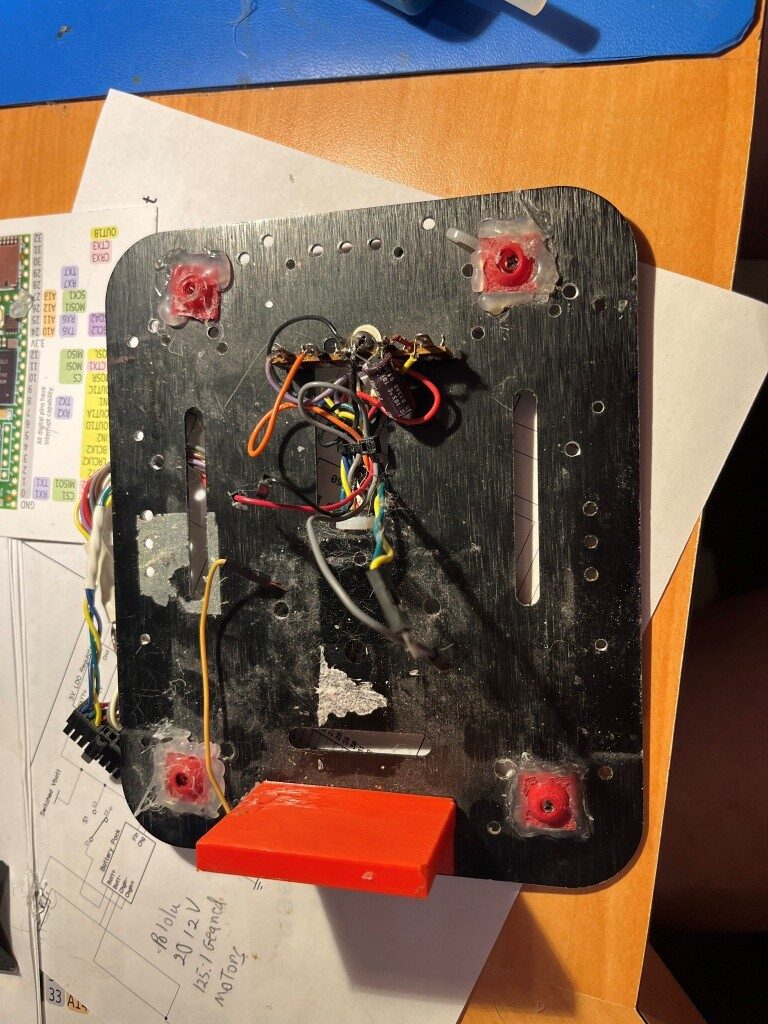
I started out thinking I would 3D print another ‘2nd deck’ plate so I wouldn’t have to disassemble the original one. Then I came to my senses and realized that I had originally constructed the 2nd deck expressly so it *could* be disassembled – duh! Here’s the mostly disassembled 2nd deck plate:
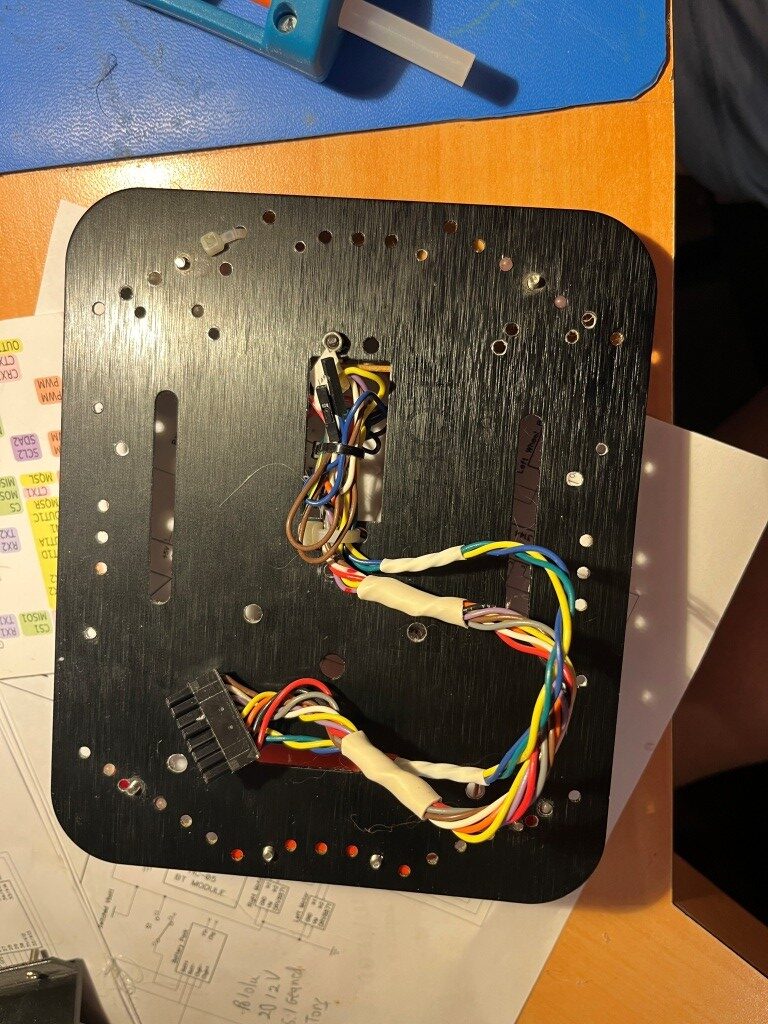
And the bottom contains all the motor hardware and drivers, the battery and charging circuitry. The ‘deck’ of the bottom deck already has a 5V regulator module (more on that below), the MPU5060 MPU and the charger unit homing module. Why re-invent when it is already there.
15 July 2026 Update:
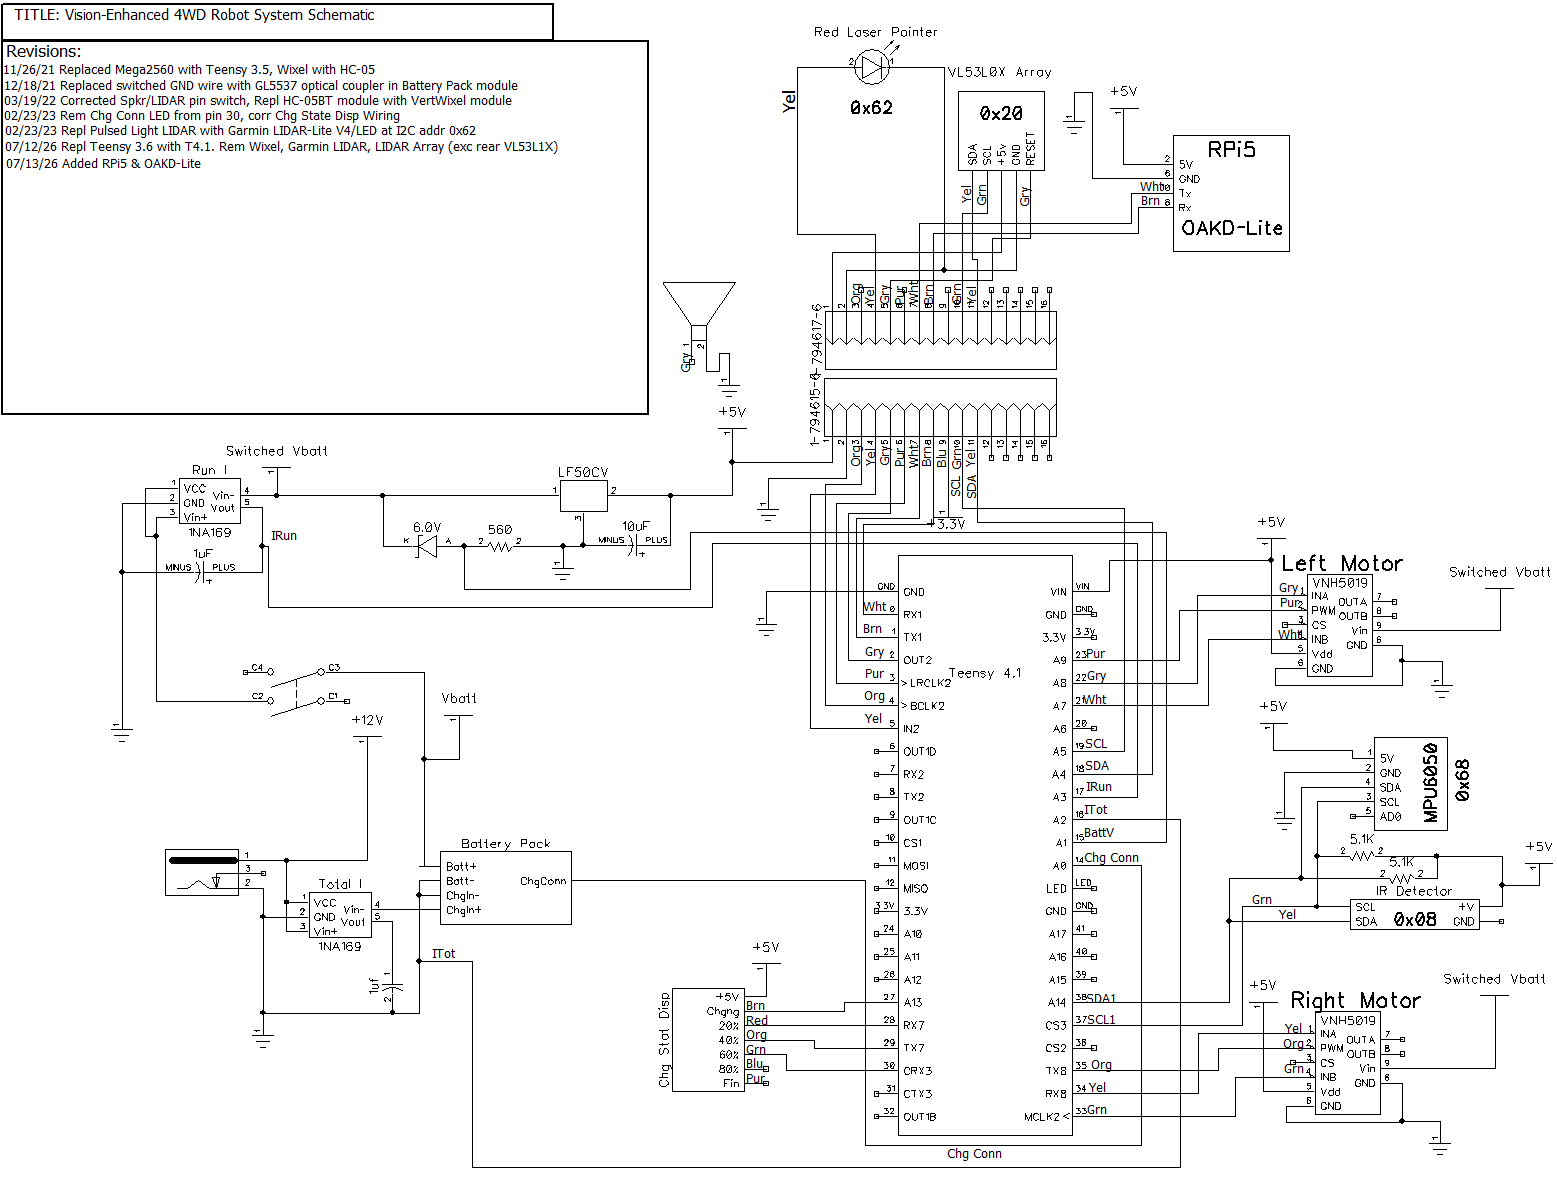
I launched DipTrace, opened the schematic file for my current 4 wheel robot, then saved a copy as ‘Vision-Enhanced Robot Schematic’ and then edited it to reflect the following changes:
- removed the Wixel OTA module; OTA is now handled through the Pi5 wifi link.
- removed all but the rear-facing element of the 7-element VL53L1X LIDAR array and the Teensy 3.5 that managed it.
- added the Raspberry Pi5 and the OAKD-Lite camera to the second deck, utilizing pins freed up by the removal of the Teensy 3.5 LIDAR array manager
- Replaced the Teensy 3.6 main system controller with a Teensy 4.1 for additional processing power.
I also replaced the approximately 45cm long USB cable that came with the camera with a 15cm one as the extra length was just adding mass (and mess) to the installation. When the new USB cable arrived, I hooked it and the Pi5 stock power cube up to the Pi5 and used the previously developed Python script and associated shell scripts to confirm that the cable worked.
20 July 2026 Update:
In the process of moving the Pi5 and OAKD-Lite camera to the 4-wheel robot, I managed somehow to lose the Pi5’s SD card. I tried my best to find it – including dumpster-diving with the hope that I could find in my last trash bag – but no luck. Attempting to make lemonade out of lemons I decided to try and document the process of building up a new SD card from scratch.
RaspberryPi Imager:
20 July 2026 Update:
In the process of moving the Pi5 and OAKD-Lite camera to the 4-wheel robot, I managed somehow to lose the Pi5’s SD card. I tried my best to find it – including dumpster-diving with the hope that I could find in my last trash bag – but no luck. Attempting to make lemonade out of lemons I decided to try and document the process of building up a new SD card from scratch.
RaspberryPi Imager:
Choose Ubuntu Server 24.04 LTS (64-bit) (Server version is recommended — Desktop images sometimes cause issues with the customization wizard). I actually had no problem with the ‘desktop’ version, but I think it included a lot more ‘crapware’ than the ‘server’ version. Also, when the ‘server’ version is chosen, the imager includes the ‘Customization’ page for wifi setup, username/password, etc.
- Hostname: RobotPi5.
- Capital City: Washington D.C
- Time Zone: America/New York
- Username: Pi
- Wifi: Choose ‘Secure Network, fil in SSID & password.
- SSH: Choose ‘Enable SSH’ and ‘Use Password authentication.
- Password: xxxx (note that on subsequent passes of the imager, it will offer to use a saved password)
- Write: The image below shows the situation just before writing the image to the SD card
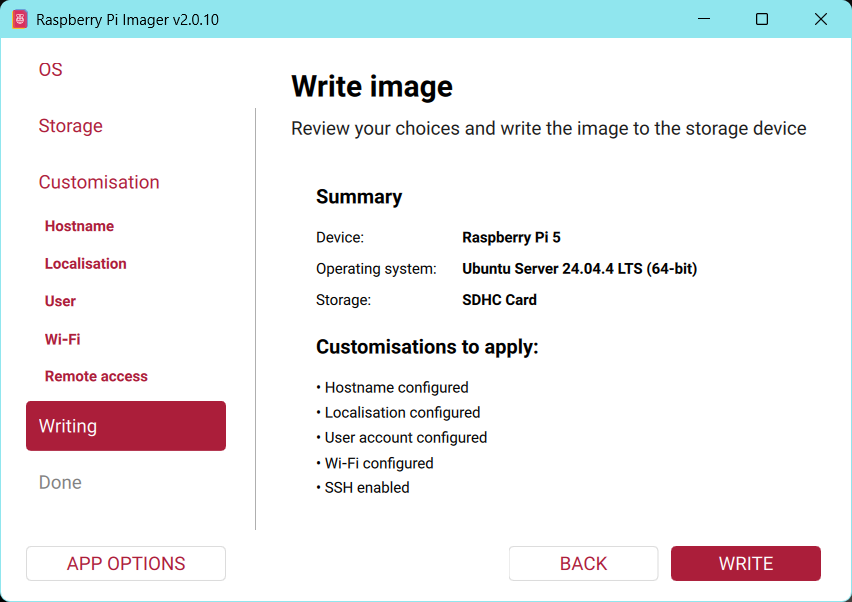
Write to the SD card (takes a few minutes).
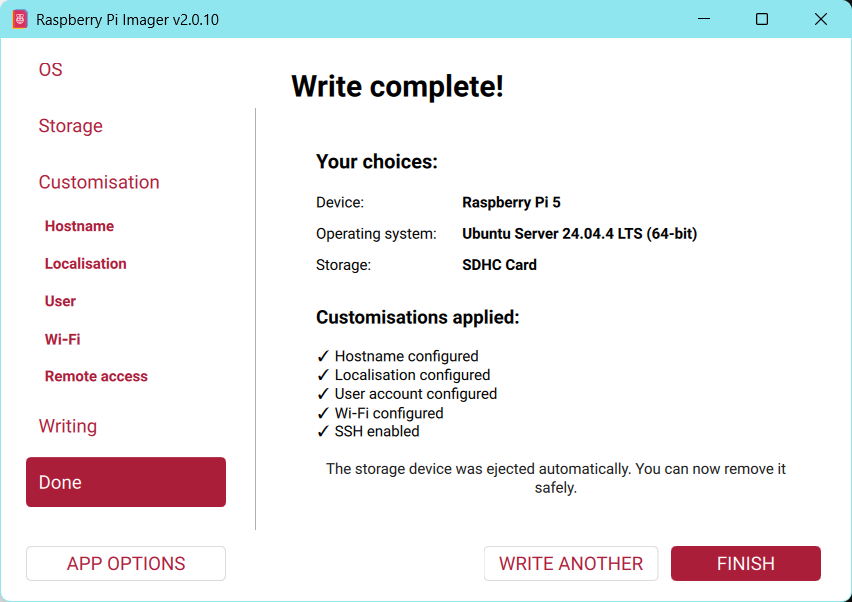
First Boot (Monitor + Keyboard):
Insert the SD card into the Pi 5 and power it on.Complete the initial Ubuntu setup prompts (this can take a few minutes).Log in with username pi and the password you set. I had to reboot the Pi a couple of times to get it to go all the way through the startup sequence to present the login screen.
Connect from Your PC via SSH:
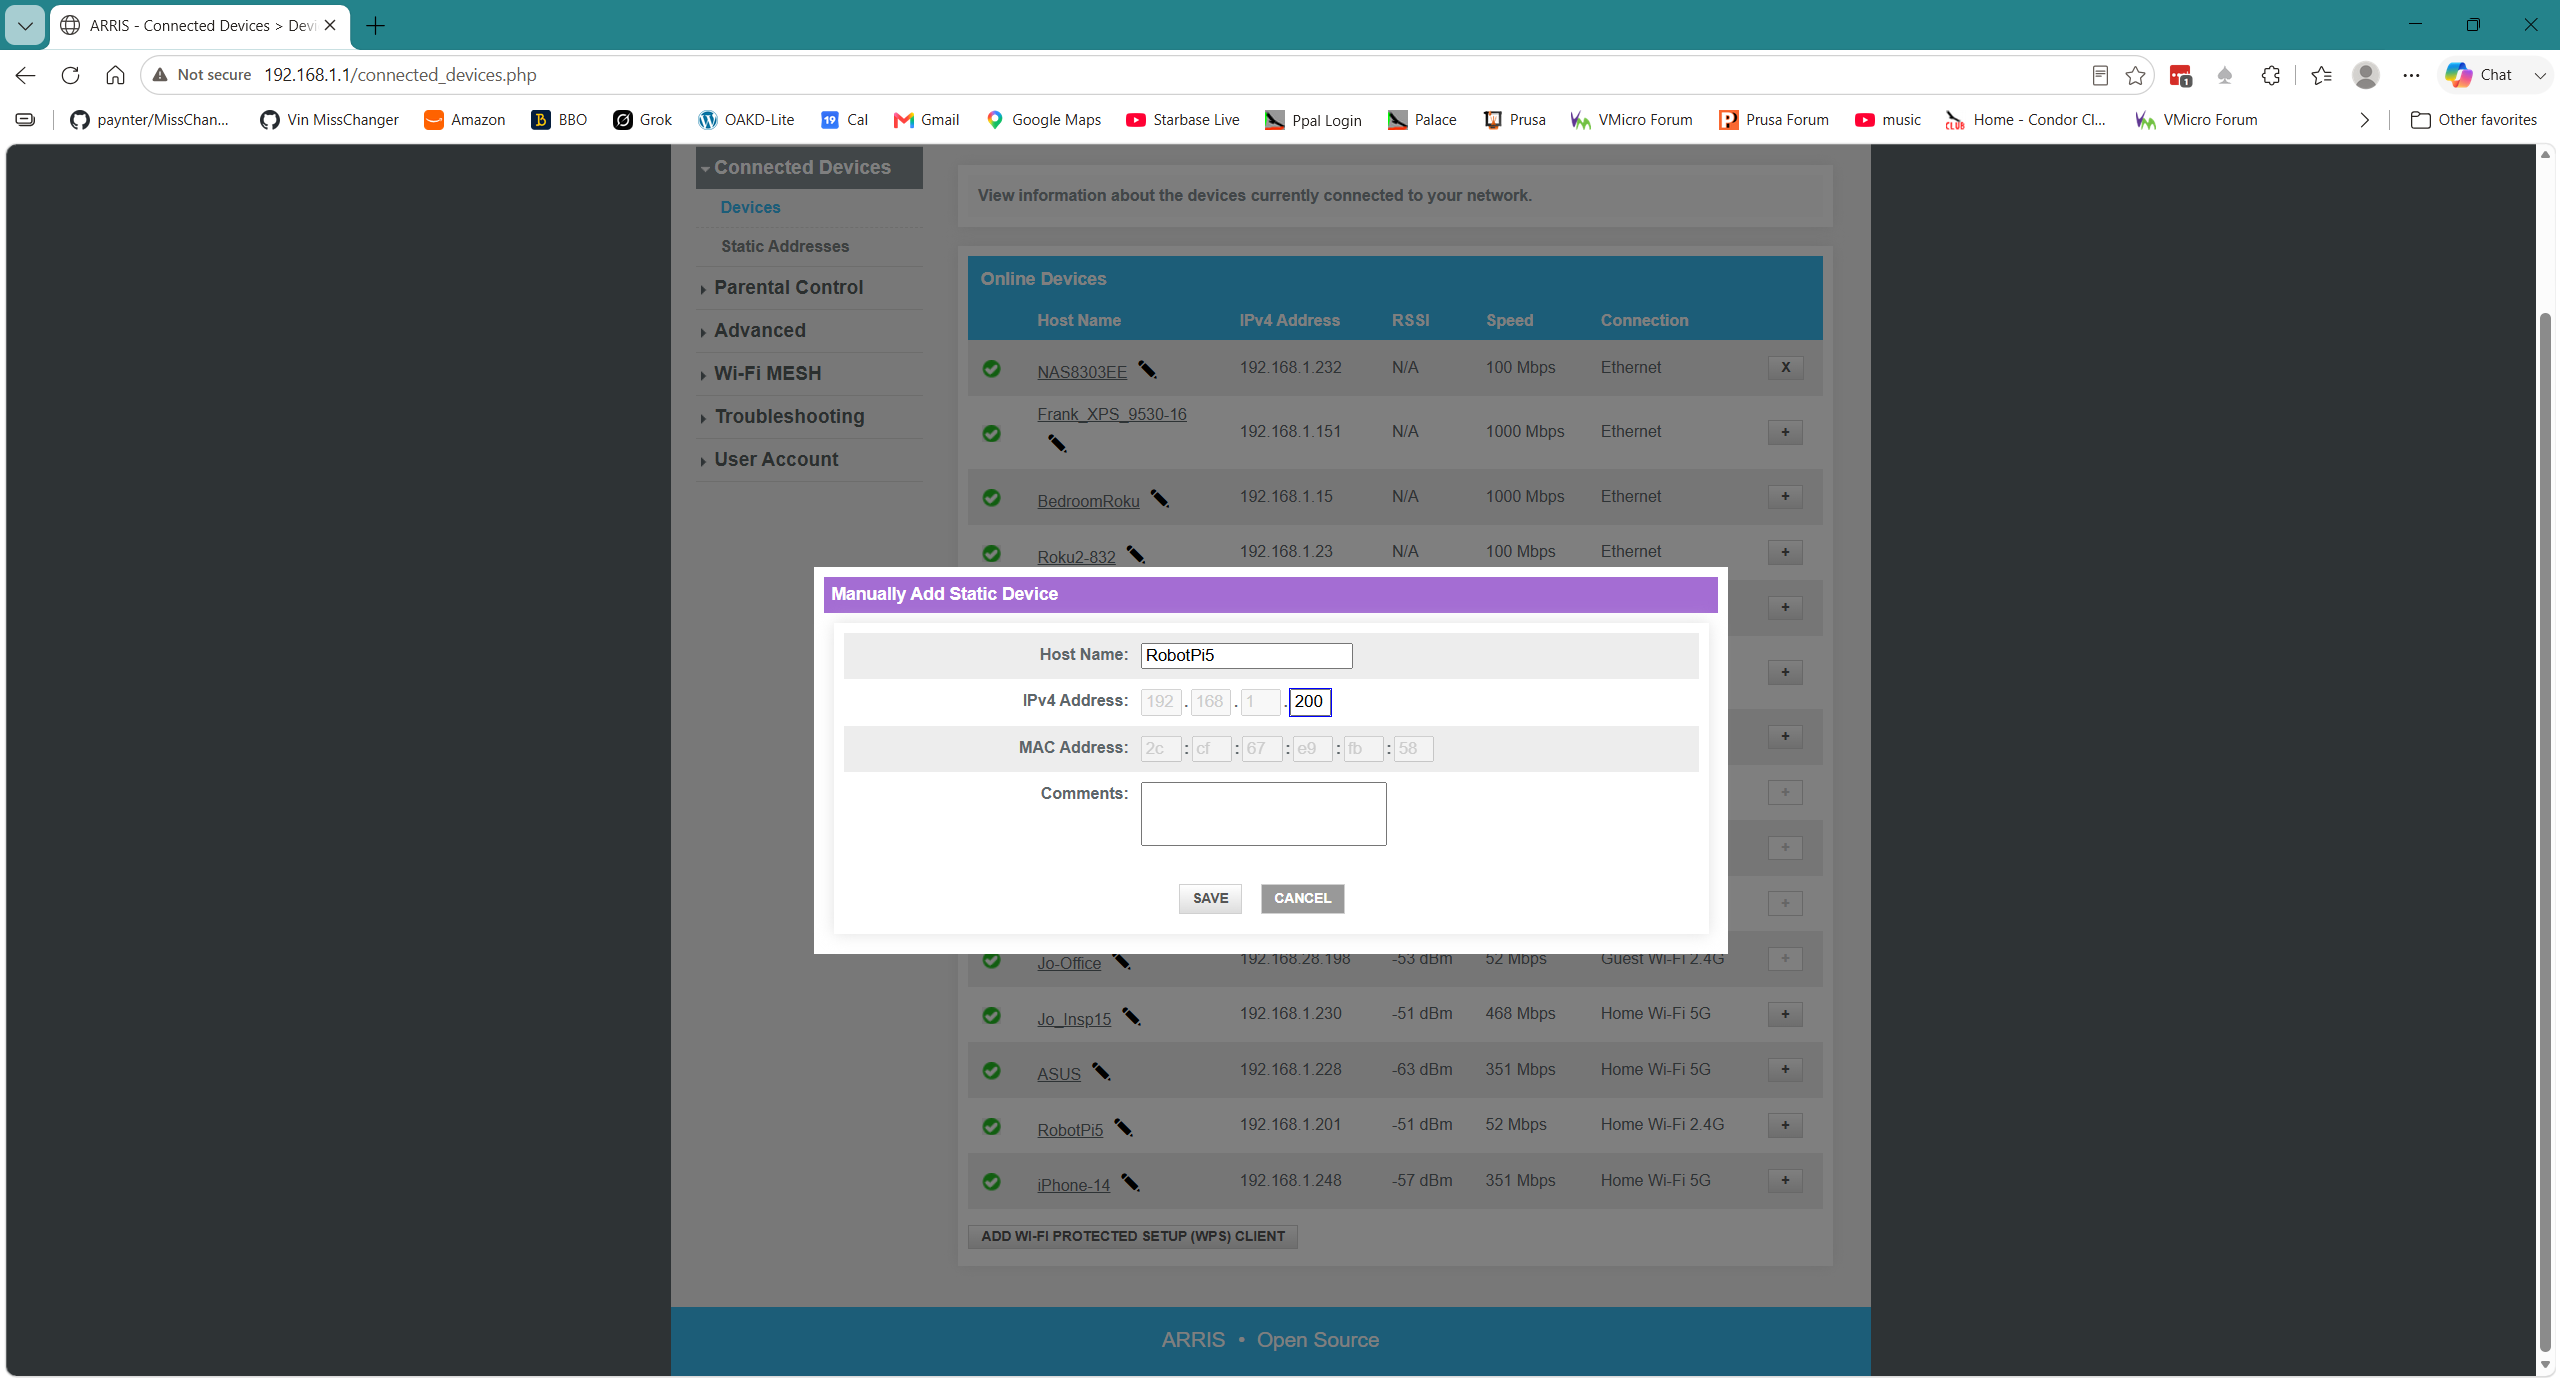
To confirm that the Pi can see the wifi network, run ‘ssh pi@RobotPi5’ from a Windows Command Window and enter your password. This should connect right away. If it doesn’t, then check the Pi’s IP address (DHCP can assign it a different one) with the ‘ip addr’ command on the Pi. If the address was changed (like from 192.168.1.200 to 192.168.1.201), you can change it back by editing your local router to give the Pi5 a static IP address reservation as shown below, and then rebooting the Pi. When the Pi comes back up it will get the ‘reserved’ address from the router, and life will be good again, except…
When you try to connect from your PC using ssh, you will probably get the following error message:
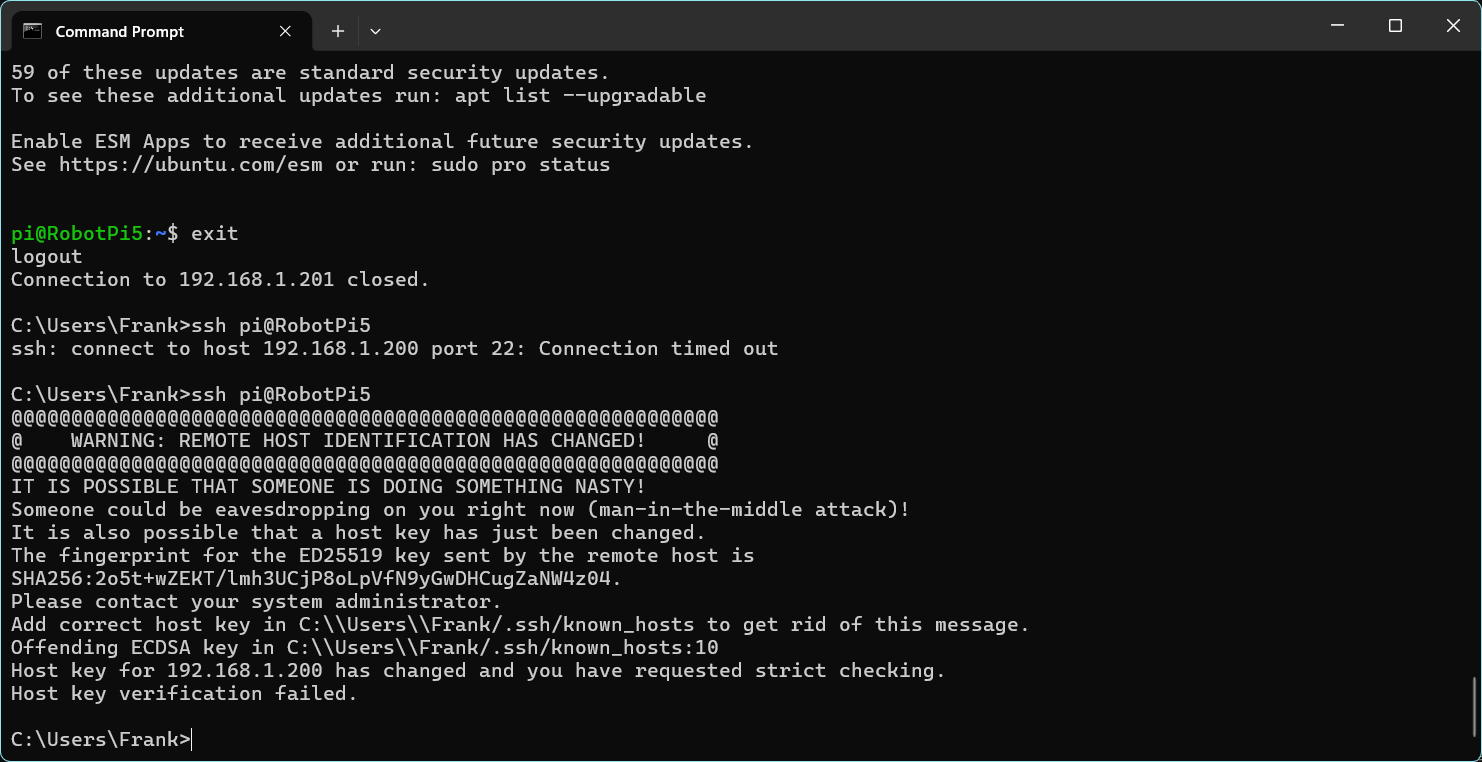
This occurs because the new Ubuntu installation generated a new SSH key, and the on one in your PC’s ‘host’ file no longer matches. To fix this, you must first remove the old key, with the following in a command window on your PC:

Then try to connect to the Pi from the PC with ‘ssh RobotPi5’. You should now see this:
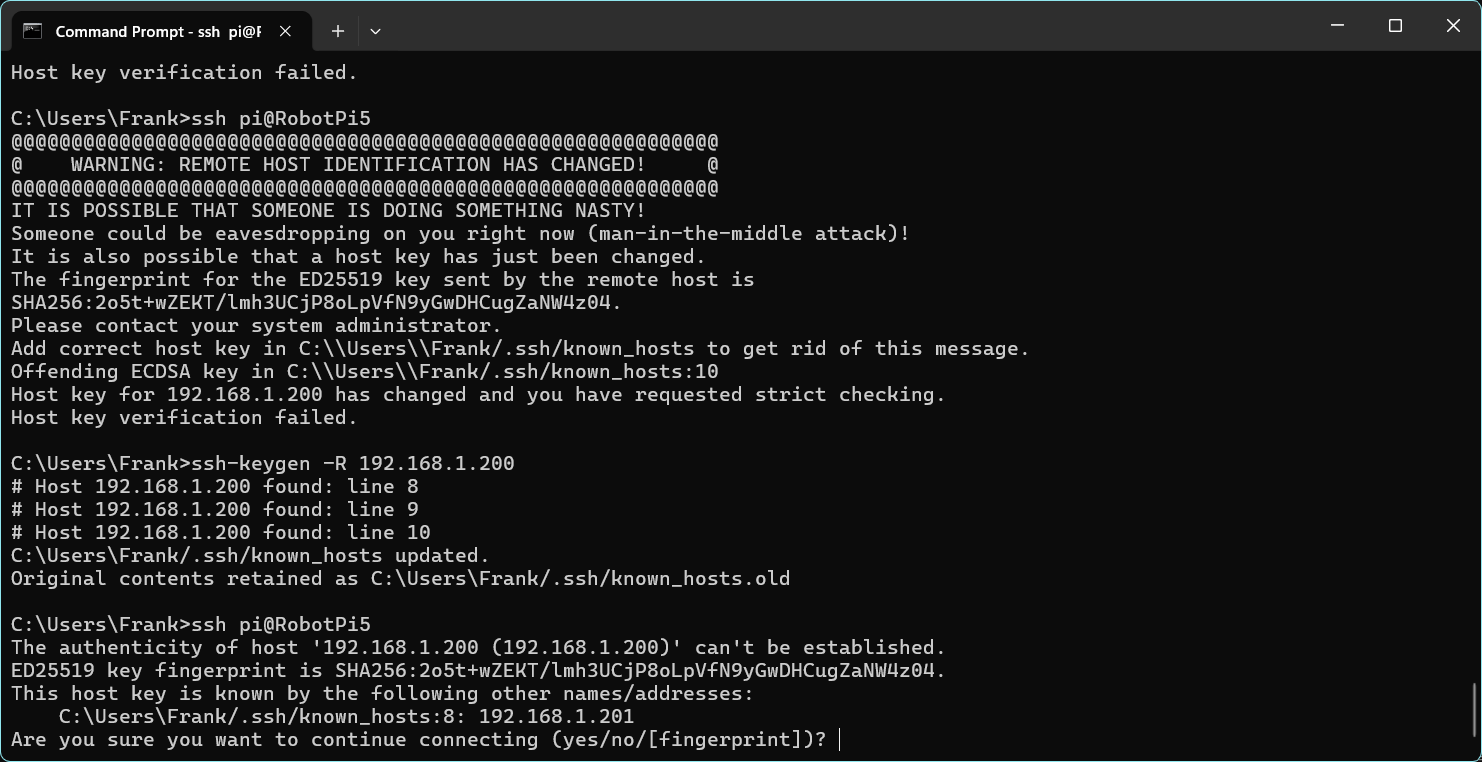
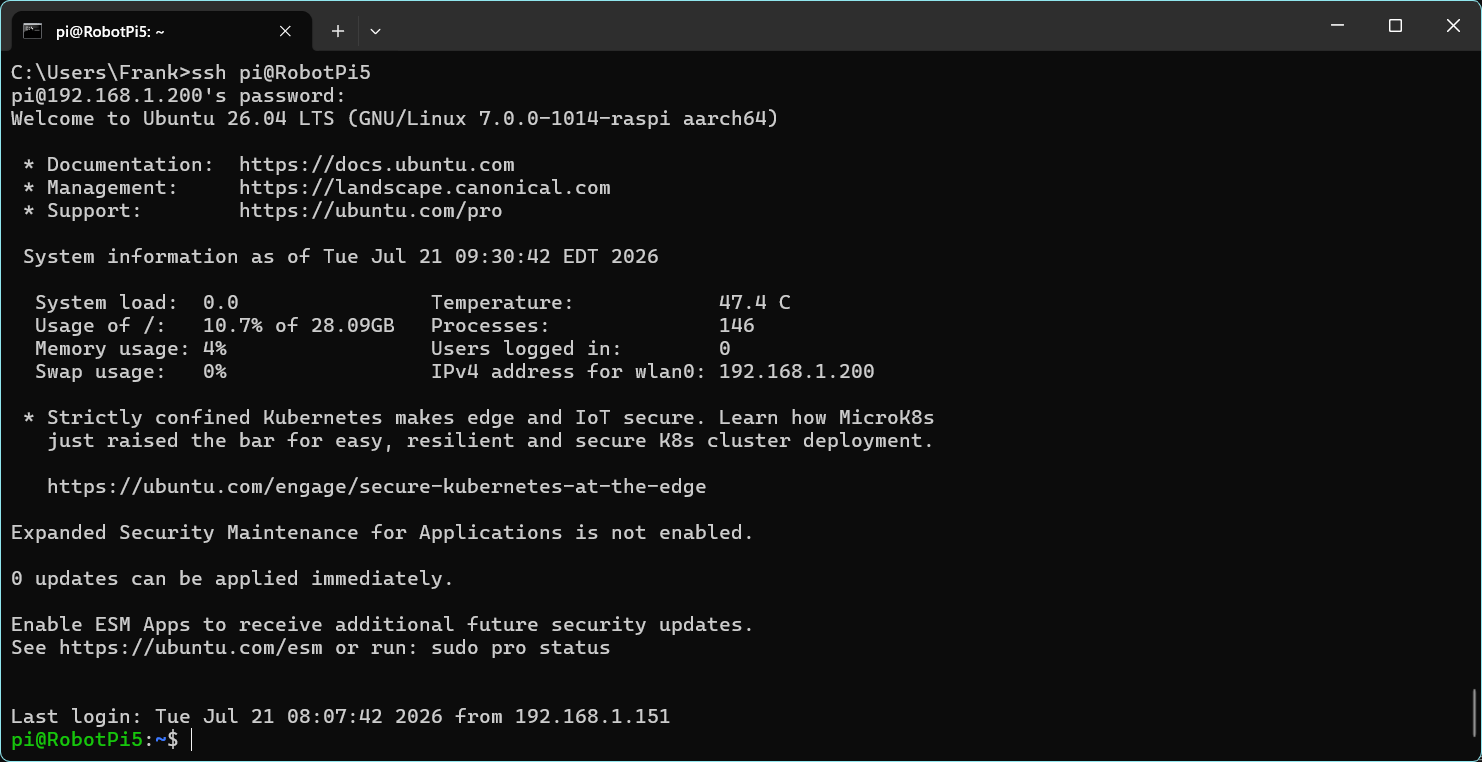
Enter ‘yes’ (can’t enter just ‘y’) to accept the new key. Then you should be able to connect to the Pi with your username and password, and you should see this:
Connect using VS Code:
Now you should also be able to connect to the PI from VS Code with Cmd – Shift – P -> Remote SSH: Connect to host ->’RobotPi5′. This should result in the following screenshot:
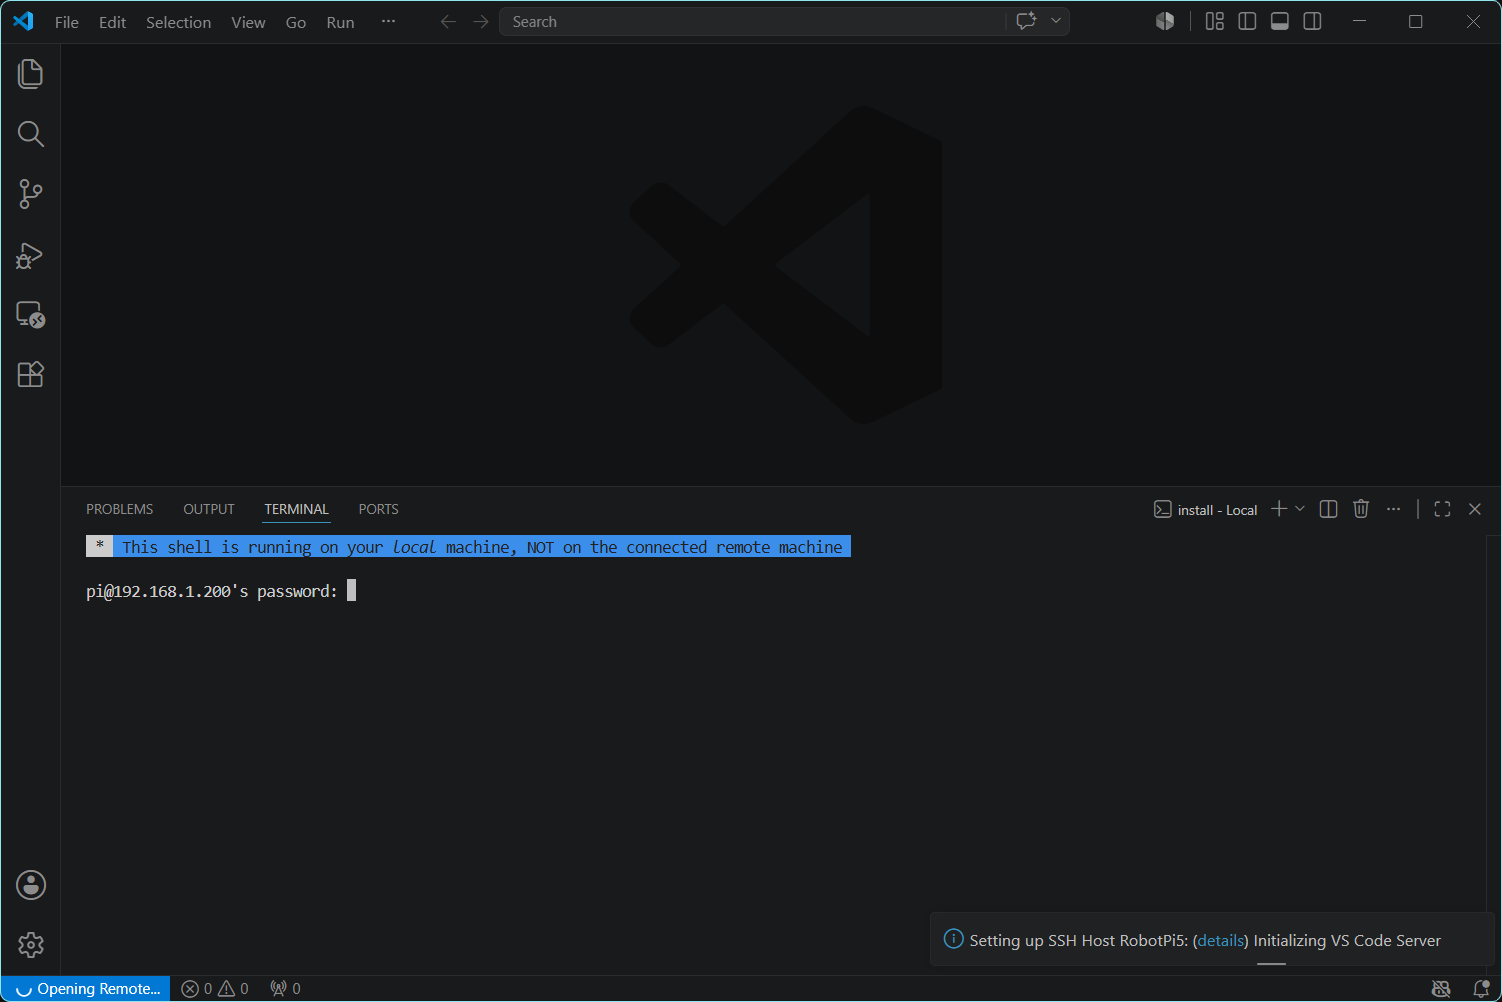
Ignore the misleading warning in the blue field above and enter the password for the Pi5. This should log you in, but it may still take a while for VS Code to connect the first time (you will see ‘opening RobotPi5’ with the spinner in the bottom left-hand corner, and then this will change to ‘SSH: RobotPi5’ as shown below:
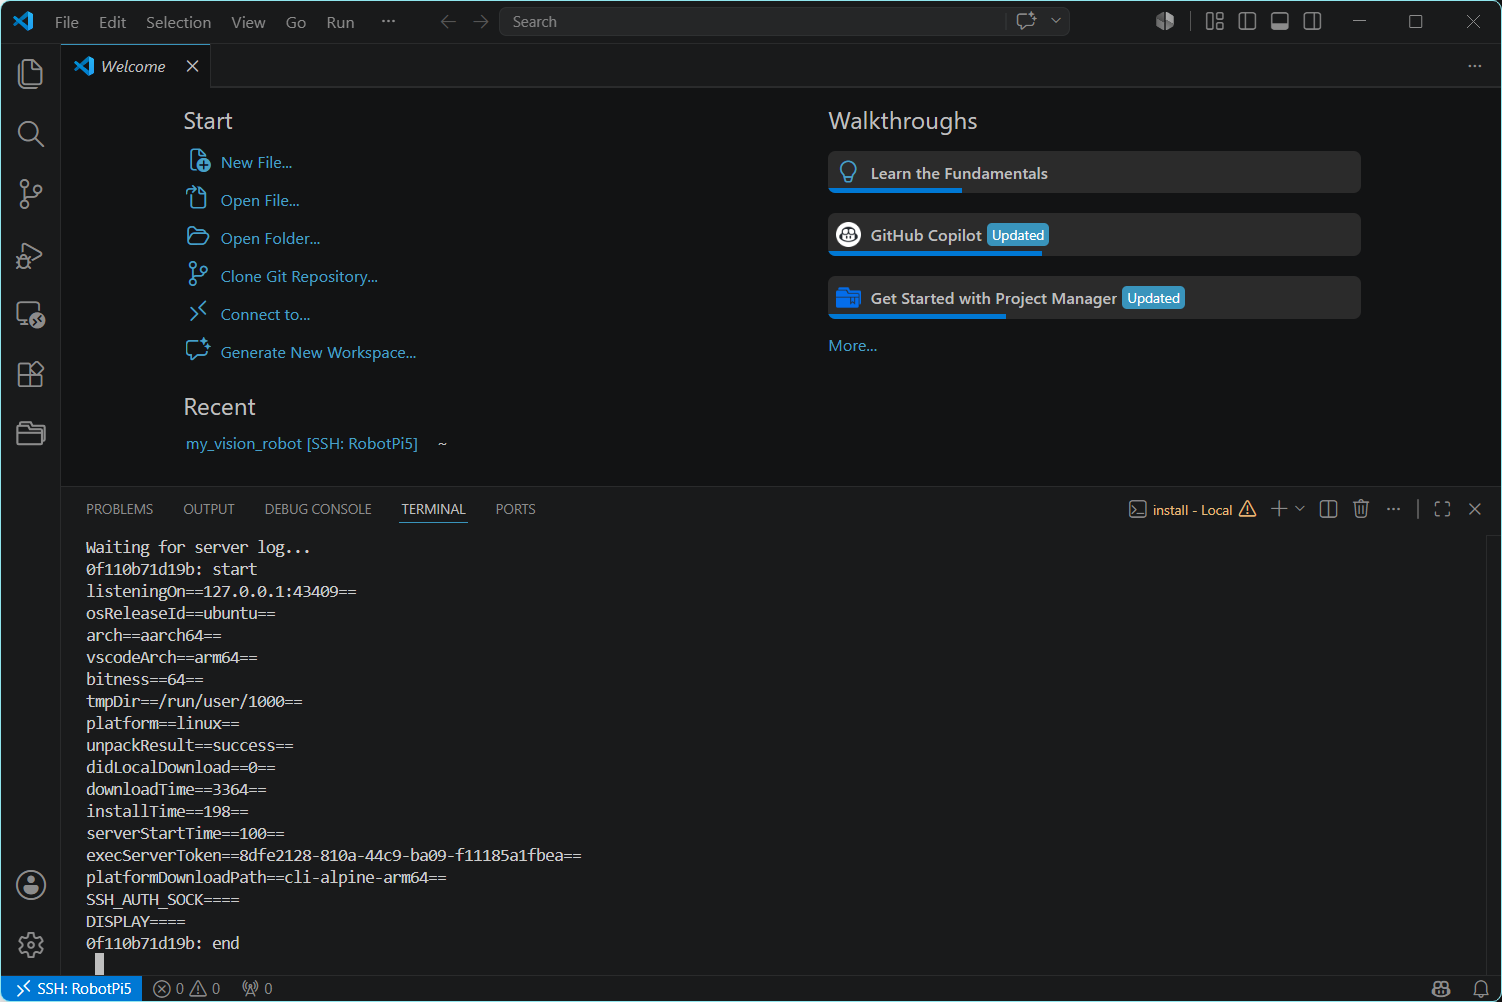
or this:
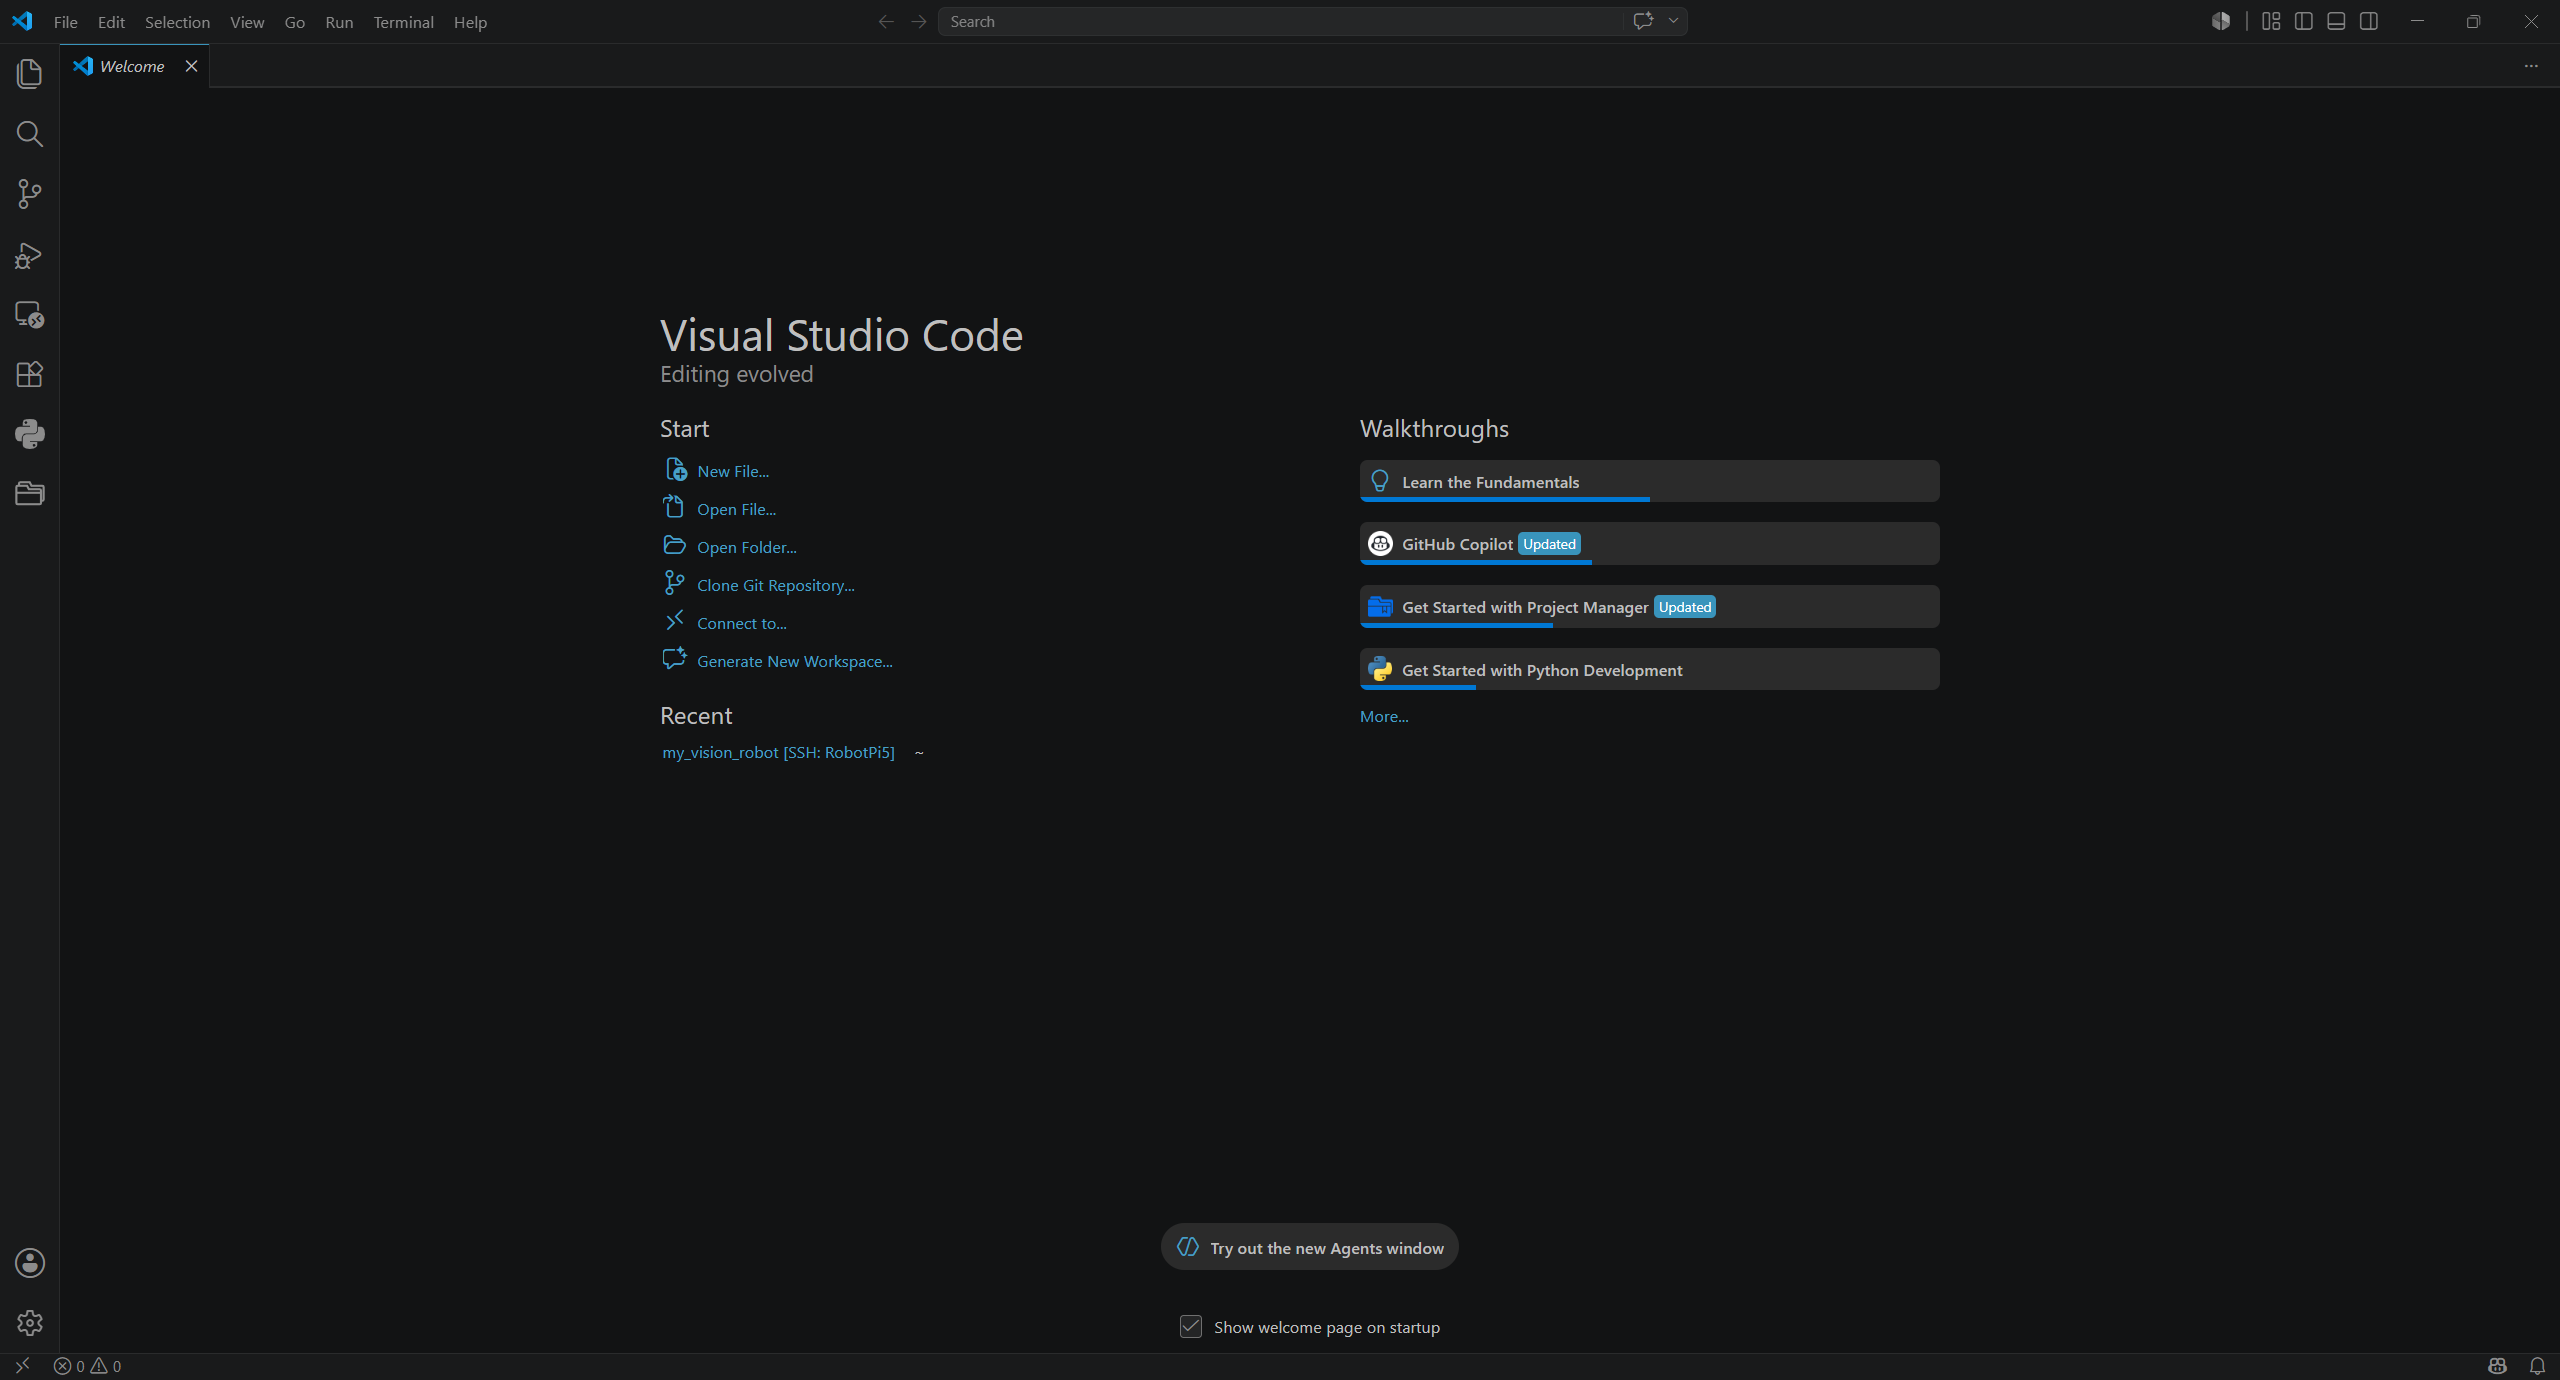
At this point you have a fully functional Ubuntu ‘server’ installation on the Pi, but none of the software packages (ROS2 Jazzy) needed to actually use the OAKD-Lite camera, and none of the already-developed user software. The user software can be retrieved from your GitHub repo (you DID create a GitHub repo and save your software, right?).
Install ROS 2 Jazzy (Jazzy is a version nickname):
From a VS Code Terminal Window, run these commands in order:
sudo apt update && sudo apt upgrade -y
sudo apt install software-properties-common curl -y
sudo add-apt-repository universe -y
sudo curl -sSL https://raw.githubusercontent.com/ros/rosdistro/master/ros.key -o /usr/share/keyrings/ros-archive-keyring.gpg
echo "deb [arch=$(dpkg --print-architecture) signed-by=/usr/share/keyrings/ros-archive-keyring.gpg] http://packages.ros.org/ros2/ubuntu $(. /etc/os-release && echo $UBUNTU_CODENAME) main" | sudo tee /etc/apt/sources.list.d/ros2.list > /dev/null
sudo apt update
sudo apt install ros-jazzy-desktop -y
You will probably need Grok’s help with getting through the entire package installs. We tried the Ubuntu 24.04LTS ‘server’ edition because it has less bloatware, but ros2-Jazzy would not install. Finally went back to Ubuntu 24.04LTS ‘desktop’ edition, and this worked – yay!!
After flashing the SD card with Ubuntu 24.04LTS ‘desktop’ edition, I booted it up on the Pi5 and went through the initial setup process. The ‘desktop’ edition skips all the customization stuff in the SD card load because it can be done by the user in the desktop.
The first hurdle to overcome was the inability to connect to the Pi with SSH, even though I ‘enabled’ SSH in the desktop settings.
|
1 2 3 4 5 6 |
sudo apt update sudo apt install openssh-server -y sudo systemctl enable --now ssh sudo systemctl status ssh |
the first two commands above succeeded, but the stataus was still ‘unable’. However after some tangential stumbling around with (almost) trying to kill some interfering processes, it turned out that just waiting a minute or two did the trick and SSH started working – Yay!
At this point we started the process of getting ros2 ‘Jazzy’ installed, as follows:
|
1 2 3 4 5 6 7 8 9 10 11 12 13 14 15 16 17 18 19 20 21 22 23 24 25 26 27 28 29 30 31 32 33 34 35 36 37 38 39 40 41 42 43 44 45 46 47 48 49 50 51 52 53 54 55 56 57 58 59 60 |
sudo apt update && sudo apt upgrade -y sudo apt install software-properties-common curl -y sudo add-apt-repository universe -y #Then add the ROS 2 repository: sudo curl -sSL https://raw.githubusercontent.com/ros/rosdistro/master/ros.key | sudo gpg --dearmor -o /usr/share/keyrings/ros-archive-keyring.gpg echo "deb [arch=$(dpkg --print-architecture) signed-by=/usr/share/keyrings/ros-archive-keyring.gpg] http://packages.ros.org/ros2/ubuntu $(. /etc/os-release && echo $UBUNTU_CODENAME) main" | sudo tee /etc/apt/sources.list.d/ros2.list > /dev/null sudo apt update #Finally, install ROS 2 (we'll use the lighter ros-base version to avoid the previous dependency issues): sudo apt install ros-jazzy-ros-base -y source /opt/ros/jazzy/setup.bash #So you don’t have to source it manually every time, run: echo "source /opt/ros/jazzy/setup.bash" >> ~/.bashrc #Then either log out and back in, or run: source ~/.bashrc #Then see if ros2 is actually installed and running pi@RobotPi5:~$ ros2 --help usage: ros2 [-h] [--use-python-default-buffering] Call ros2 <command> -h for more detailed usage. ...ros2 is an extensible command-line tool for ROS 2.options: -h, --help show this help message and exit --use-python-default-buffering Do not force line buffering in stdout and instead use the python default buffering, which might be affected by PYTHONUNBUFFERED/-u and depends on whatever stdout is interactive or notCommands: action Various action related sub-commands bag Various rosbag related sub-commands component Various component related sub-commands daemon Various daemon related sub-commands doctor Check ROS setup and other potential issues interface Show information about ROS interfaces launch Run a launch file lifecycle Various lifecycle related sub-commands multicast Various multicast related sub-commands node Various node related sub-commands param Various param related sub-commands pkg Various package related sub-commands plugin Various plugin related sub-commands run Run a package specific executable security Various security related sub-commands service Various service related sub-commands topic Various topic related sub-commands wtf Use wtf as alias to doctor # Install and initialize rosdep (I have no idea what this does...) sudo apt install python3-rosdep -y sudo rosdep init rosdep update #Clone your repository (if you haven’t already) cd ~ git clone https://github.com/paynterf/my_vision_robot.git cd my_vision_robot git checkout vision-to-motion-demo |
So at this point ros2-Jazzy is installed and active, and my working software has been restored from Github – WHEW!
Tomorrow we will continue through to getting the ‘clearest_direction_node.py’ program running (yet again)
While I can’t really say that losing that micro-SD card was much fun, it *was* educational, and now I think I have a better understanding of how the startup process works, and much better documentation.
22 July 2026 Update:
I renamed the Grok session to “260722 Pi5 Boot ROS and OAKD-Lite Initialization” to be more recognizable in the future.
OK, back to the effort to recover from my disastrous loss of my original micro-SD card. When we left it last night, we had gotten to the point of successfully flashing the ‘desktop’ version of Ubuntu 24.04, gotten ros2-Jazzy installed, cloned the ‘my_vision_robot’ GitHub repo and switched to the ‘vision-to-motion-demo’ branch.