Posted 20 September 2021
I’ve been working on some Bball moves – through-leg and behind-back combinations. Here’s a short video showing one of the combinations:
Posted 20 September 2021
I’ve been working on some Bball moves – through-leg and behind-back combinations. Here’s a short video showing one of the combinations:
Posted 27 November 2020
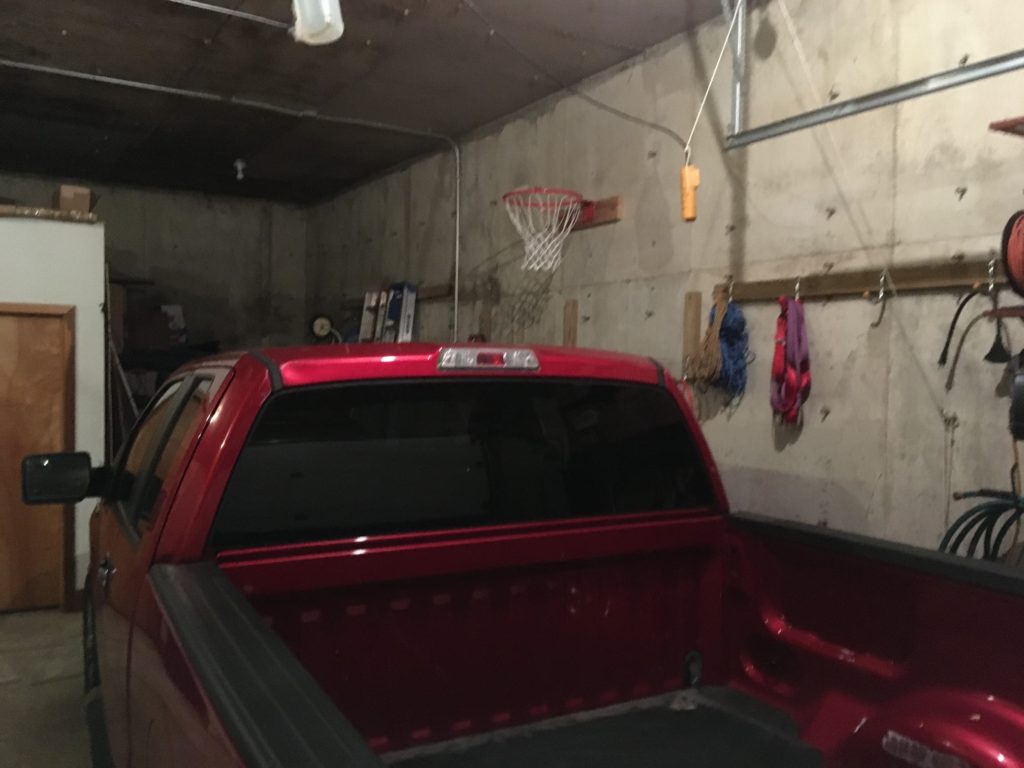
After my recent right shoulder surgery, I have been looking for ways to get back into BBall shooting practice. However, the combination of Covid-19 lockdowns and the oncoming winter weather has drastically reduced my options for shooting practice. Not to be dissuaded from BBall practice, I figured out a way of moving my practice area from my driveway outside the garage inside the garage. As it turns out, our earth-sheltered house boasts an attached earth-sheltered two-car garage with a 12′ interior ceiling and no vertical support beams (I insisted on this in the design, and paid the extra cost, knowing from prior experience that interior support columns in a two-car garage was a bad thing.
Still not quite perfect, as even a 12′ ceiling isn’t quite enough room for a 10′ high BBall rim and enough headroom for practical shooting practice. So, I decided to mount my new practice rim at 9′ vs 10′, leaving 3′ of headroom. Obviously this isn’t ideal, but I figured a lot of practice on a 9′ rim was much better than no practice on a 10′ rim ;-).
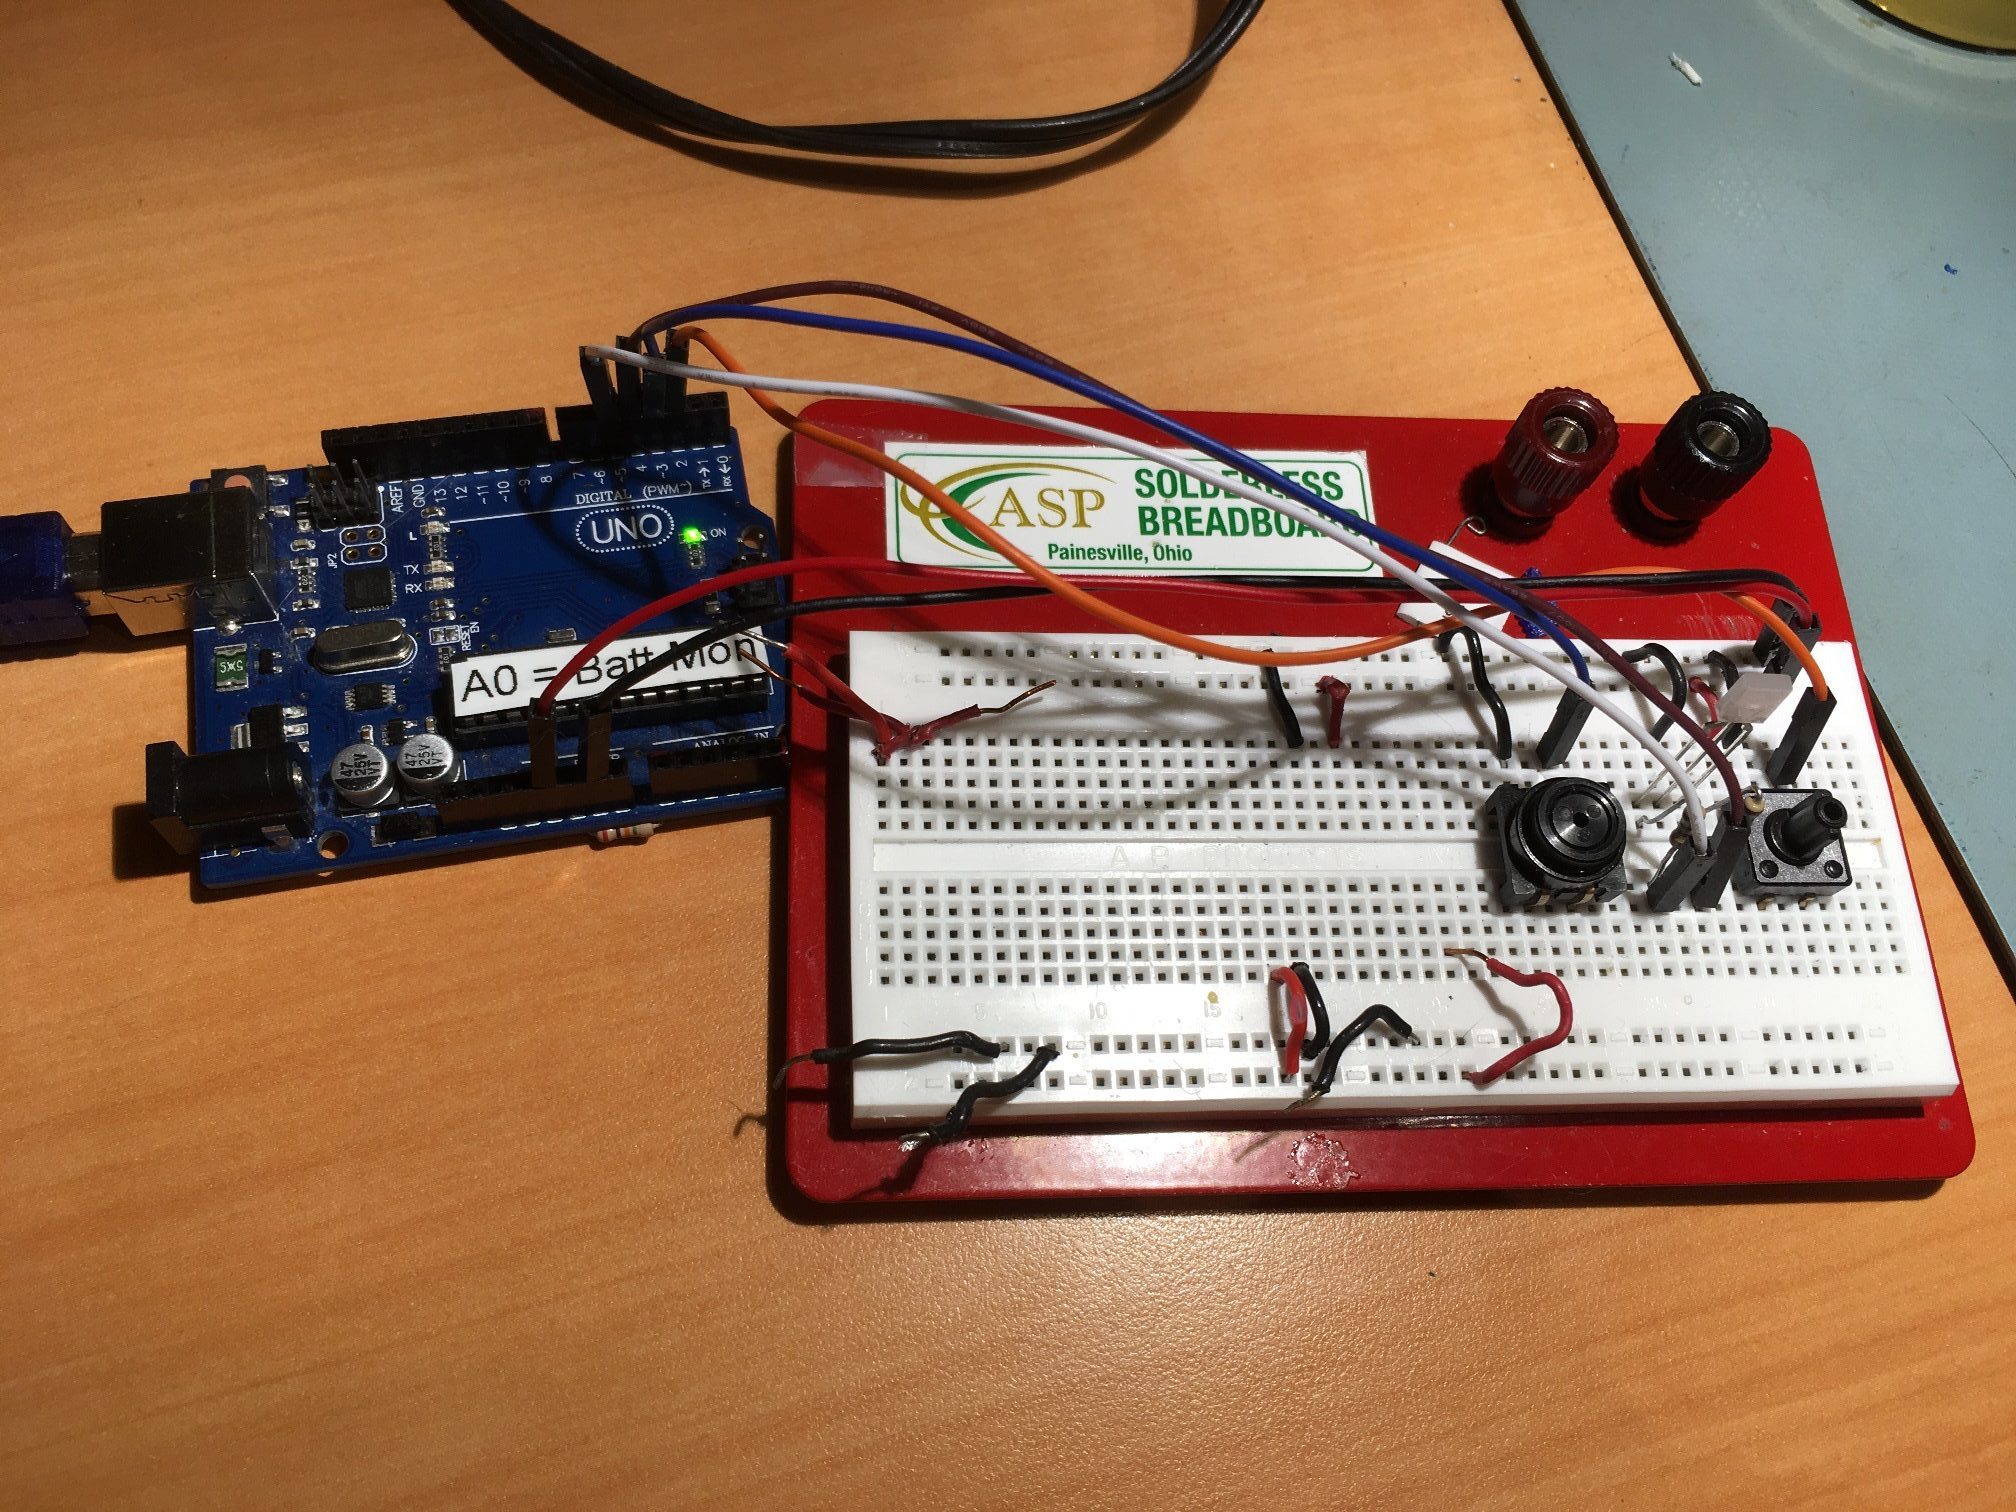
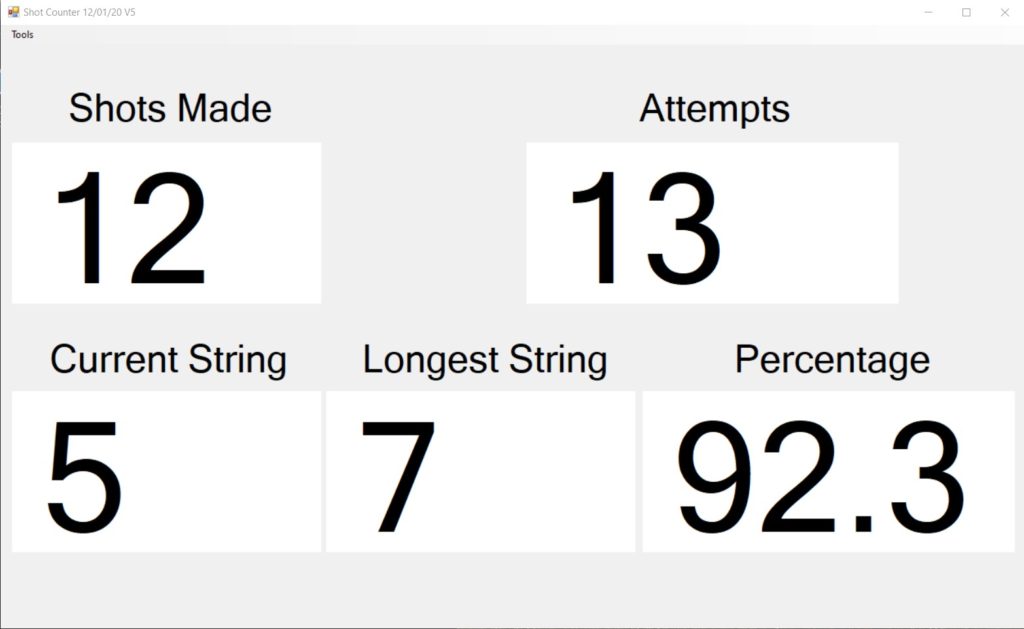
As I started to shoot in my new practice gym, I realized I also now needed a way to record hits and misses so I could keep a running ‘made shots’ percentage. My short-term memory degradation due to being an old fart has made it almost impossible to do this in my head, and besides, what could be better than being able to combine my love of BBall, my love of programming, and my love for hardware/software projects? That’s at least a trifecta if not a quadfecta (and that is actually a word!). So, I programmed up a Windows program in C# to display ‘Hits’, ‘Attempts’, and ‘Hit Percentage’, and used an Arduino microcontroller to interface to two push-buttons – one for a hit, and the other for a miss. The arduino talks to the Windows program via a serial port over the USB cable, and the Windows program displays everything in a readily visible way. My idea was to use foot switches for the input so it would be easy to provided the needed hit/miss inputs without having to break out of a shooting rhythm. So, I jumped up on Thingiverse and found a neat, rugged footswitch by ‘vandenmar’. I needed two switches, so I modified vandenmar’s design by adding an additional cable routing trench out to the other side of the switch (so the switch cable can be routed in from the left or right-hand side of the switch).
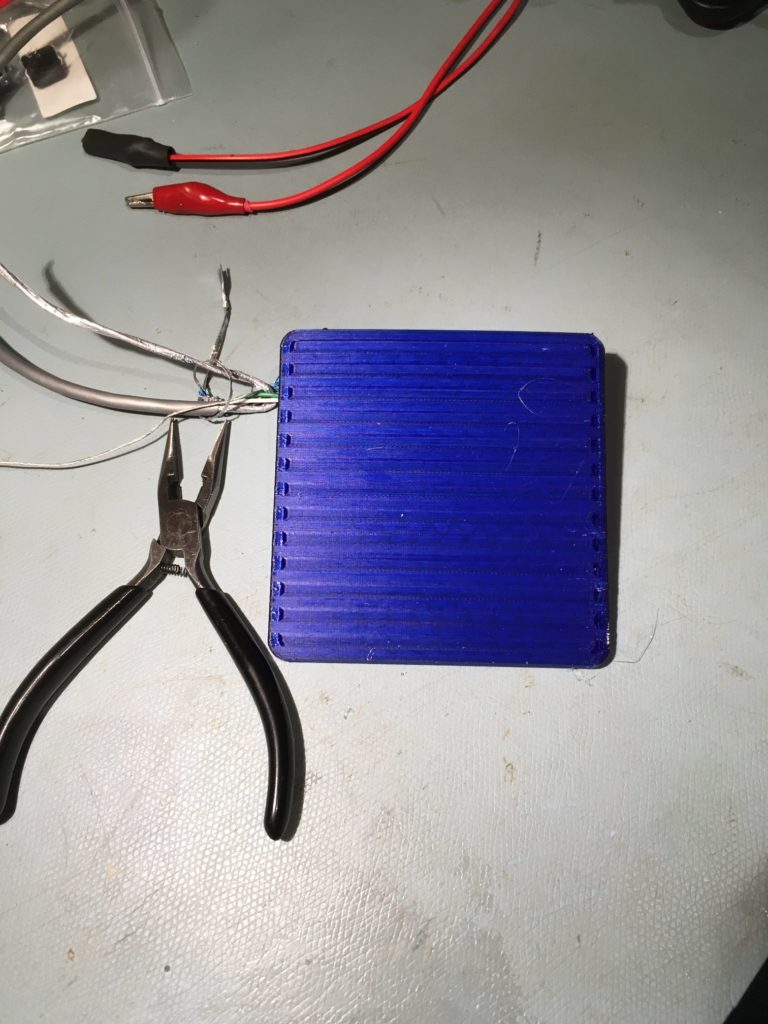
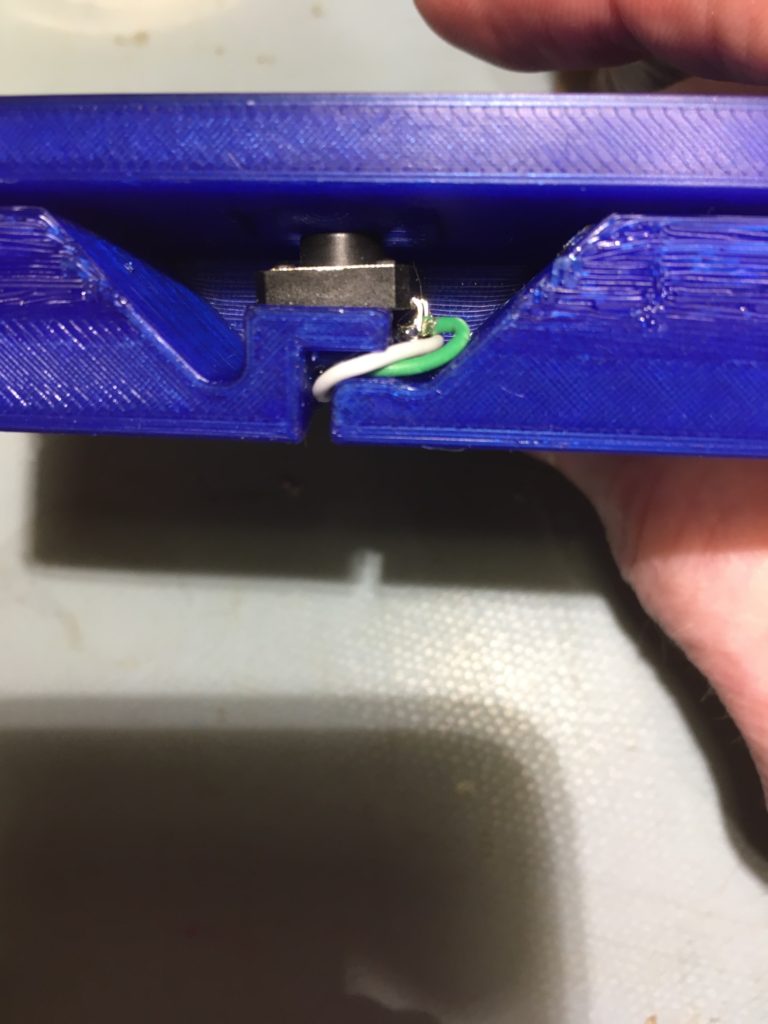
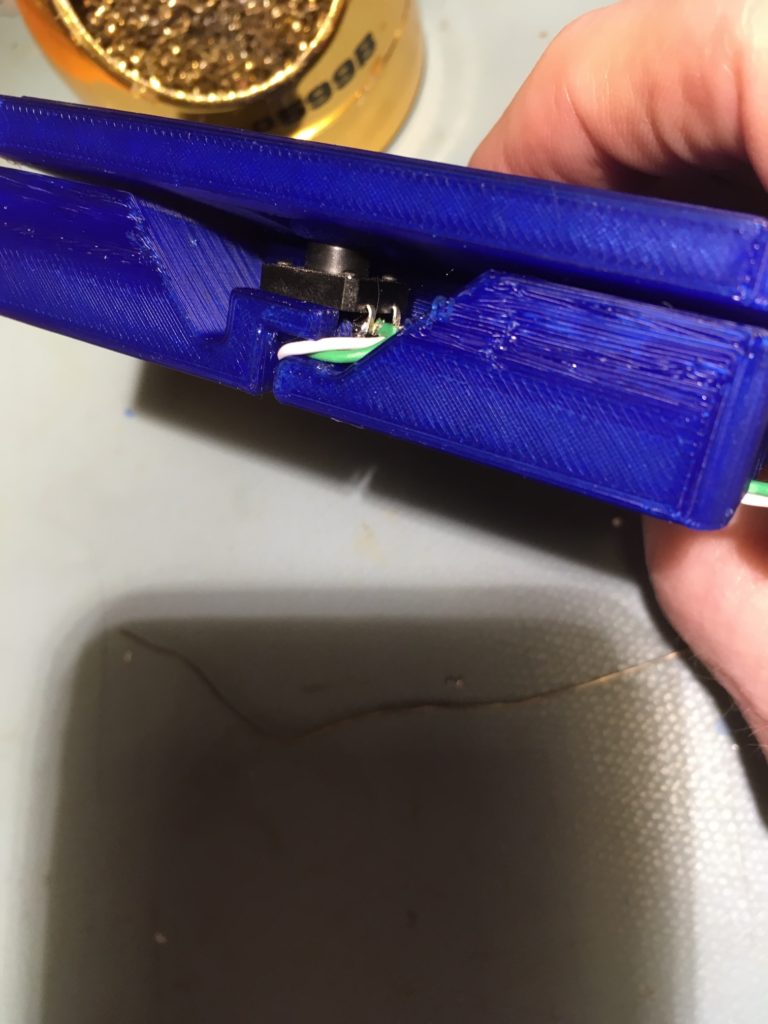
Here’s a photo of the Arduino switch contoller
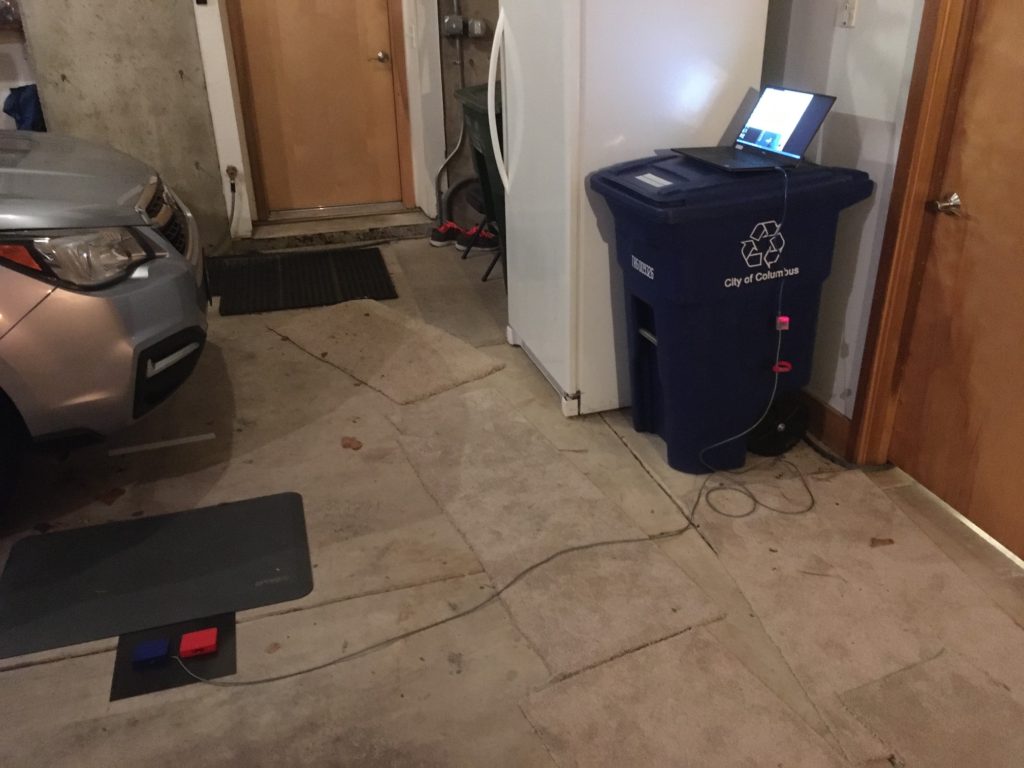
After getting all the pieces together, this is how it looks in my garage. The red footswitch is for ‘makes’ and the blue one is for ‘misses’.
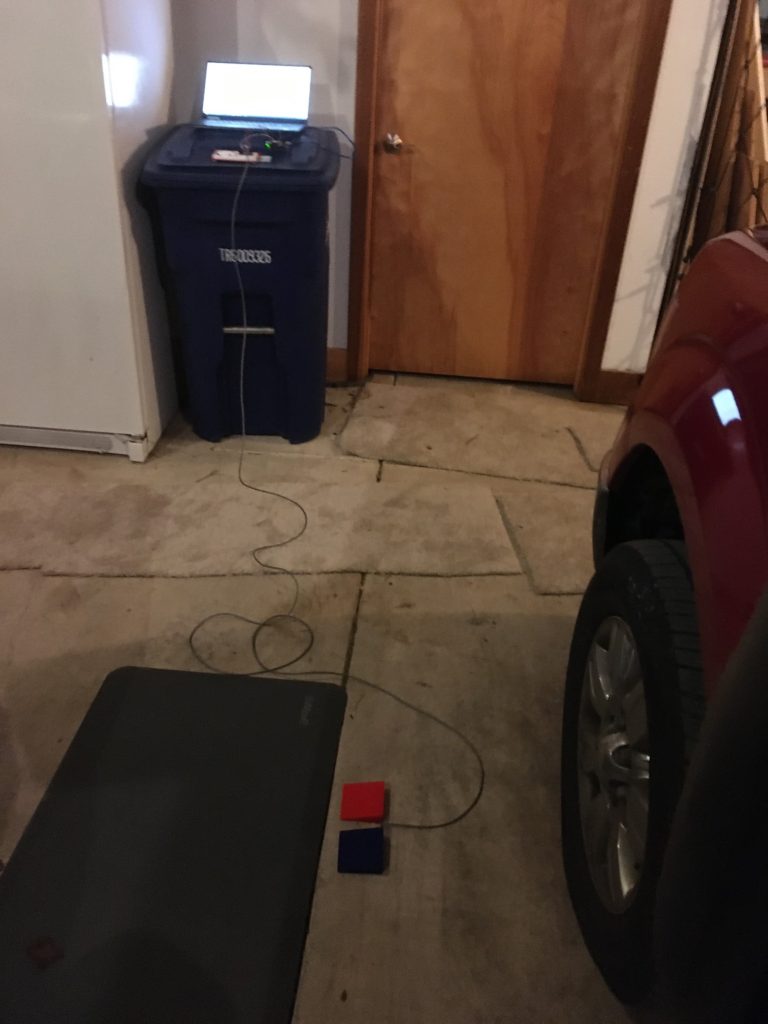
This setup worked pretty well, but it still wasn’t quite ready for prime time. The UNO & breadboard were, well, breadboards, and not very mechanically robust. I was afraid I would spend more time repairing the breadboard than I would actually shooting, so I decided I needed to move from a breadboard to a more finished project. In addition, the Windows program I was using to display stats needed some work, so both sides (Windows and Arduino) needed some TLC.
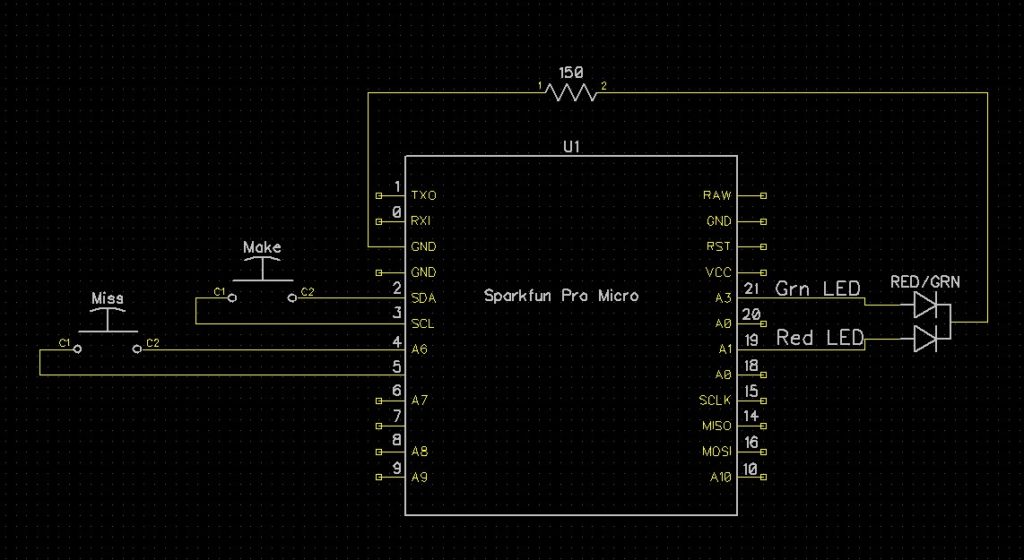
I happened to have a Sparkfun Pro Micro module laying around in my parts bin, so I decided I would change out the UNO for the much smaller Pro Micro. With only two pushbutton switches and a Red/Green LED, the Pro Micro has plenty of I/O for the project. Here’s the Pro Micro version of the hardware layout.
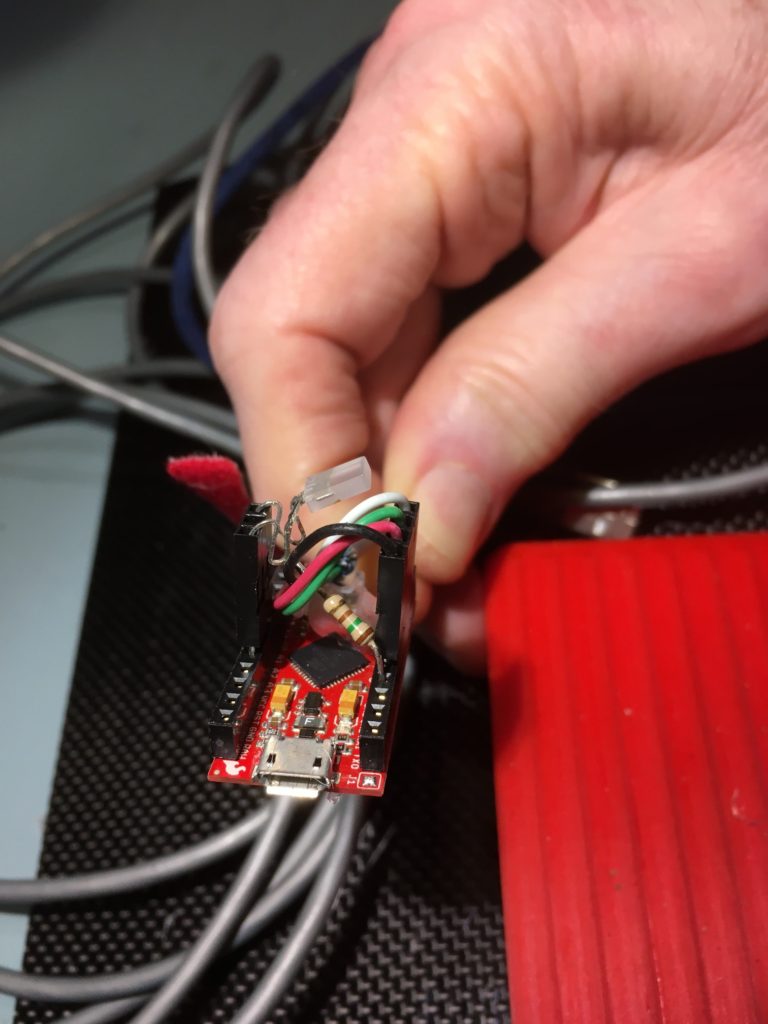
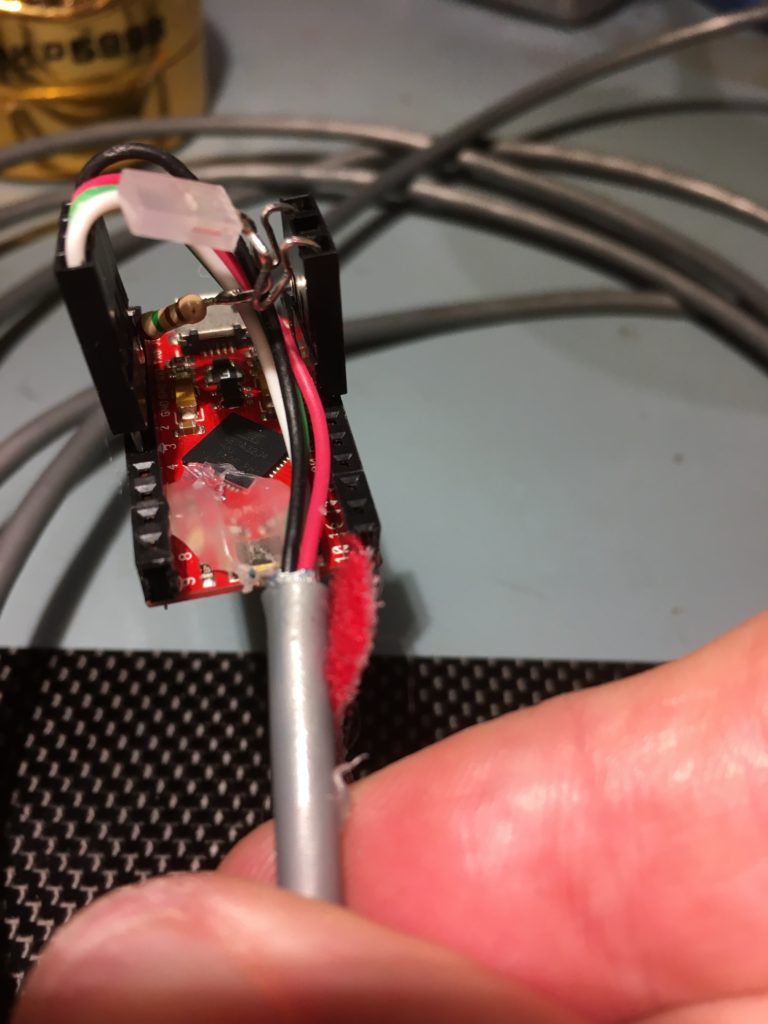
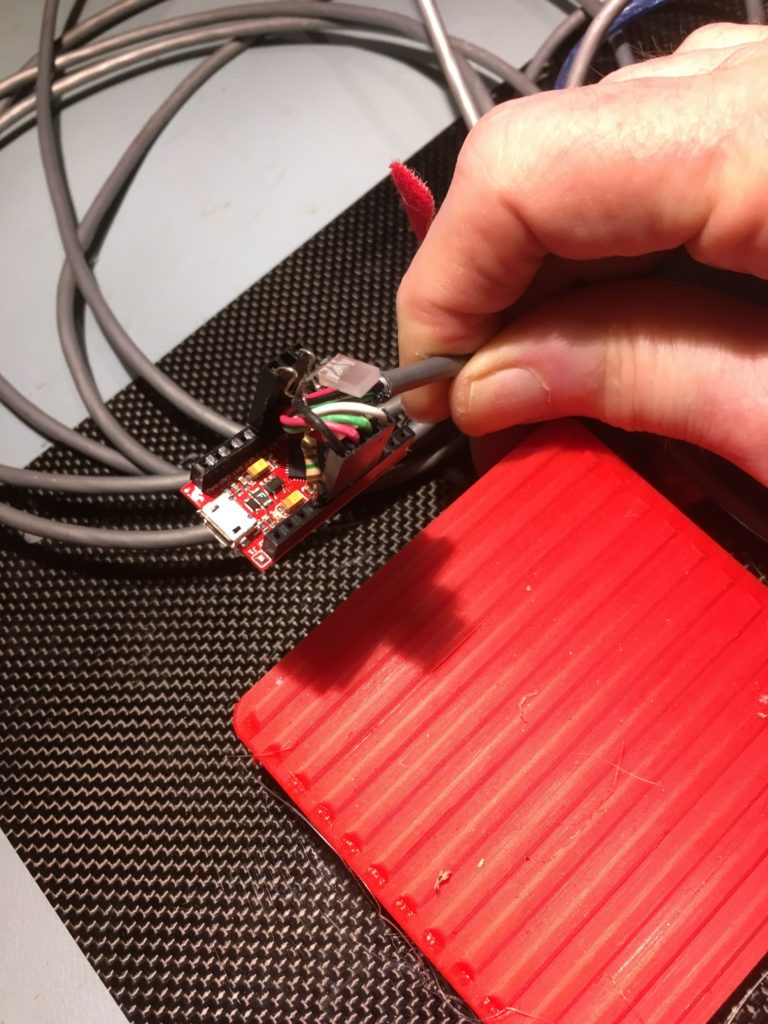
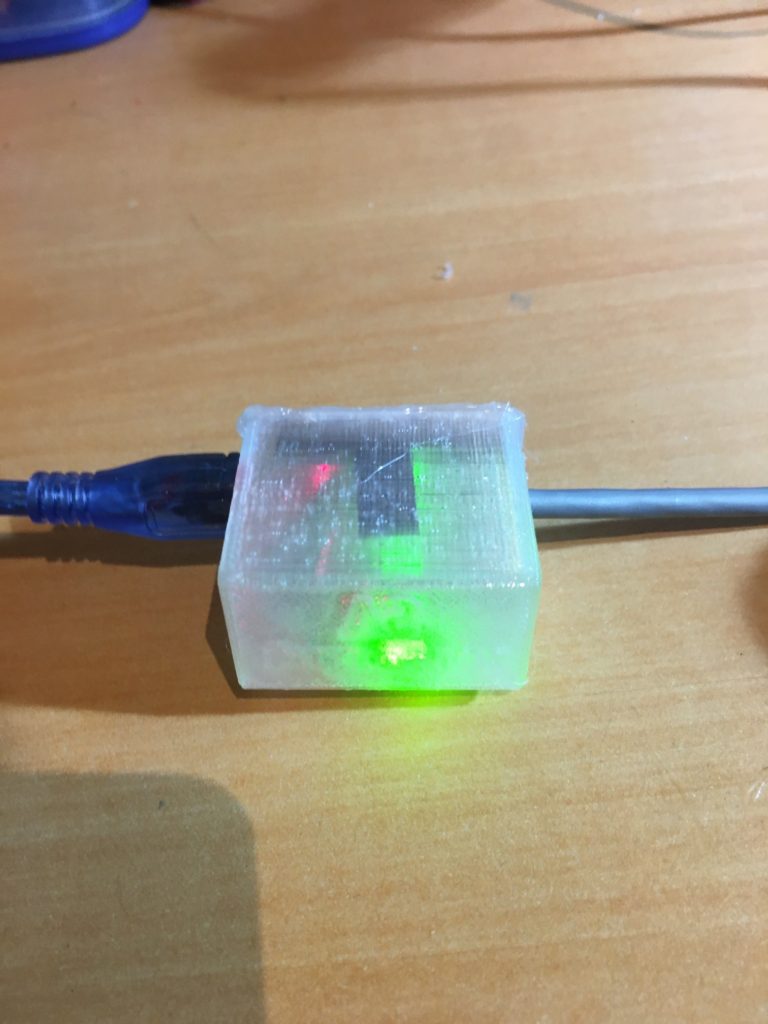
So then I opened up my trusty Open SCAD ’rounded box with lid’ script and printed up a translucent enclosure, shown below
Next I updated the Windows program to show Makes, Misses, Percentage makes, and number of shots made in a row, along with the longest run of made shots for this session, as shown below
And here is the ‘final’ setup in my garage:
Here’s the schematic for the Sparkfun Pro Micro setup
And here is a short video showing the system in action.
At 0:43 into the above video you can see the green ‘Make’ LED illuminate in the background when I pressed the red ‘Make’ footswitch, and at 1:25 you can see me pressing the blue ‘Miss’ footswitch.
Stay tuned!
Frank
More videos from training sessions with Mark Clay at the Ohio Training Center
Posted 01 October 2020,
I have been working with Mark Clay, a personal basketball coach I found through CoachUp – a site for connecting coaches and clients. We have been working on ball handling and shooting fundamentals, and it seems to be improving my game considerably (to the extent that a 71-year old B-Ball Wannabe’s game can be improved). Here are some videos from my September 28, 2020 session (that’s Mark in the background of the first video). Mark has been super helpful and supportive, even though I’m absolutely certain that I’m not his (or anyone’s) idea of a hot NBA prospect ;-).
I had to suspend training with Mark last Fall, as I underwent right shoulder surgery to address a long-running pain issue. After a successful surgery and rehab, I re-connected with Mark to use up the last three sessions of the original 10-session package. Last night was the final session, and the following video shows the results. I have to say that I never thought I would be draining threes off the dribble, but that’s exactly what happened last night (well, there were a lot of misses, too, but….
And here’s a link to a much longer, hi-res record of the above session
Posted July 26 2020,
An upside of the U.S. lockdown, if you can call it that, is that I have had plenty of time to work on my basketball shooting. Here are some recent videos taken from inside my garage (too hot to shoot outside). This me trying to shoot ‘Larry Bird’ style.
Posted 14 May 2019
In March of this year, I suffered yet another broken nose while playing basketball. Off to the emergency room where, following the normal interminable wait, I was told “yep – you have broken your nose – here’s a referral to an ENT guy – have a nice day!” The next day I went to the ENT guy, who said “yep – you have a broken nose, and there’s nothing I can do for you; you need an ‘open reduction’ (aka ‘nose job’), and here’s the name of the plastic surgeon I recommend”. At this next appointment Dr. Bapna (the plastic surgeon) said “yep – you have a broken nose, and you’re going to need an open reduction. It’s not going to be a whole lot of fun, but I should be able to get you squared away (literally)” (or words to that effect, anyway).
So, in early April I endured a ‘functional rhinoplasty’ (aka nose job), and indeed it wasn’t much fun. Fortunately I had learned from an earlier rotator cuff operation that I could rent a powered recliner on a short-term basis, and this at least made the convalescence a little less terrible.
In the subsequent post-op appointments with Dr. Bapna, he made it quite clear that while the operation was an unqualified success, another broken nose while playing basketball might not be repairable. He strongly recommended that I either give up basketball (and what is a 70-year old man doing playing b-ball anyway?) or wear a protective face mask. Since I wasn’t really interested in giving up round-ball, I started investigating face mask options.
Some research showed that a number of clear face masks are available on Amazon and other retail outlets, and there were a few firms advertising custom face masks. When I mentioned this to Dr. Babna, he told me that a local prosthetic business (Capital Prosthetic and Orthotic Center, Inc) also does custom face masks (who knew?). Apparently the process involves making a plaster impression of the face, and then using the impression as the mold for a custom polycarbonate mask. While I was researching the possibilities, it occurred to me that I might be able to use the knowledge of 3D modelling I had gained from an earlier project to create a duplicate of a chess piece to create a 3D model of my face, and then print a full-size plastic face replica to use as the basis for a polycarbonate mask. This would eliminate the need to make a plaster impression, and might open up a new technique for custom face mask fabrication.
So, I talked my lovely wife into helping me make a 3D representation of my head, using the same Canon SX260 HX digital camera I used for my chess piece replication project. It took us a couple of iterations to get enough good shots, but soon I had sucked 185 photos into Meshroom and it was busily cranking away to create the 3D model.
Except when it crashed. I had experienced this problem during the chess piece project, and had solved it by finding and removing the problem photos, usually a shot that was badly out of focus. So, I found and removed the photo pointed to by the crash log, and restarted Meshroom’s processing.
And it crashed again, and kept crashing even as I removed more and more photos. In addition, there wasn’t anything apparently wrong with the photos that caused the crash.
After a LOT of research on the Meshroom GitHub site, I finally ran across a post where one responder noted that Meshroom-2019.1.0-win64, the version I was using had ‘issues’ with photos that weren’t exactly perfect, and recommended downgrading to the 2018.1.0 version.
So, I downgraded to 2018.1.0, and voila – Meshroom processed all 185 photos without complaint and produced a startlingly accurate 3D model of my head, shown below
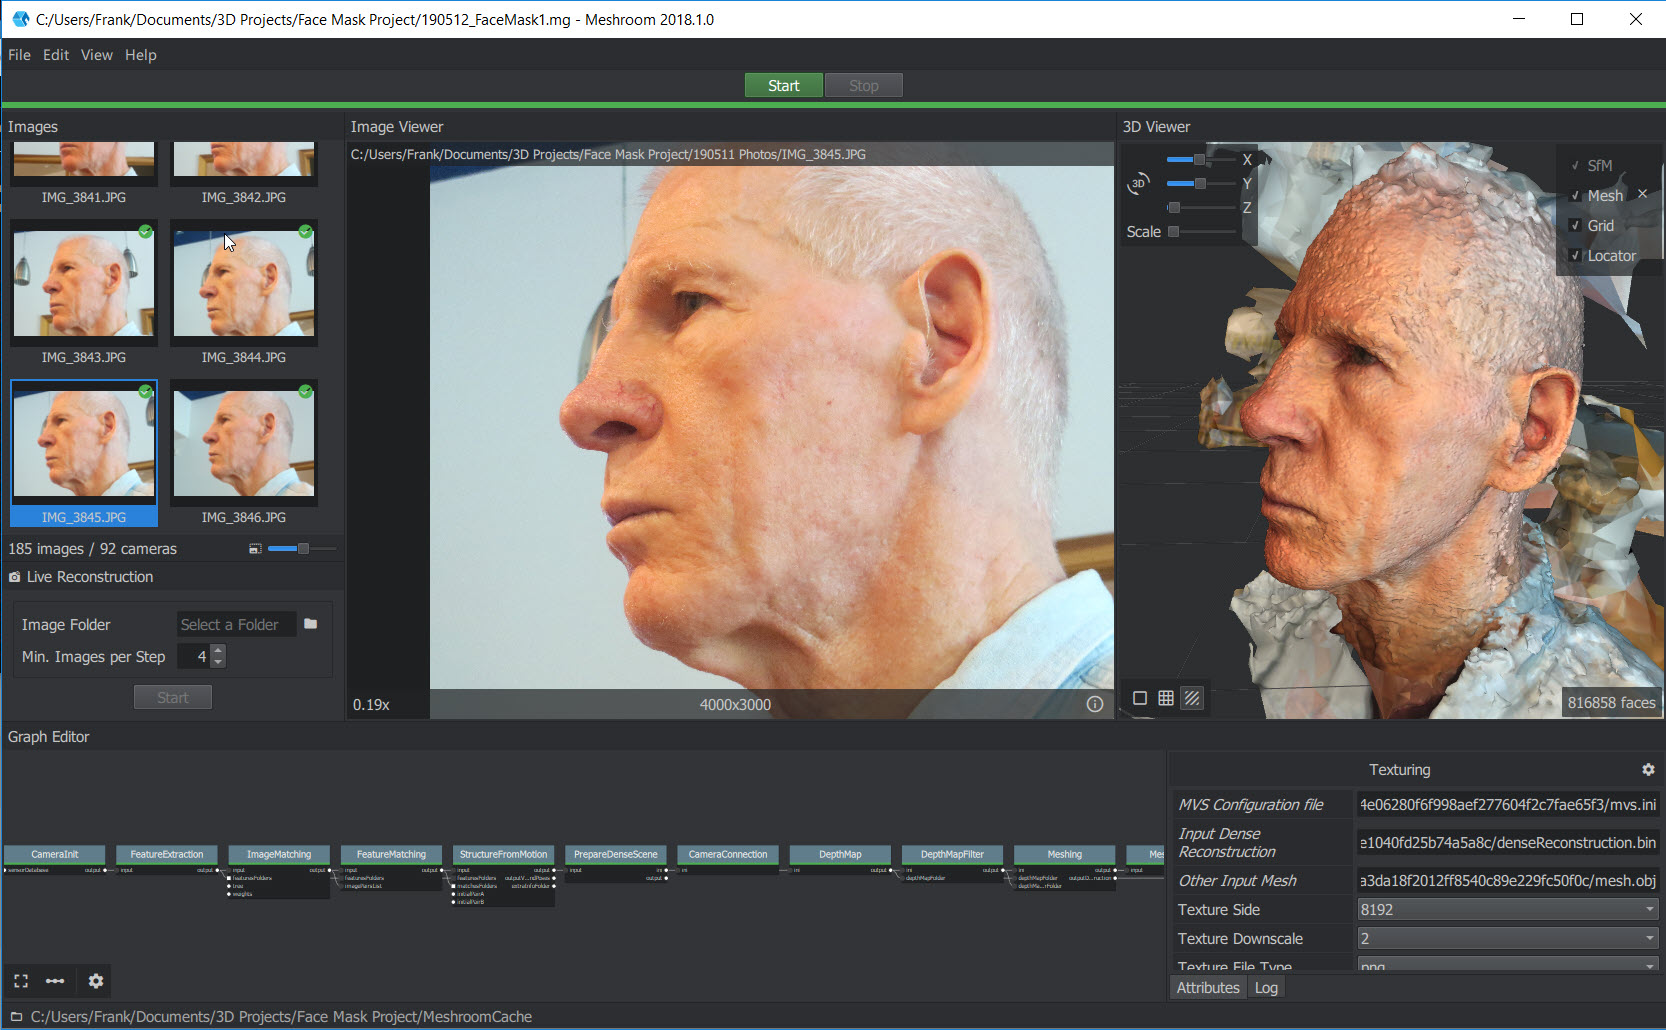
Screenshot of Meshroom 2018.1.0. From left to right; input photos, selected photo for comparison, textured 3D model
Leveraging on my experiences with the chess piece project, I immediately sucked the 57+ MByte texturedMesh.obj output from Meshroom into Microsoft 3D builder, and set about removing all the background artifacts, resulting in the revised model shown in the screenshot below:
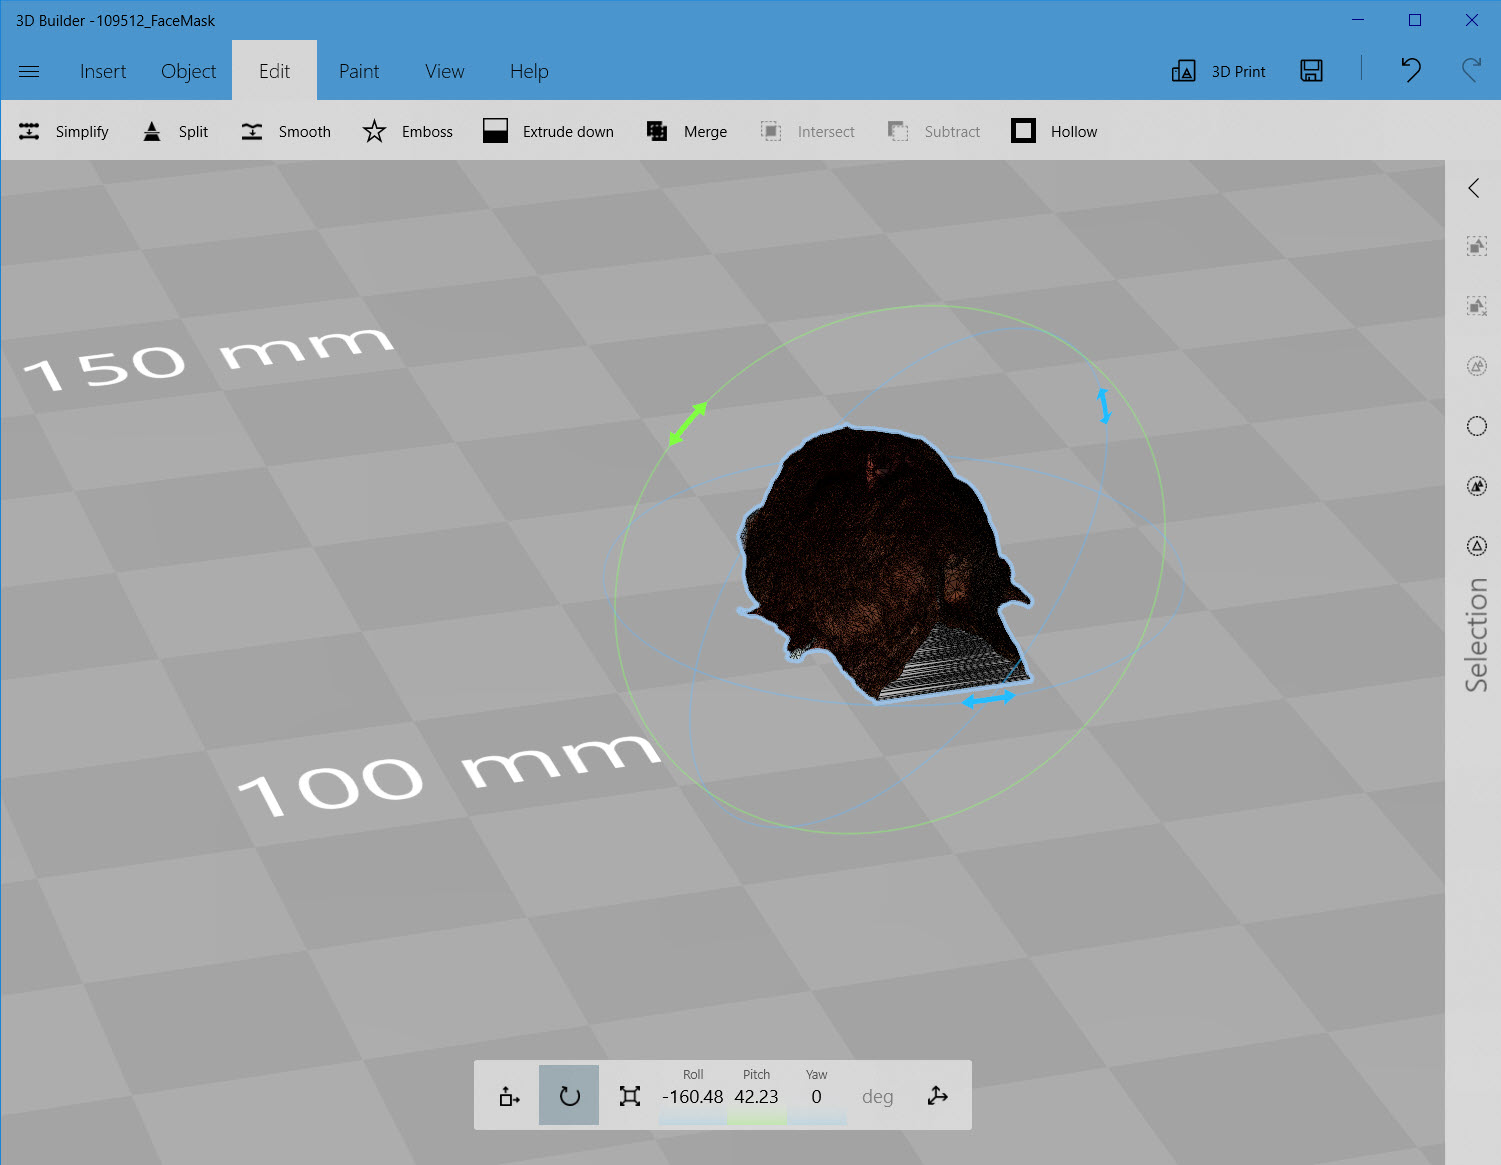
Model in Microsoft 3D Builder, after removal of background artifacts
If you are doing the sorts of 3D modelling projects involving lots of photos and 50+ MByte object files, I highly recommend Microsoft 3D builder; it seems to be one of those little-known unappreciated gems in the Microsoft ecosystem; using 3D Builder was like expecting a tricycle and actually getting a 12,000HP supercar; 3D Builder not only accommodated my 57+ MByte .OBJ file, it didn’t even seem to be breathing hard; more like “Yawn – is that all you’ve got?”
After removing all the background artifacts, I exported the model from 3D Builder as a .3MF file that I was delighted to see is compatible with Prusa’s Slic3r PE, as shown below
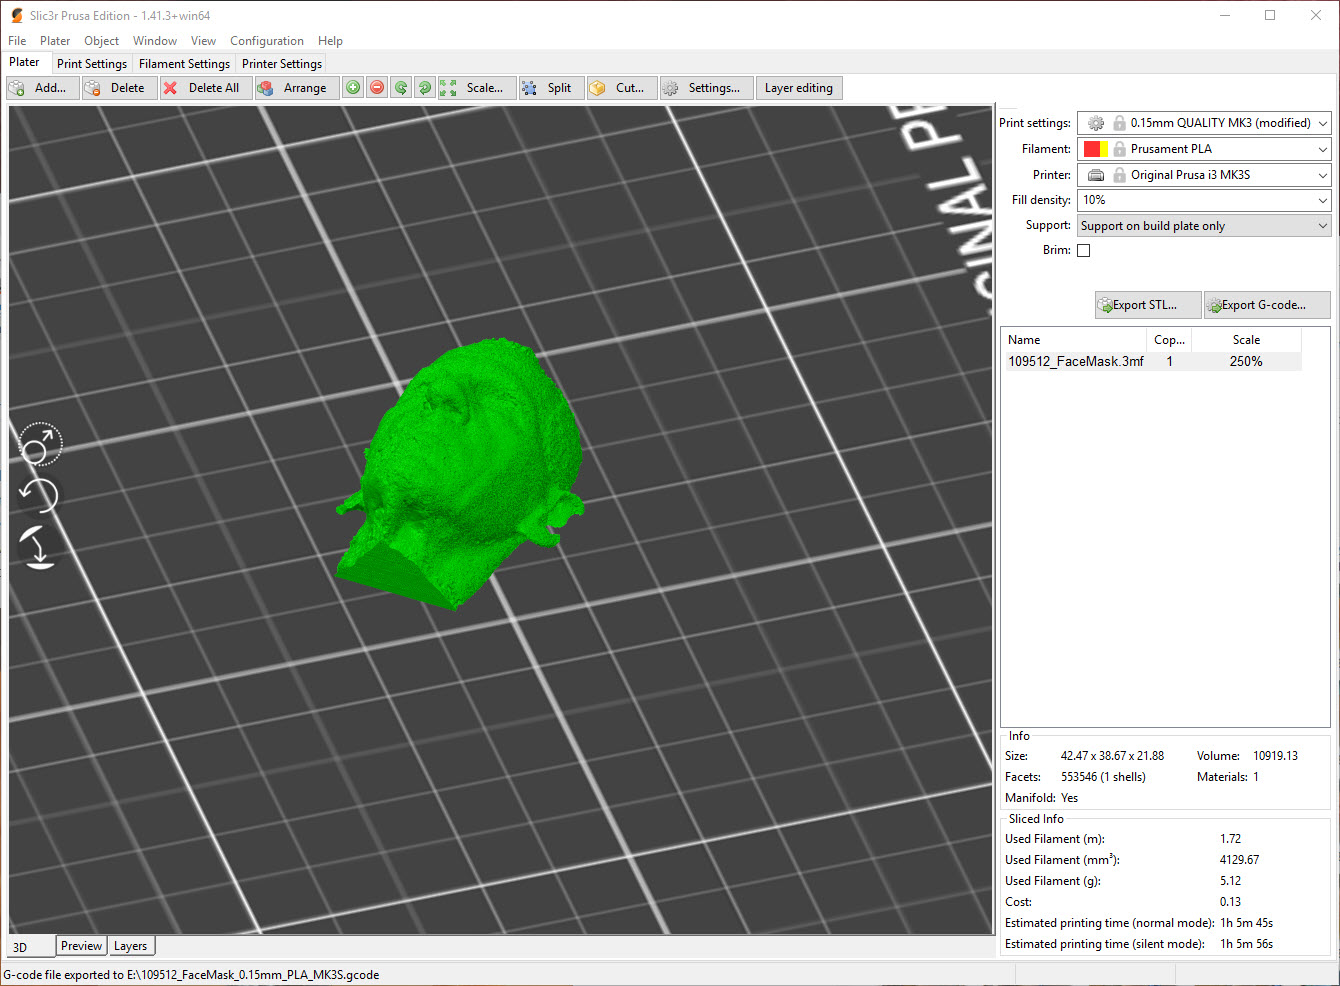
The .3MF file from 3D Builder imported into Slic3r PE
I fired up my Prusa MK3 printer and printed out the model, and got the following off the printer

Very small scale version of my 3D head model. 0.5mm mechanical pencil provided for scale
Then I scaled the model up a bit and reprinted it, getting the following model:
Once I was convinced the model was reasonably accurate, I set out to print a full-sized model. To get the proper scale multiplier, I measured the distance between the outer rims of my eye sockets and compared this to the measurement on my mid-scale model. This gave me a scale factor of almost exactly 3.5, so I used this to print the full-scale model. The full scale model just barely fit on my Prusa MK3/S print bed, and took an astounding 24 hours to print! Also, this is the only model I’ve ever printed that actually cost a non-trivial amount of money –
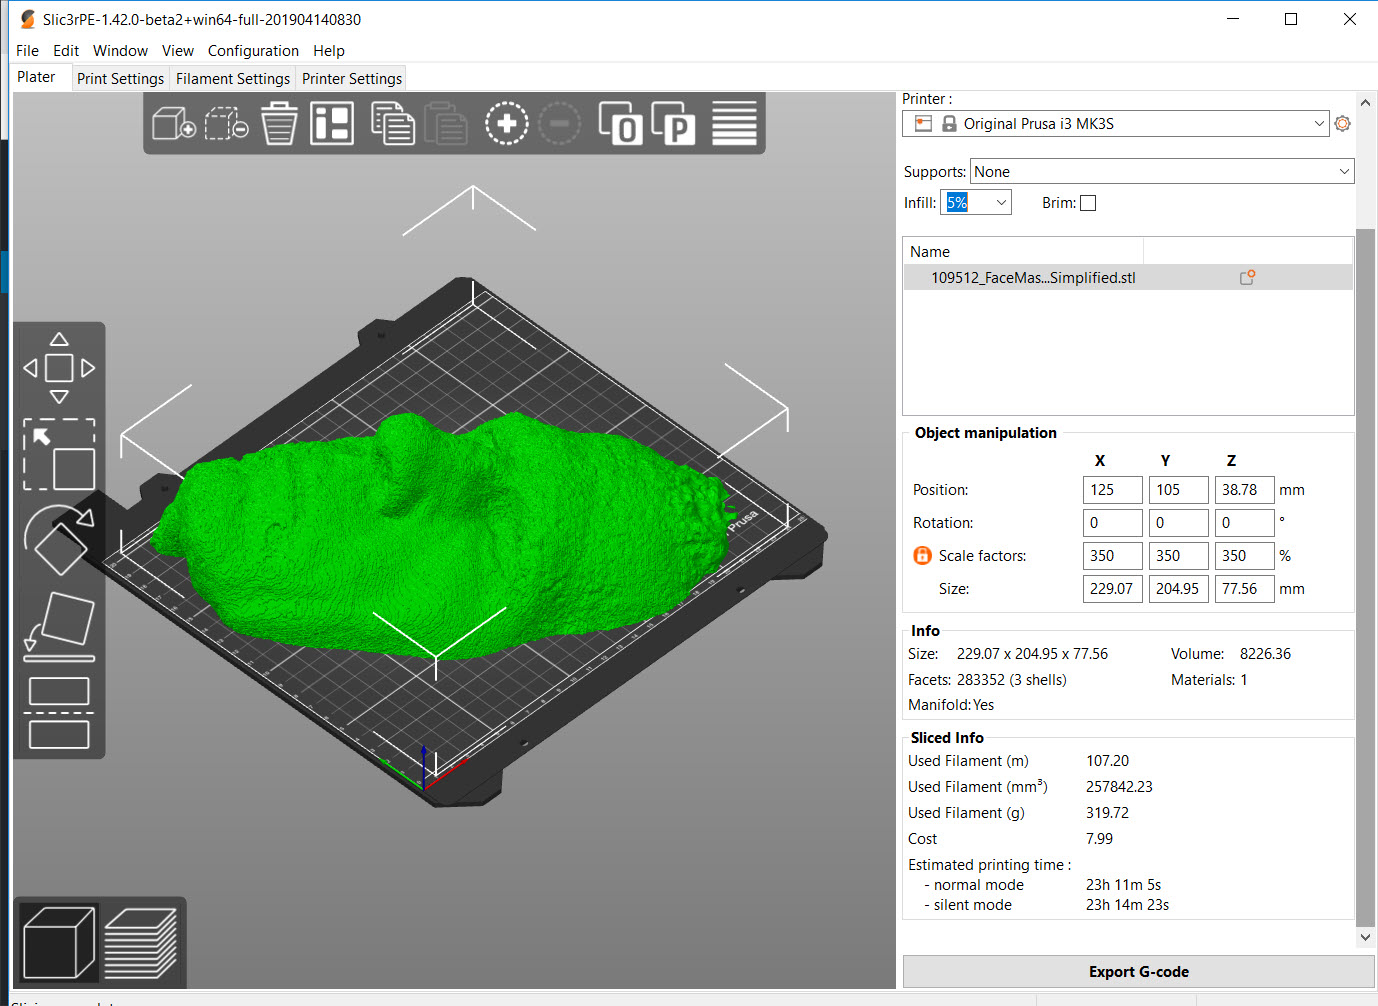
Full scale print setup. Note the print time of almost 24 hours, and the used filament – over 100 m/$8 in cost – wow!!

Partially finished model, showing the internal structure (5% fill)

Finished print
With the finished 3D model, it should be possible to create the desired custom face mask directly, without having to take a plaster cast impression of my face. However, to verify that the full scale model was in fact a faithful representation of my face/nose structure, I decided to make a plaster cast of the printed model, and then compare the plaster cast to my actual face. This is sort of the backwards process used by a prosthetics house to create a custom face mask; they make a plaster cast using the patient’s face, and then use the plaster cast as the model for the final product.

Plaster cast impression using the 3D printed model instead of my face
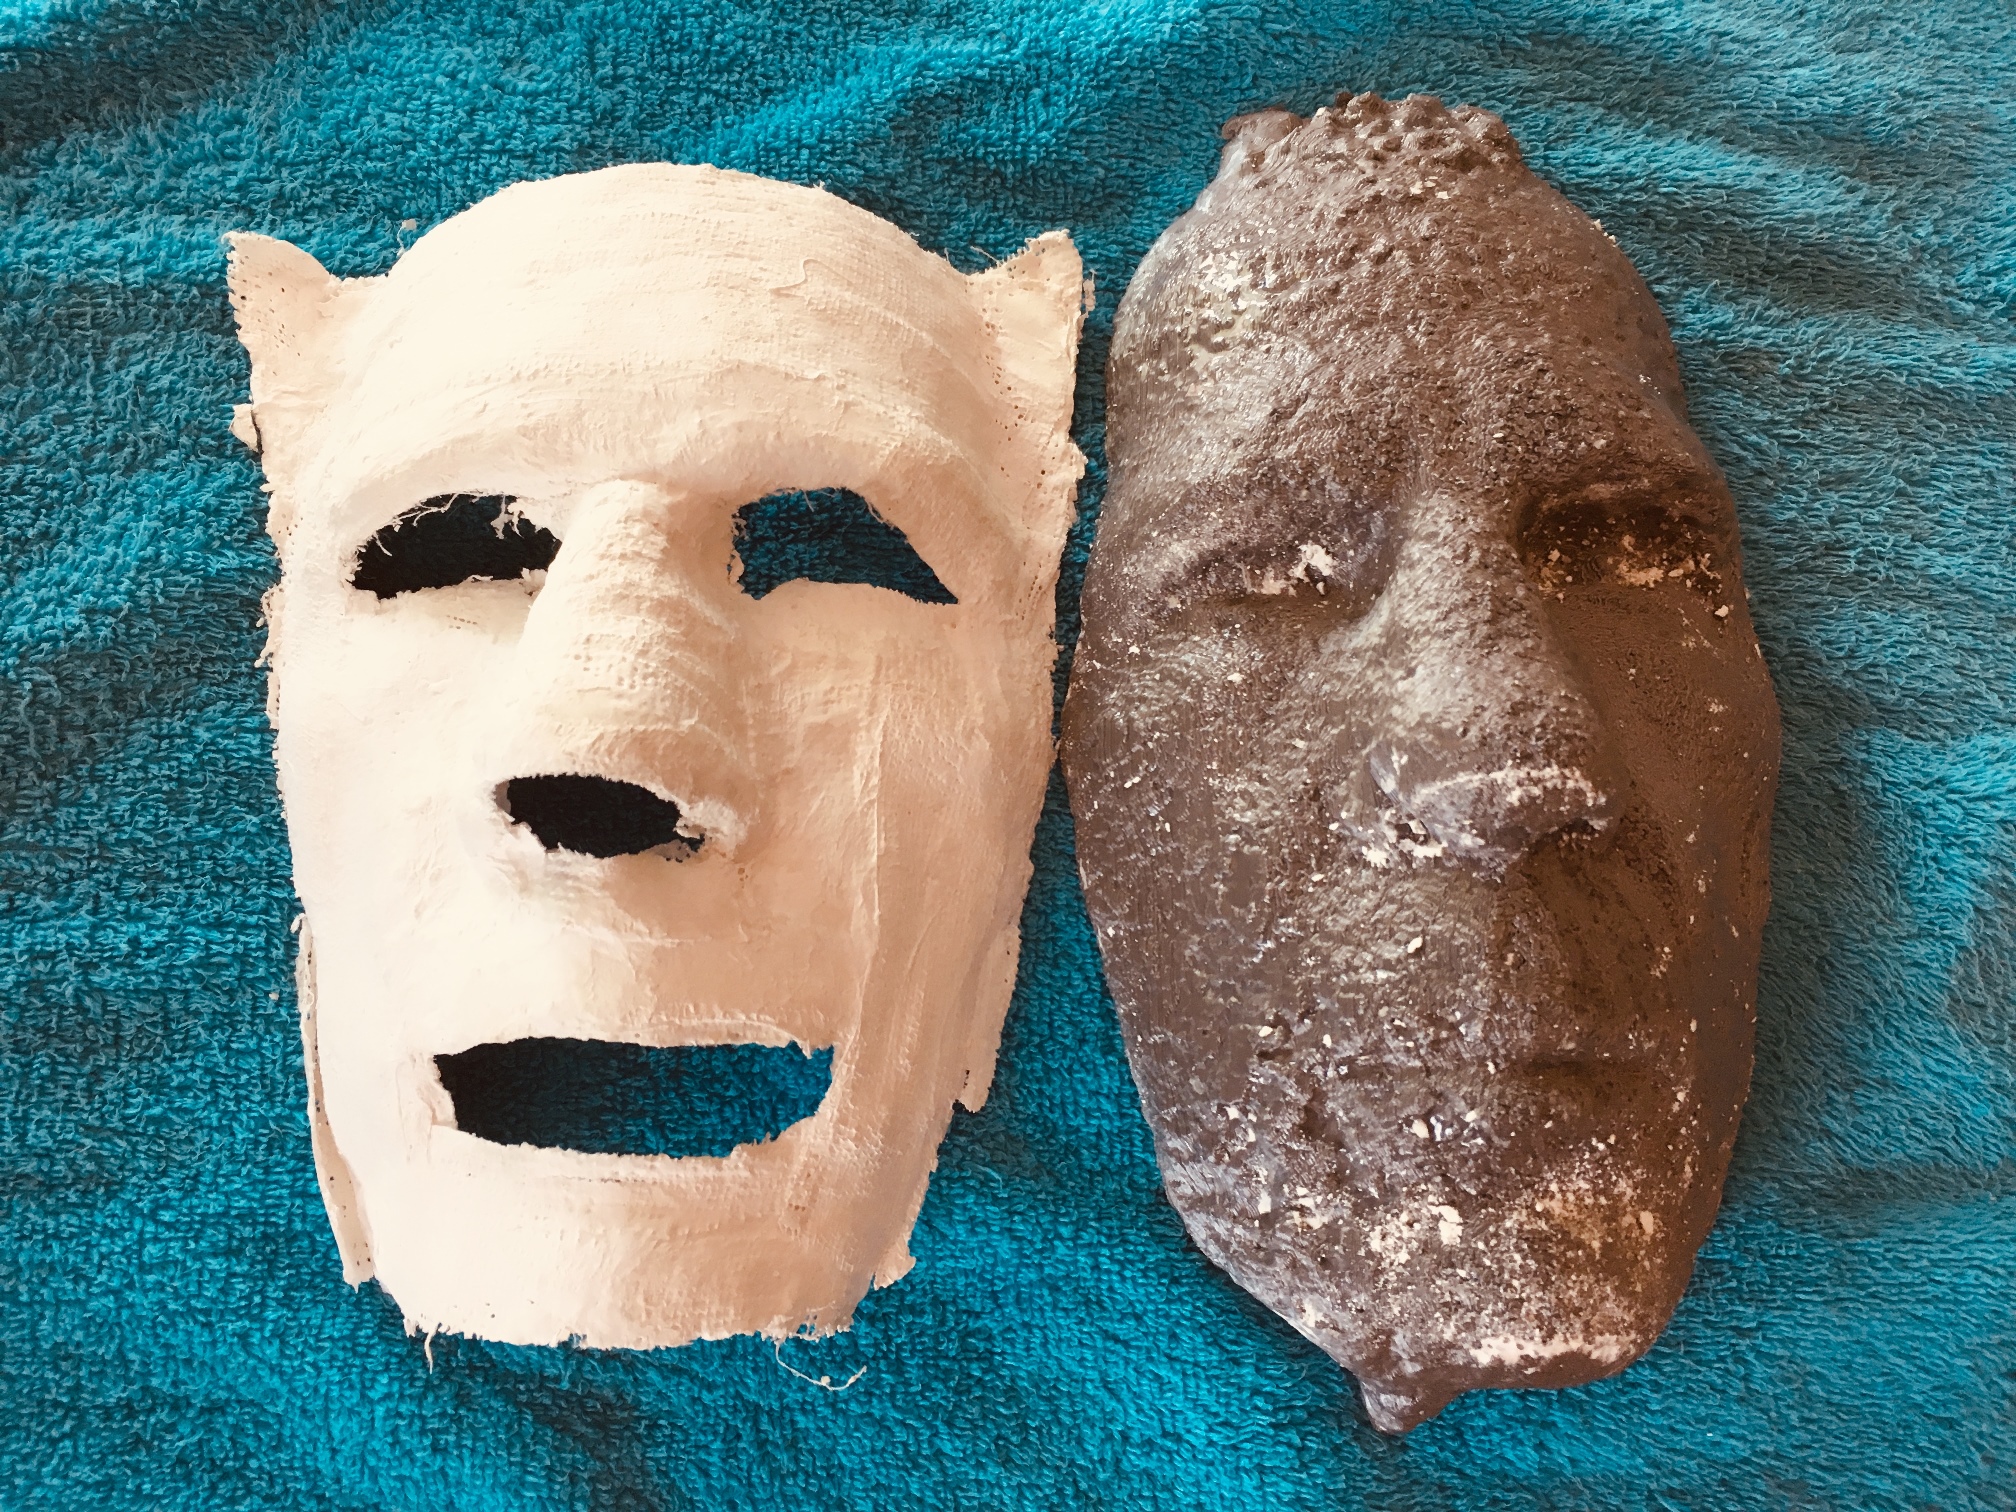
Plaster cast separated from the 3D model

Side view of plaster cast on my face, showing that the 3D model is an accurate representation.
All in all, this project was a blast; I was able to create an accurate 3D model of my face, which should be usable for the purpose of creating a custom face mask for me so I can go back to abusing my body playing basketball. However, I have to say that if I added up all the time and effort required to take all the photos, deal with Meshroom’s idiosyncrasies, actually print the full-scale model (24 hours, $8), and still have to take the plaster cast impression to verify the model, I might have been better off to just get the plaster cast impression made by a professional. OTOH, I learned a lot and had loads of fun, so…
Stay tuned!
Frank
Posted 06 April 2018
It’s been almost six months since I last posted on this subject, and I have been practicing my outside shot for an hour or so almost every weekday. I can’t say that I’ve made spectacular progress, but I have discovered a number of techniques that don’t work (the Edison approach, I believe). Interestingly, as the following video shows, after all that time I seem to have returned to a style very similar to the one I demonstrated in my last post on this subject back in September 2017.
Here is a short clip taken on my home court, showing a couple of nice shots in slo-mo, taken with my new (to me) iphone SE.
Posted 14 September 2017
It has been almost exactly one year since I last posted about my ongoing Quixotic quest to develop an outside basketball shot. In the intervening period I have had to deal with chronic pain in both knees.
Fortunately I have gotten significant relief from cortisone shots, but unfortunately the relief is fairly short-lived; I get about 2-3 months of relatively pain-free activity, and then another month or so of increasing pain until I am forced to go back for more drugs. The orthopod tells me that I can continue to do 3-4 shots/year, but eventually I’ll be in the market for new knees.
As it turns out, I have an appointment in about a week to see a joint replacement specialist, and I suspect the result of this visit will be a knee replacement surgery appointment :-(.
In the meantime, I have been making some actual visible progress on developing an outside shot, and just today I hit two 3’s in a 3-on-3 game, one of which was the game winning shot – wowee!!
Here’s a short video showing front and side views of the current shot technique
Here are a couple more short videos taken on my home b-ball court. My technique is (slowly!) improving, to the point where I hit 22 of 27 foul shots and most of the medium range ones. These videos focus on my release and follow-through, from the side (first video) and then the front/back (second video)
23 September 2015
Well, it’s been over a year since my last post on this subject, and while I’d like to say I’ve made great strides, In reality progress has been somewhat spotty. From November of last year until about two months ago I had been practicing my shot almost every day, and was seeing slow but steady improvement. I even got to the point where I was making the occasional 3-point shot ‘in competition’ (at my age, the ‘in competition’ is definitely in quotes!). However, while my shooting prowess was increasing, so was pain in both my knees, and sometime in July it got to be too much to bear anymore. When a doctor’s visit and a set of X-rays ruled out skeletal damage as the culprit, I tried some massage therapy to see if that would help; it did, but not significantly enough to get me back on the court. At the recommendation of the massage therapist, I started a physical therapy course, and although I haven’t quite finished the PT sessions, my knee pain has gone from ‘cant-stand-it-anymore’ agony to ‘mild-old-age-annoyance’ stiffness. I’m not sure how much of this is just abstinence from shooting and how much is due to the exercises, but at this point I’m not sure I care! 😉
So, yesterday I went back to some mild practice shooting for the first time in a couple of months. Instead of just shooting 3’s, I’m limiting my practices to short-range, foul-line, and what I call ‘2-1/2’ range (halfway between the foul line and the 3-point arc). I was encouraged to find that the break had not erased all my skill gains (such as they were), and I was still able to shoot with a reasonable amount of good form for an ‘almost-septuagenarian’ ;-). The following short videos show side and front views of my ‘2-1/2’ point range shooting form. Hopefully I will be able to increase the frequency and duration of my practice sessions without re-injuring my knees.
So, in order to not get beat up under the basket, I must have a reliable outside shot. I never needed an outside shot before, as I was always the guy banging around under the basket. Now that I’m old and feeble, this is a real good way to get hurt (ask me how I know). In the good old days, I might get bruised up in a game, but would be ready to do it again the next day. Now if I get bruised up, it might be several weeks before I can play again! I can remember remarking to my wife that “I can tell I’m getting old; it used to be that I took a couple of aspirin after a big game for relief from bruises, but now I find myself taking a couple of aspirin before the game”. And this was when I was on the uphill side of 40! ;-).
OK, so I know I need to develop an outside shot – but how hard can it be? I have the basket and backboard installed, and I have my double-height basketball escape-prevention mechanism in place. All I had to do (I thought) was go out and shoot a few baskets and voila! 3-point shot!
Not
Being the scientific type, I started out by measuring my 3-point shooting performance over time using Excel, and was encouraged somewhat to see steady progress in my shooting percentages over time. However, after doing some inet research I discovered that my shooting percentage from 3-point land was about half what was required for reasonable performance in competition. About the best I could do was somewhere in the 30’s to 40’s (on a good day). This sounds pretty good until you discover that most experts agree that one’s percentage in competition is about half the practice percentage, and 30’s to 40’s in competition is considered the minimum requirement for a productive member of a team – oops!!
After a while, it seemed like I just wasn’t getting any better, no matter how hard I tried or how much I shot (and by this time, I was shooting several hundred shots per day). Also, I was concentrating entirely on 3-point shooting, and my other shots from shorter ranges (including at the foul line) sucked even worse. So, I did what I have done every time I have been faced with a hard problem – I tossed out all my assumptions and started researching “the perfect basketball shooting form”. In the process, I ran across a series of videos created by Arthur Jackson of “One on One Basketball” fame. The videos are at http://www.monkeysee.com and go from the correct shooting stance, proper shooting mechanics and follow-through, and typical mistakes. The first video in the series is “How to Shoot a Basketball“.
After viewing the videos and comparing them with video from some of my practice sessions, I realized that my shot form was, well, shot. I was going to have to start all over again and develop a shot from scratch.
The above video was shot in late August 2014 and shows the essentially two-handed shot style I had developed up to this point. The following video shows the shot style I have developed a couple of months later, based on the Arthur Jackson video series.