Posted 14 May 2019
In March of this year, I suffered yet another broken nose while playing basketball. Off to the emergency room where, following the normal interminable wait, I was told “yep – you have broken your nose – here’s a referral to an ENT guy – have a nice day!” The next day I went to the ENT guy, who said “yep – you have a broken nose, and there’s nothing I can do for you; you need an ‘open reduction’ (aka ‘nose job’), and here’s the name of the plastic surgeon I recommend”. At this next appointment Dr. Bapna (the plastic surgeon) said “yep – you have a broken nose, and you’re going to need an open reduction. It’s not going to be a whole lot of fun, but I should be able to get you squared away (literally)” (or words to that effect, anyway).
So, in early April I endured a ‘functional rhinoplasty’ (aka nose job), and indeed it wasn’t much fun. Fortunately I had learned from an earlier rotator cuff operation that I could rent a powered recliner on a short-term basis, and this at least made the convalescence a little less terrible.
In the subsequent post-op appointments with Dr. Bapna, he made it quite clear that while the operation was an unqualified success, another broken nose while playing basketball might not be repairable. He strongly recommended that I either give up basketball (and what is a 70-year old man doing playing b-ball anyway?) or wear a protective face mask. Since I wasn’t really interested in giving up round-ball, I started investigating face mask options.
Some research showed that a number of clear face masks are available on Amazon and other retail outlets, and there were a few firms advertising custom face masks. When I mentioned this to Dr. Babna, he told me that a local prosthetic business (Capital Prosthetic and Orthotic Center, Inc) also does custom face masks (who knew?). Apparently the process involves making a plaster impression of the face, and then using the impression as the mold for a custom polycarbonate mask. While I was researching the possibilities, it occurred to me that I might be able to use the knowledge of 3D modelling I had gained from an earlier project to create a duplicate of a chess piece to create a 3D model of my face, and then print a full-size plastic face replica to use as the basis for a polycarbonate mask. This would eliminate the need to make a plaster impression, and might open up a new technique for custom face mask fabrication.
So, I talked my lovely wife into helping me make a 3D representation of my head, using the same Canon SX260 HX digital camera I used for my chess piece replication project. It took us a couple of iterations to get enough good shots, but soon I had sucked 185 photos into Meshroom and it was busily cranking away to create the 3D model.
Except when it crashed. I had experienced this problem during the chess piece project, and had solved it by finding and removing the problem photos, usually a shot that was badly out of focus. So, I found and removed the photo pointed to by the crash log, and restarted Meshroom’s processing.
And it crashed again, and kept crashing even as I removed more and more photos. In addition, there wasn’t anything apparently wrong with the photos that caused the crash.
After a LOT of research on the Meshroom GitHub site, I finally ran across a post where one responder noted that Meshroom-2019.1.0-win64, the version I was using had ‘issues’ with photos that weren’t exactly perfect, and recommended downgrading to the 2018.1.0 version.
So, I downgraded to 2018.1.0, and voila – Meshroom processed all 185 photos without complaint and produced a startlingly accurate 3D model of my head, shown below
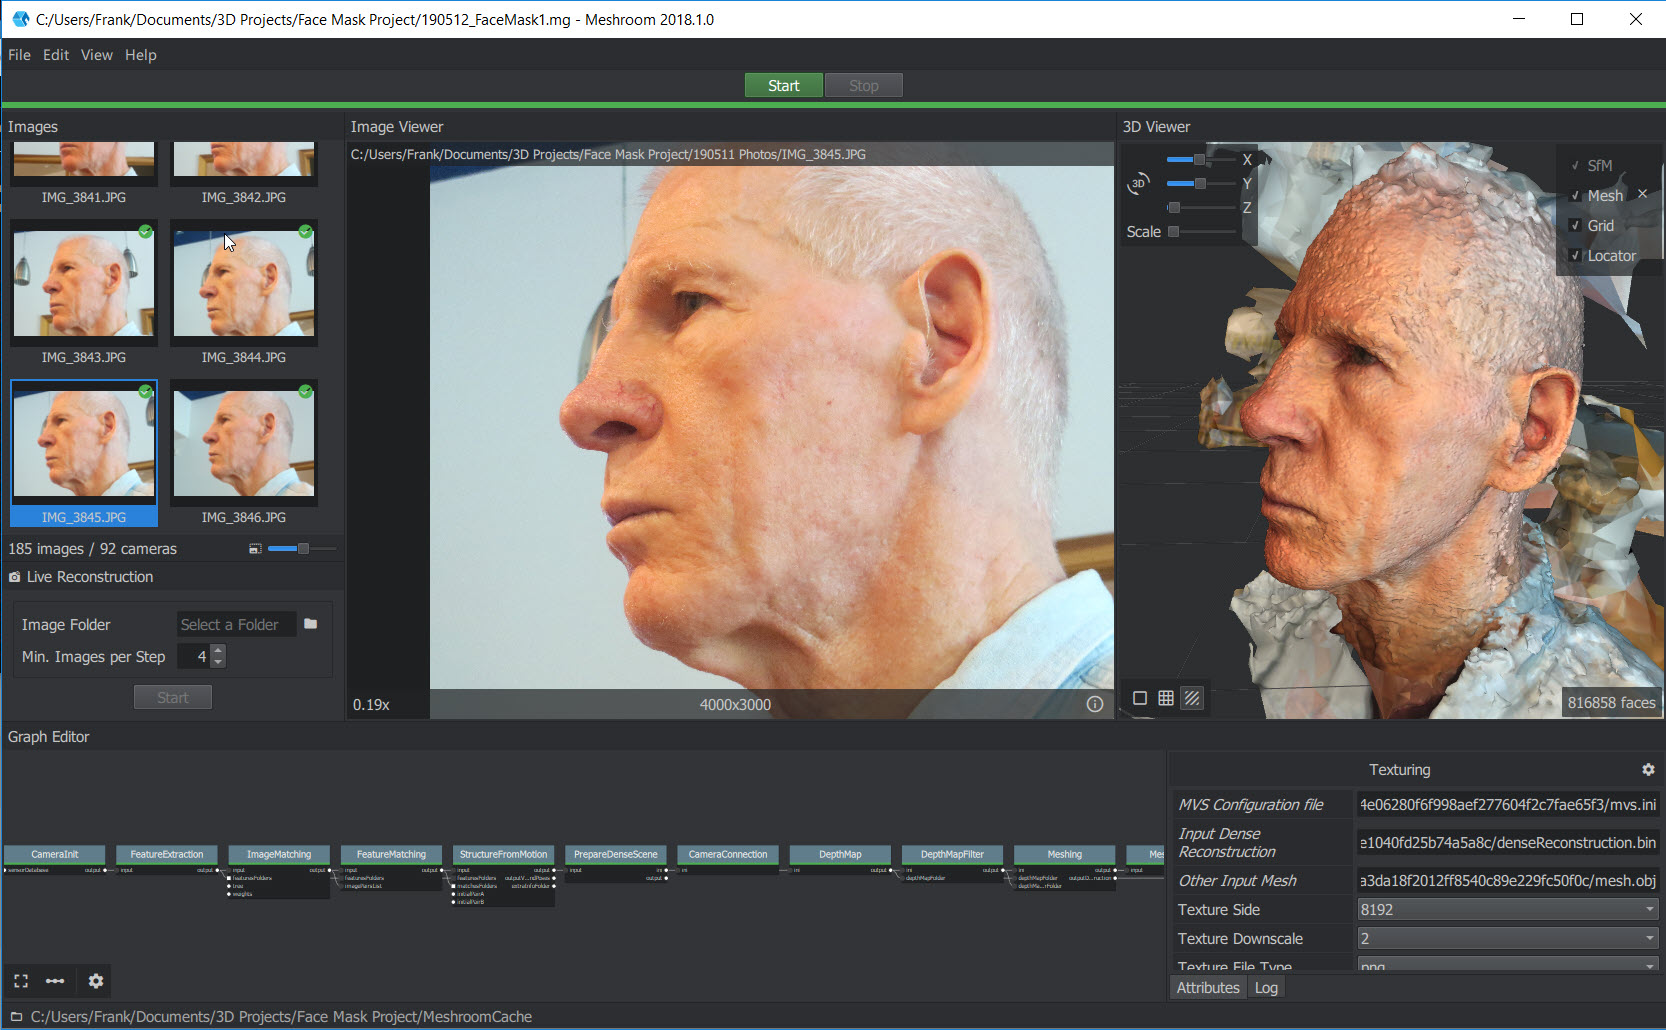
Screenshot of Meshroom 2018.1.0. From left to right; input photos, selected photo for comparison, textured 3D model
Leveraging on my experiences with the chess piece project, I immediately sucked the 57+ MByte texturedMesh.obj output from Meshroom into Microsoft 3D builder, and set about removing all the background artifacts, resulting in the revised model shown in the screenshot below:
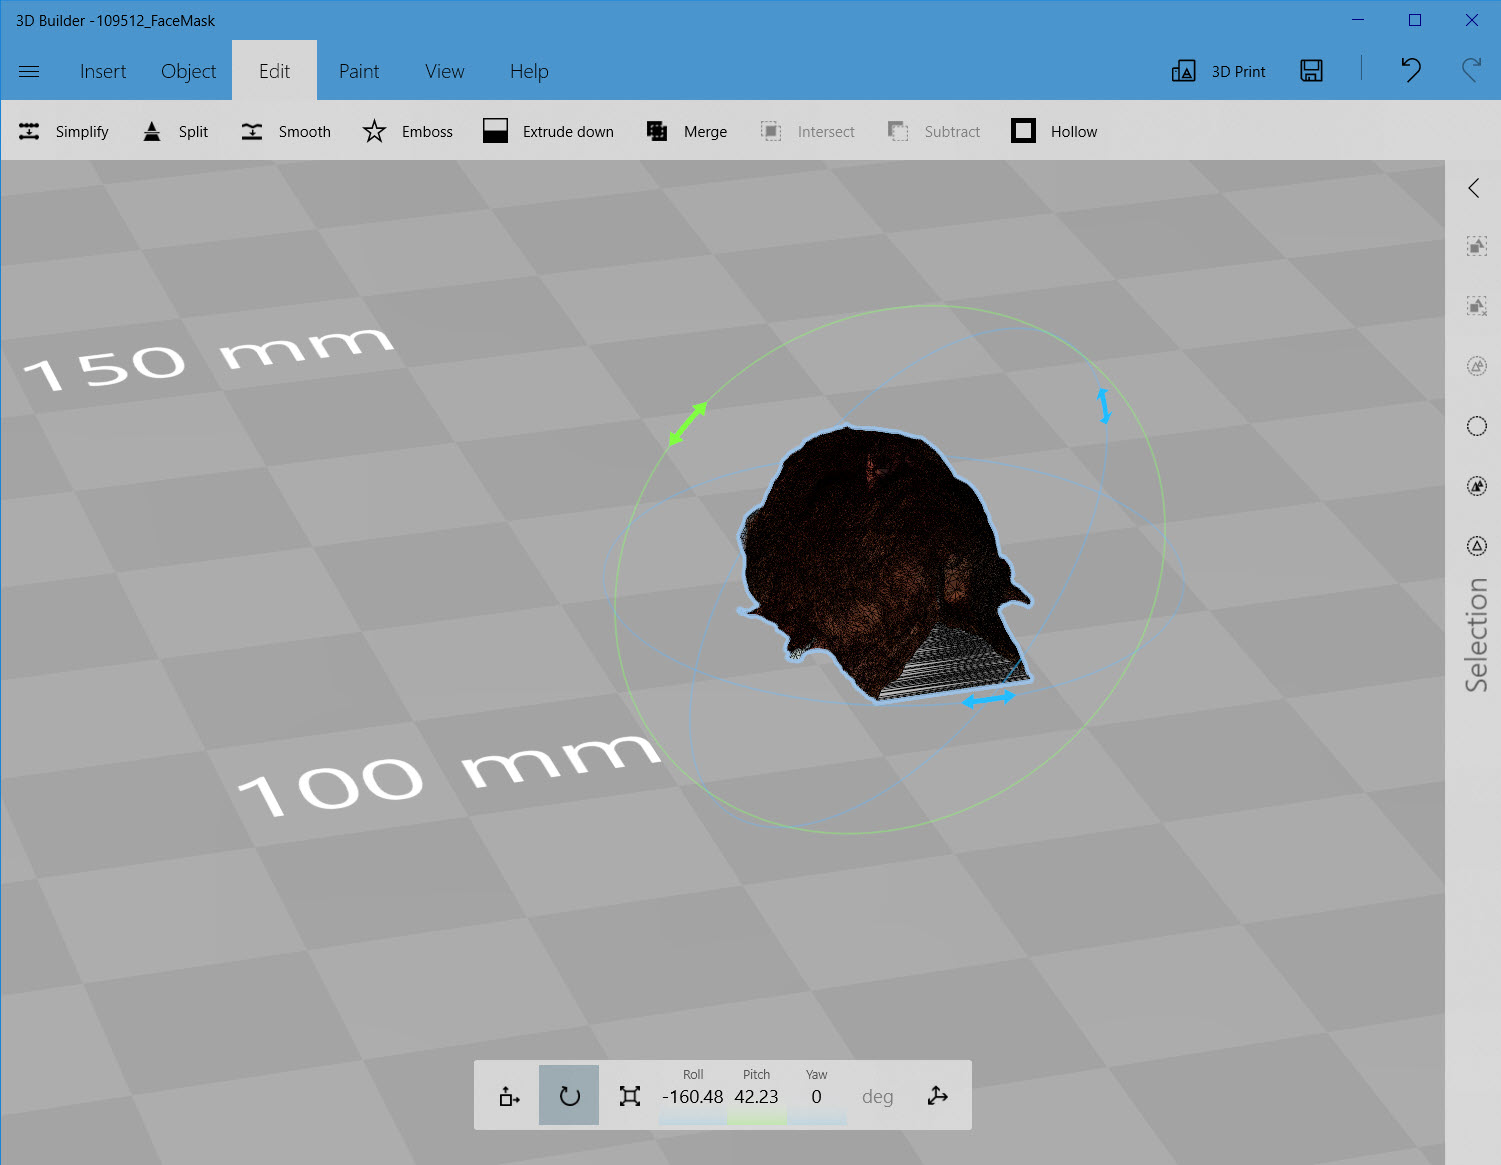
Model in Microsoft 3D Builder, after removal of background artifacts
If you are doing the sorts of 3D modelling projects involving lots of photos and 50+ MByte object files, I highly recommend Microsoft 3D builder; it seems to be one of those little-known unappreciated gems in the Microsoft ecosystem; using 3D Builder was like expecting a tricycle and actually getting a 12,000HP supercar; 3D Builder not only accommodated my 57+ MByte .OBJ file, it didn’t even seem to be breathing hard; more like “Yawn – is that all you’ve got?”
After removing all the background artifacts, I exported the model from 3D Builder as a .3MF file that I was delighted to see is compatible with Prusa’s Slic3r PE, as shown below
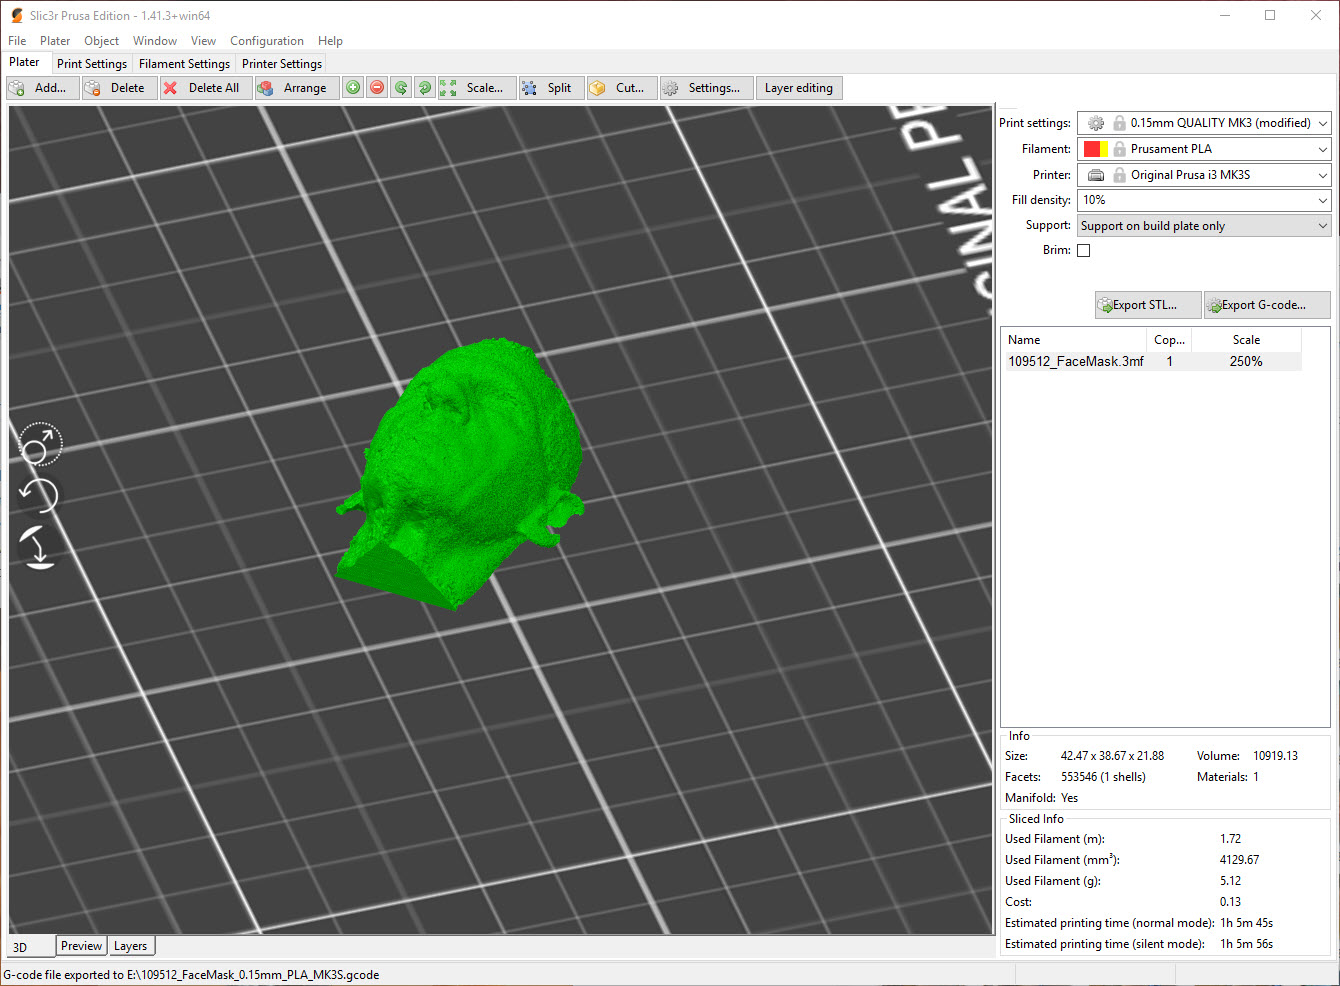
The .3MF file from 3D Builder imported into Slic3r PE
I fired up my Prusa MK3 printer and printed out the model, and got the following off the printer
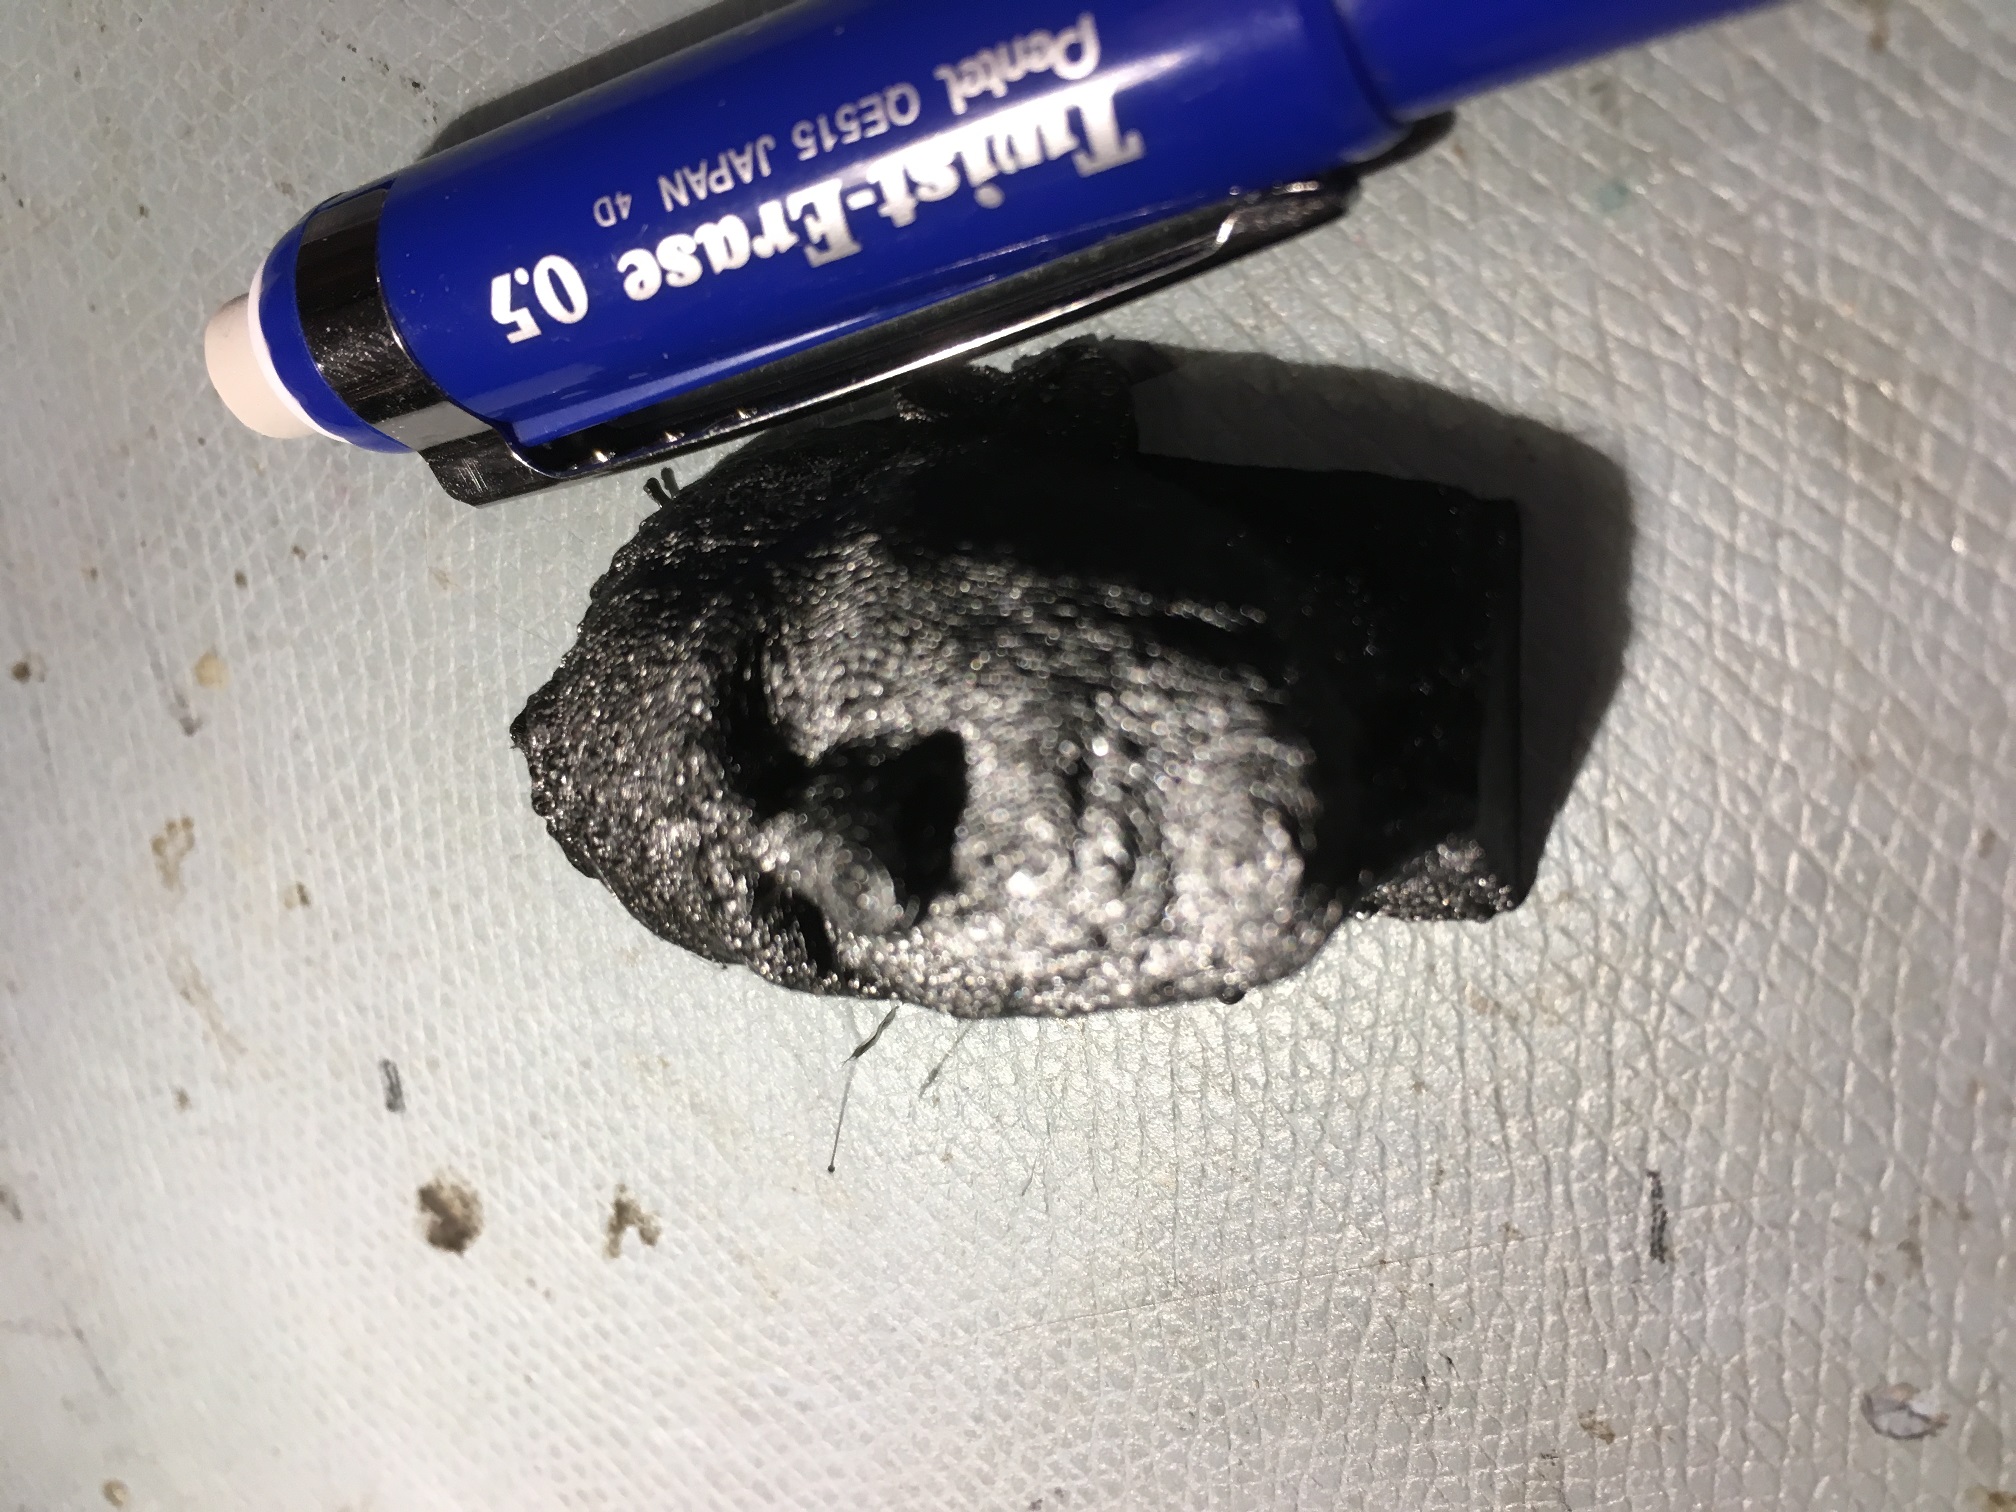
Very small scale version of my 3D head model. 0.5mm mechanical pencil provided for scale
Then I scaled the model up a bit and reprinted it, getting the following model:
Once I was convinced the model was reasonably accurate, I set out to print a full-sized model. To get the proper scale multiplier, I measured the distance between the outer rims of my eye sockets and compared this to the measurement on my mid-scale model. This gave me a scale factor of almost exactly 3.5, so I used this to print the full-scale model. The full scale model just barely fit on my Prusa MK3/S print bed, and took an astounding 24 hours to print! Also, this is the only model I’ve ever printed that actually cost a non-trivial amount of money –
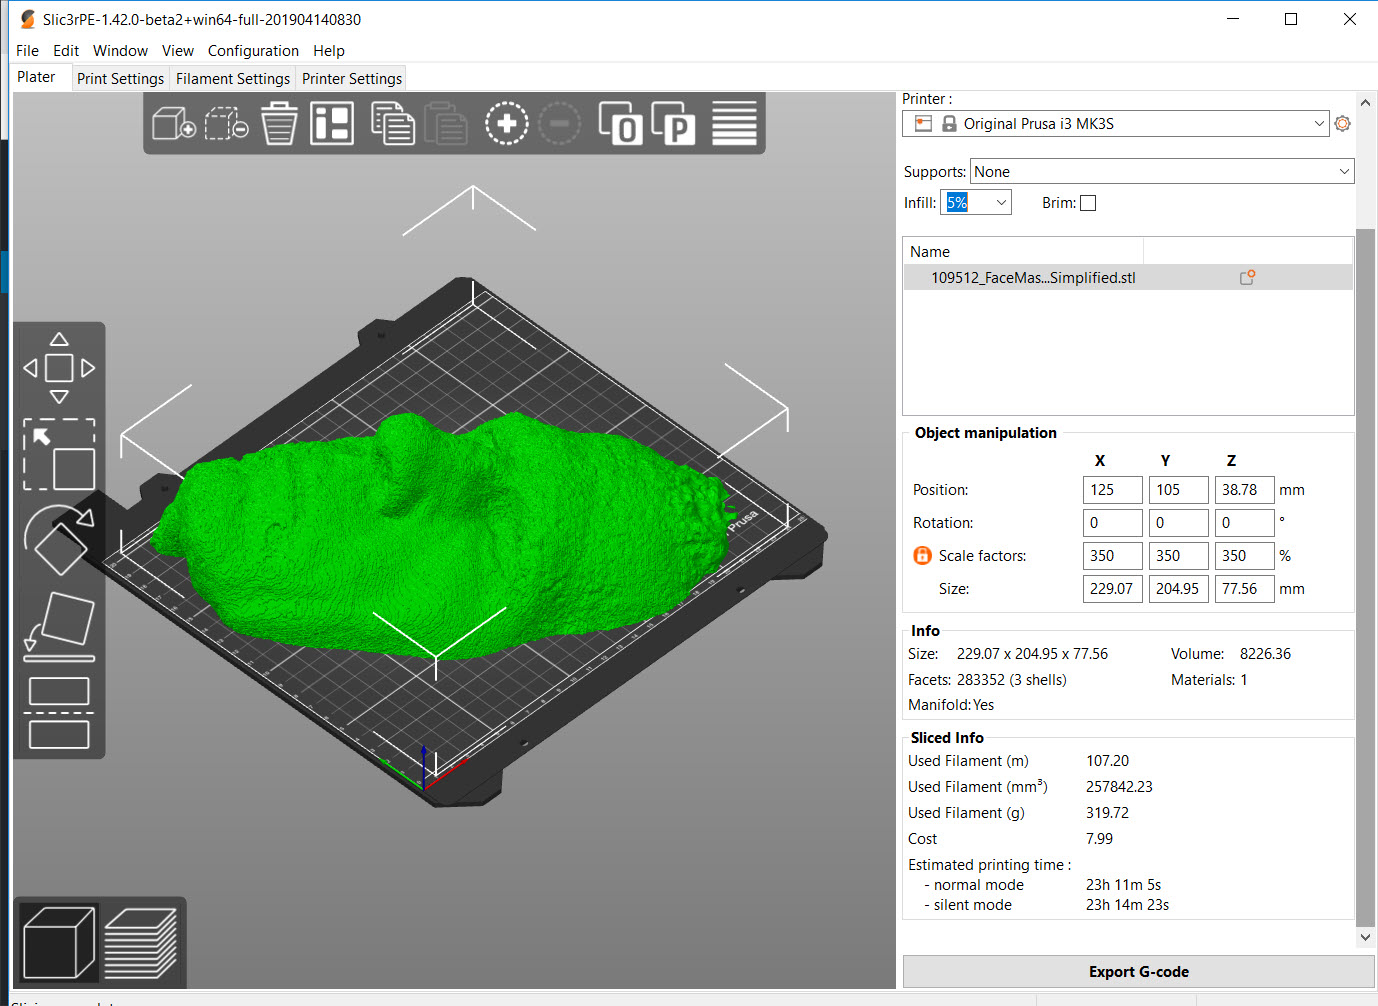
Full scale print setup. Note the print time of almost 24 hours, and the used filament – over 100 m/$8 in cost – wow!!
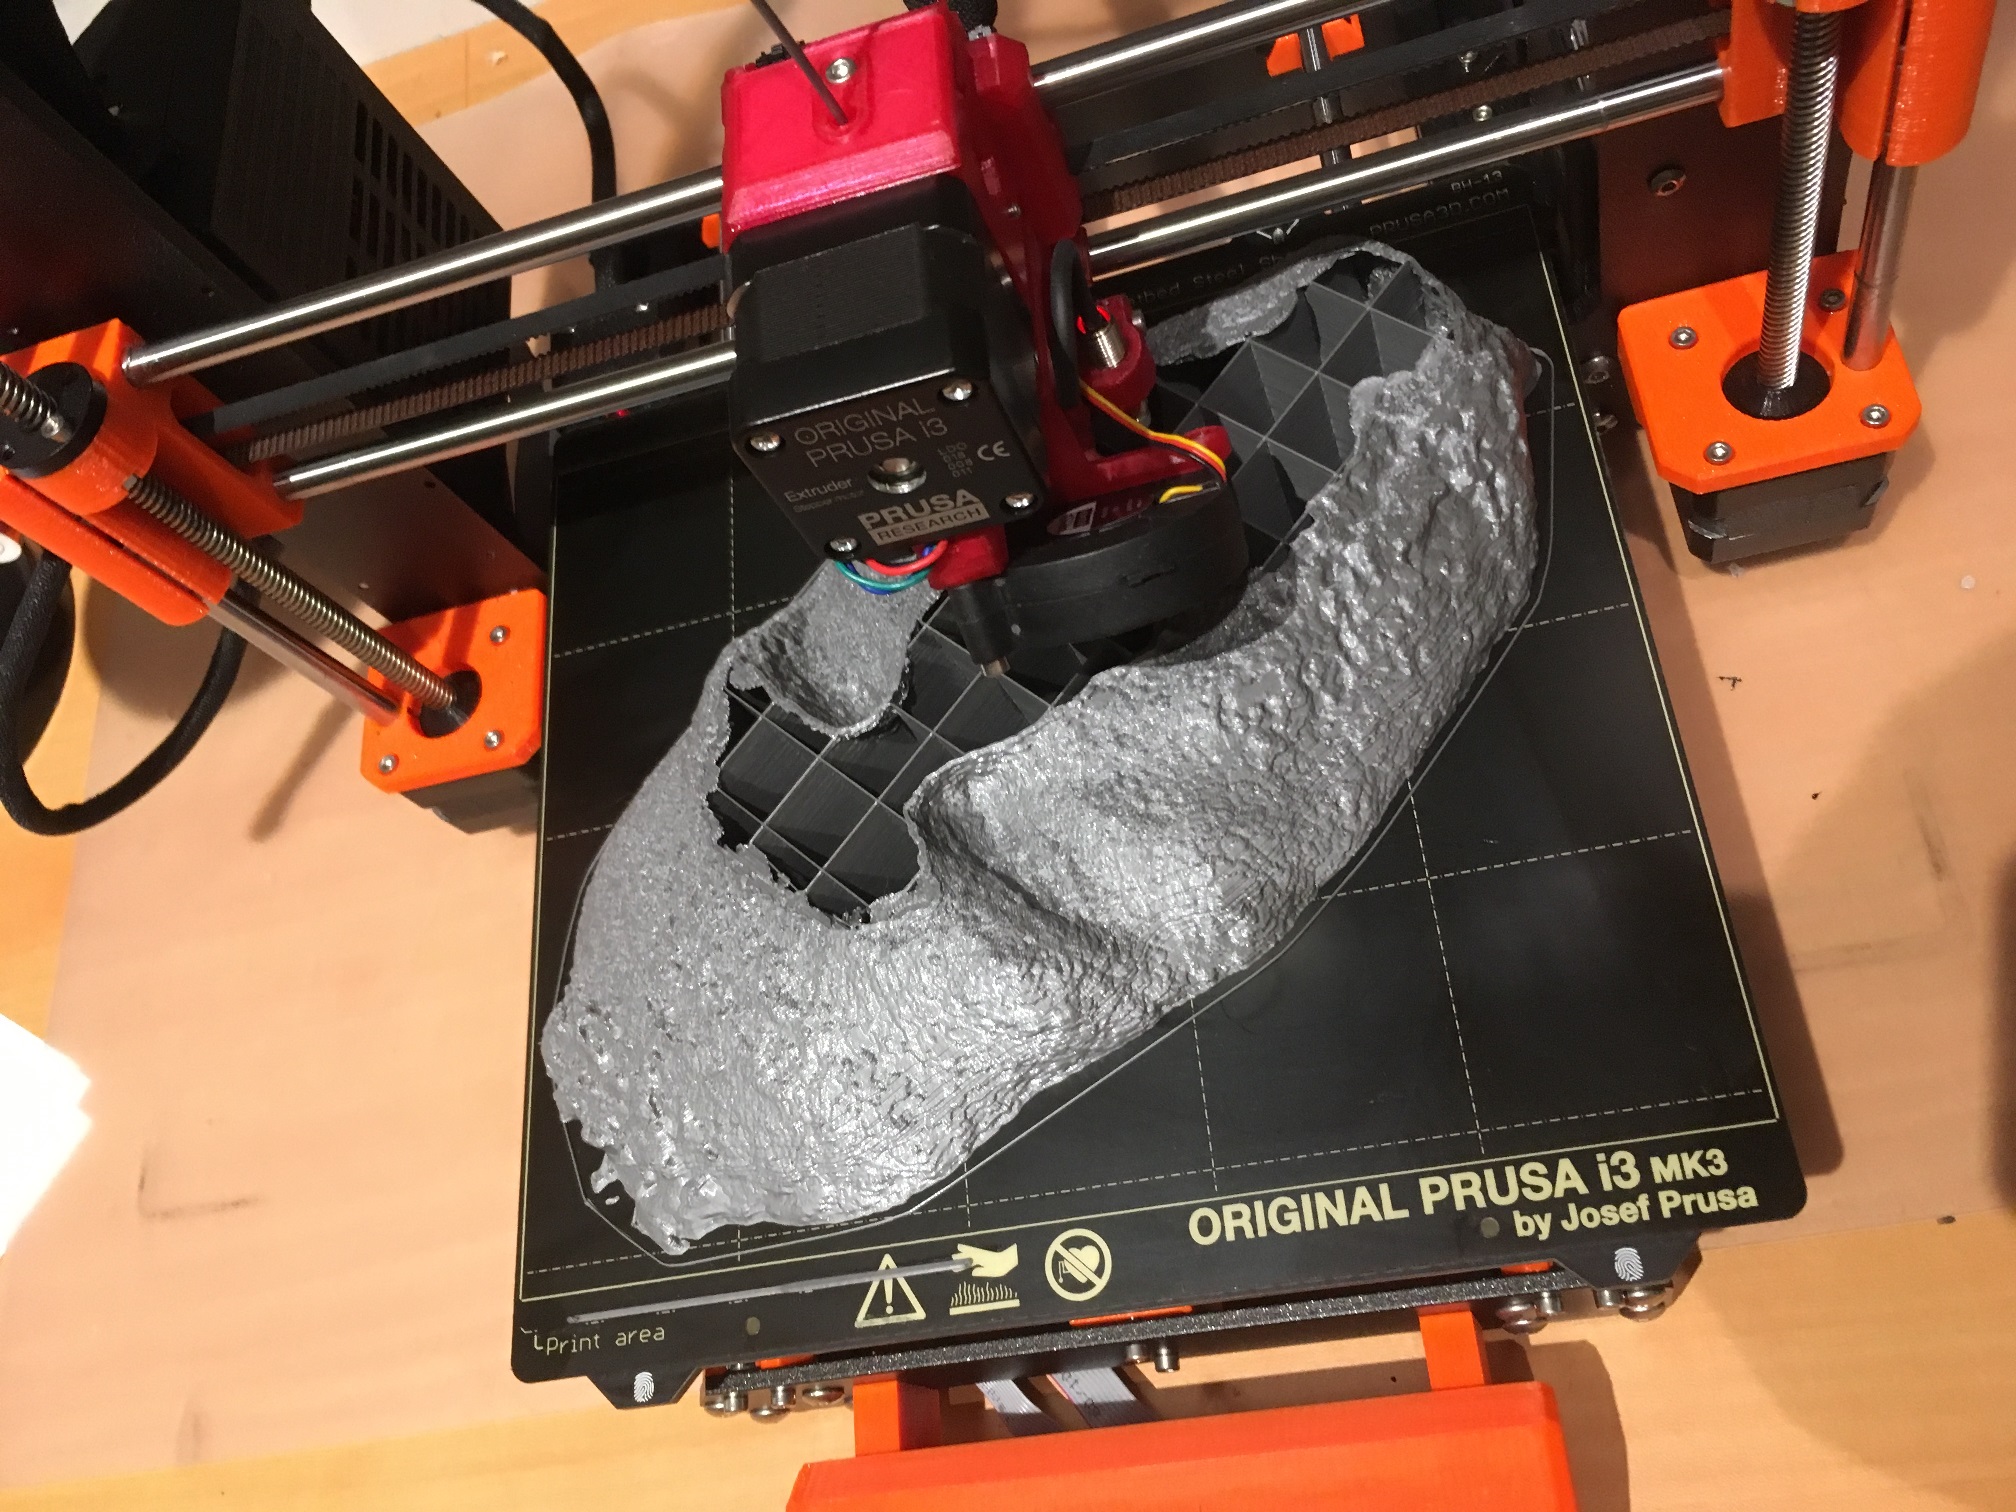
Partially finished model, showing the internal structure (5% fill)
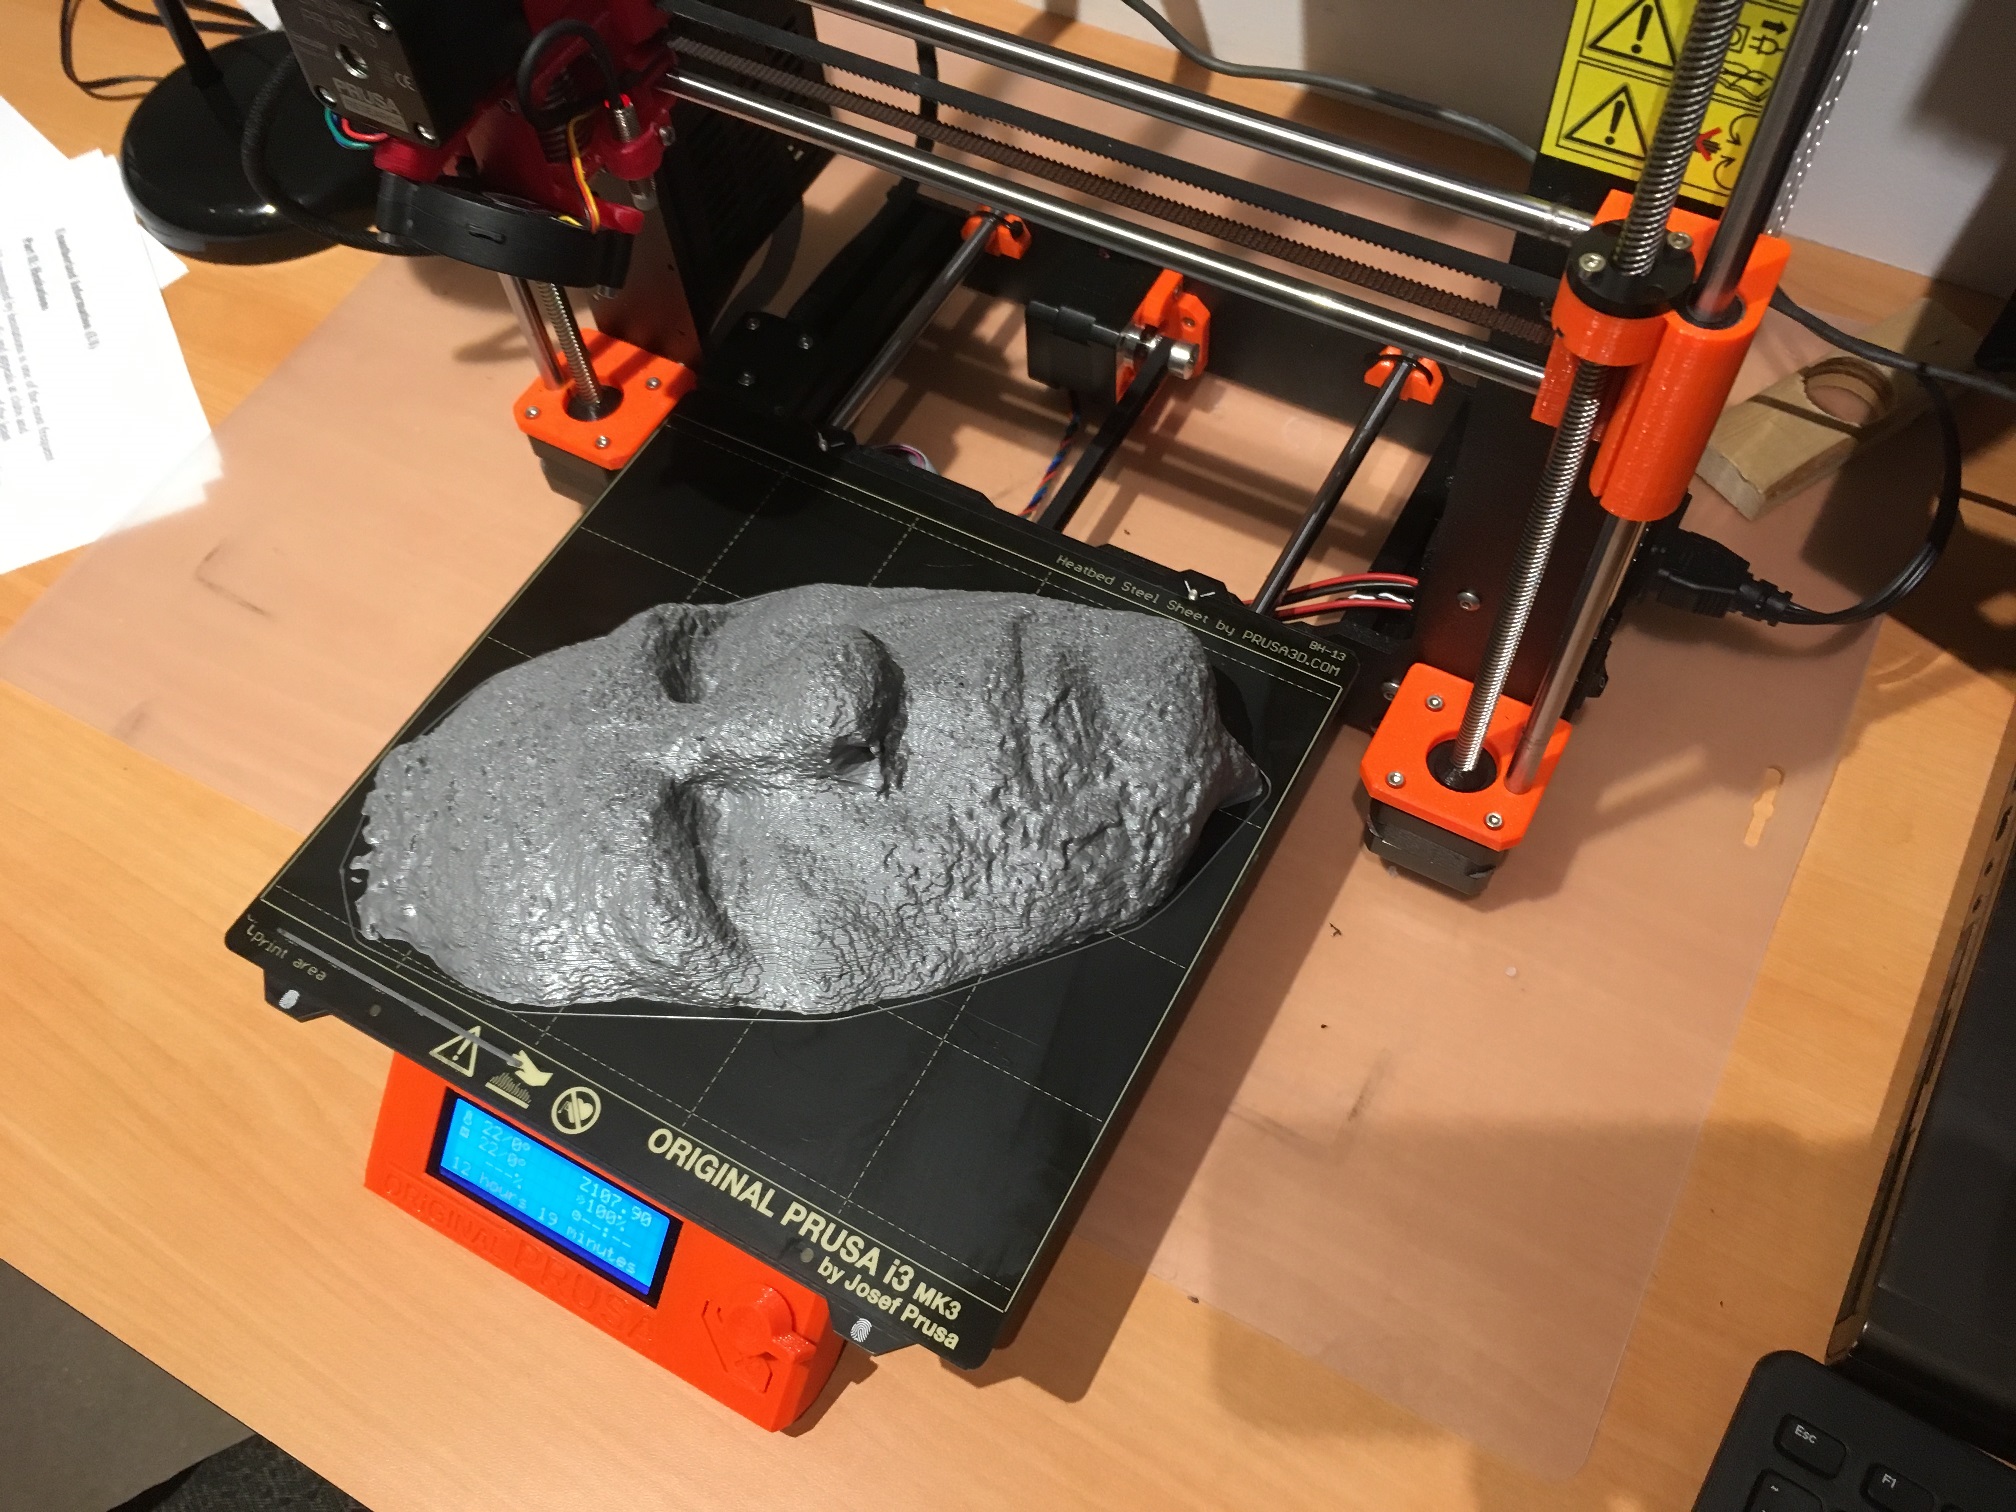
Finished print
With the finished 3D model, it should be possible to create the desired custom face mask directly, without having to take a plaster cast impression of my face. However, to verify that the full scale model was in fact a faithful representation of my face/nose structure, I decided to make a plaster cast of the printed model, and then compare the plaster cast to my actual face. This is sort of the backwards process used by a prosthetics house to create a custom face mask; they make a plaster cast using the patient’s face, and then use the plaster cast as the model for the final product.
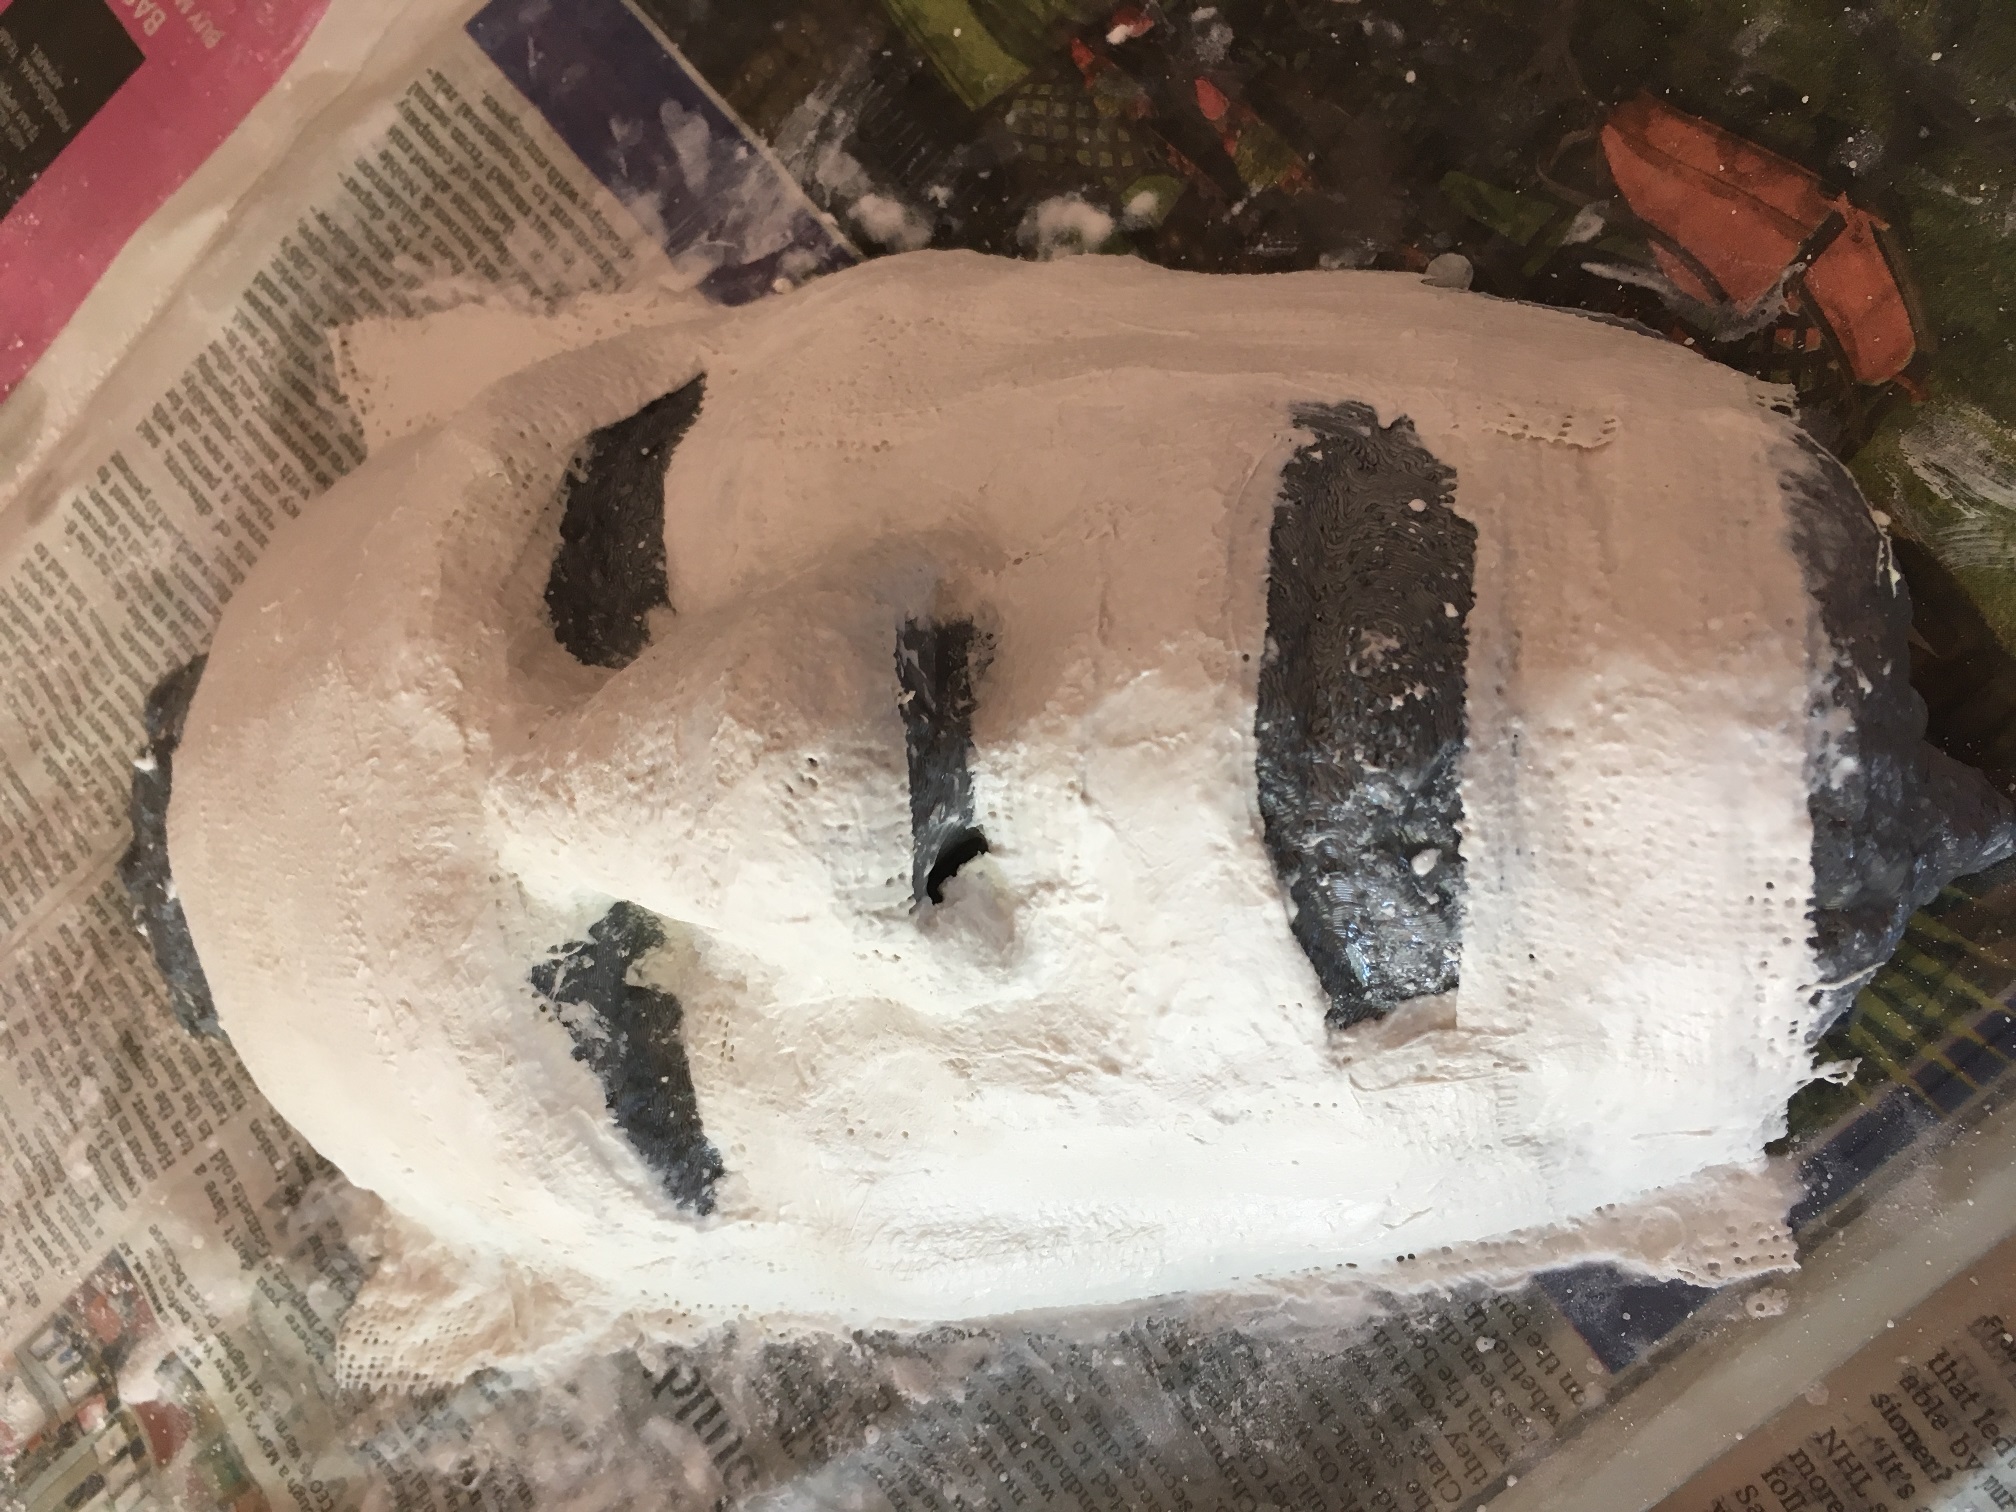
Plaster cast impression using the 3D printed model instead of my face
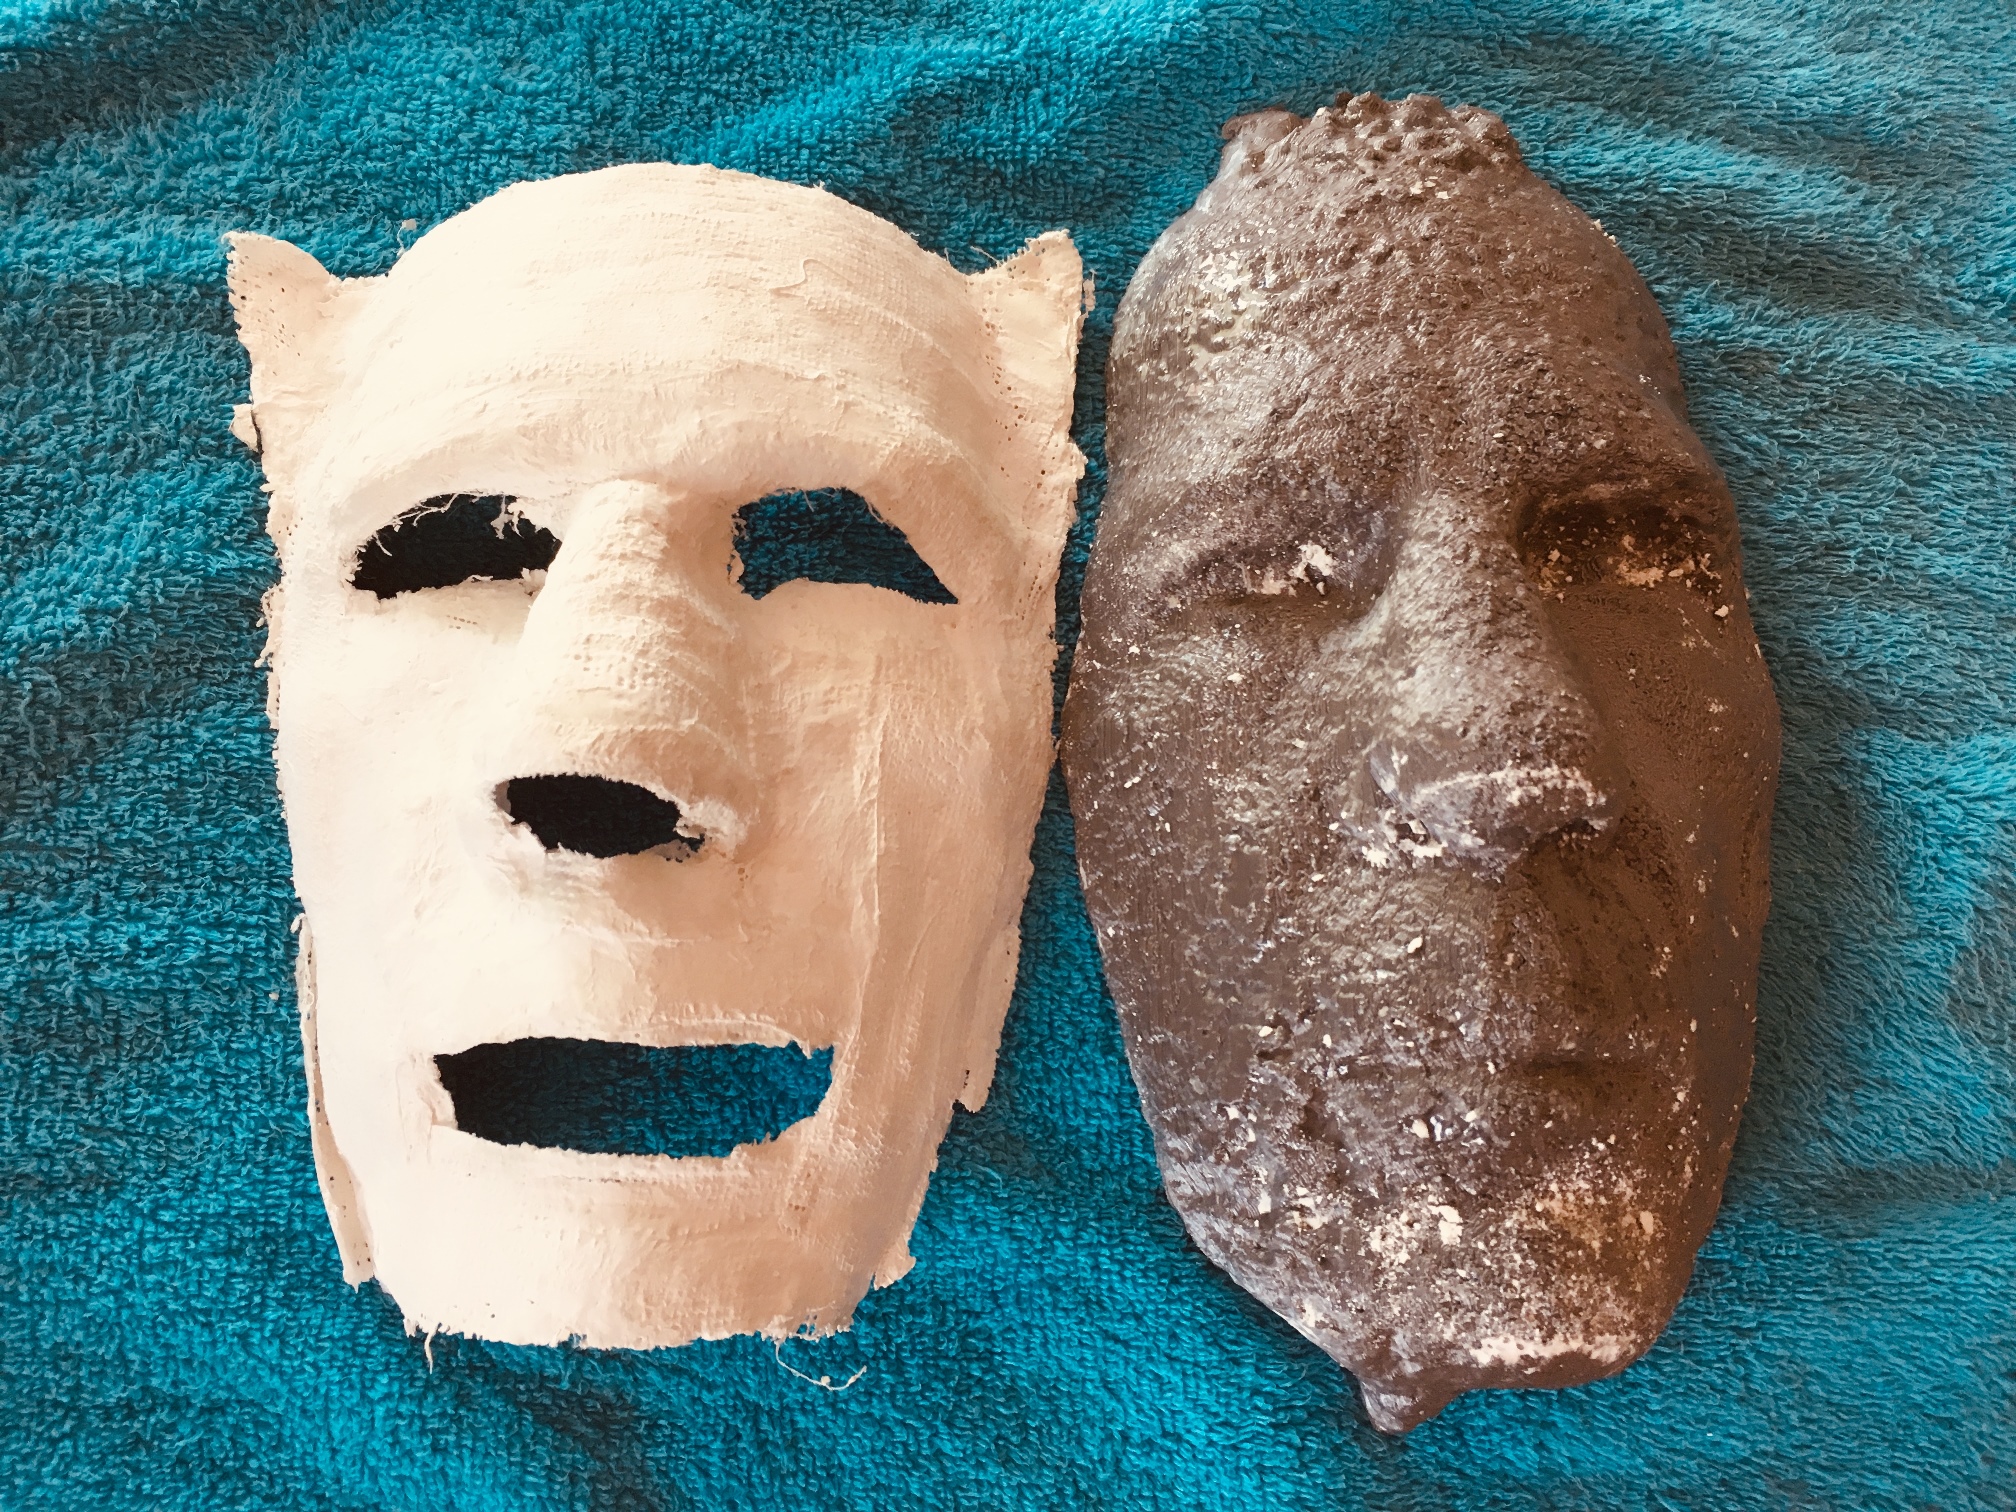
Plaster cast separated from the 3D model
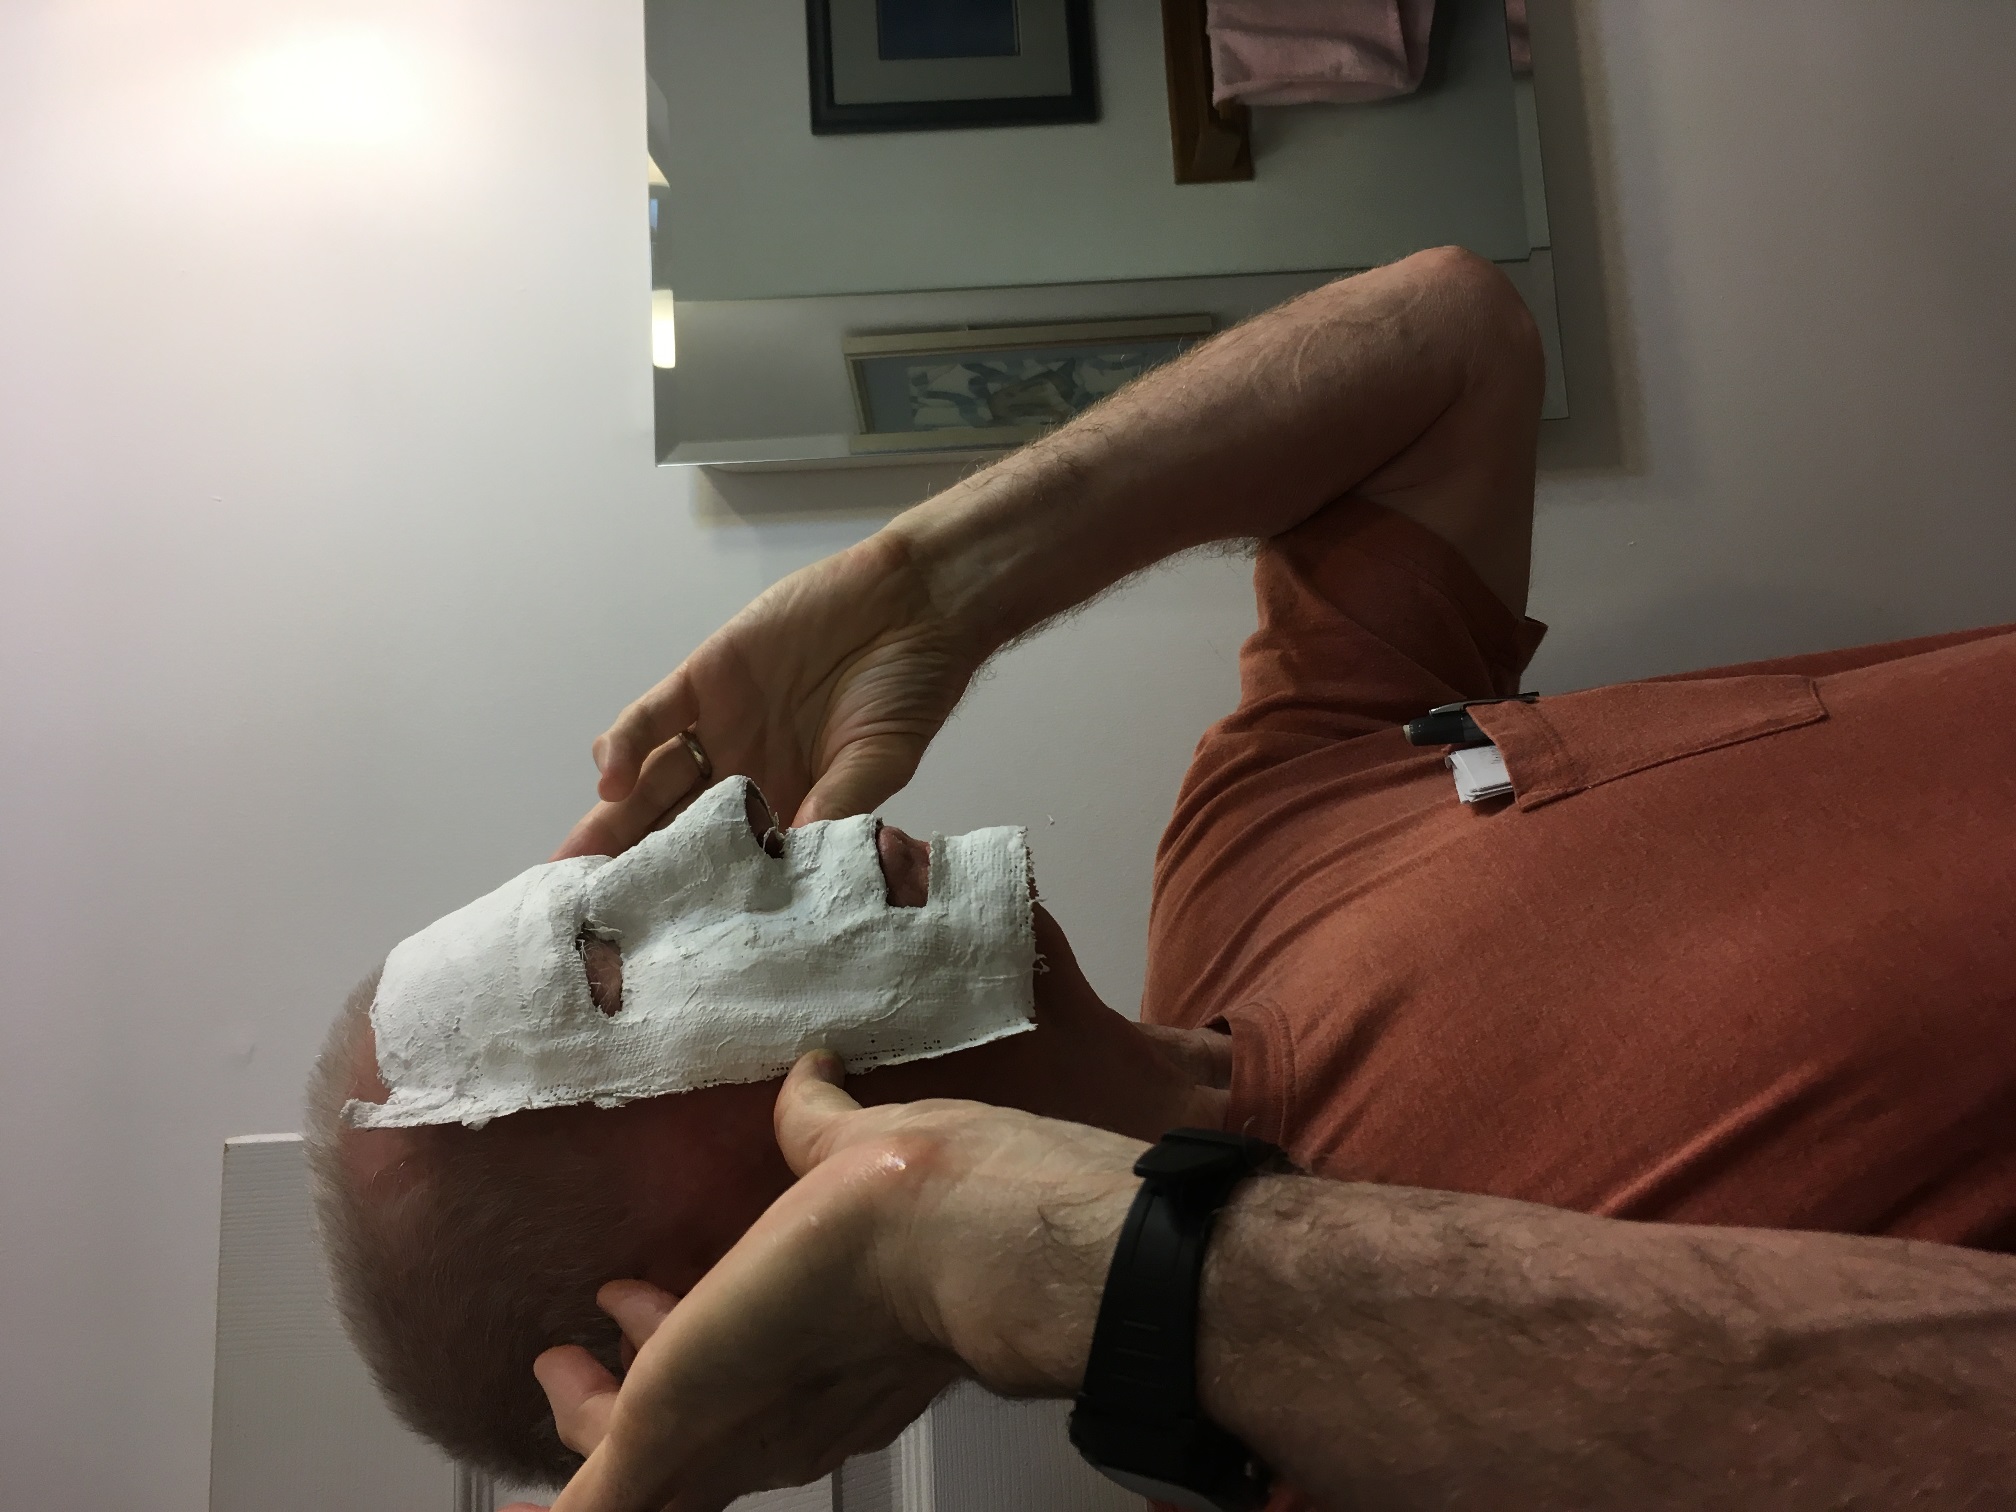
Side view of plaster cast on my face, showing that the 3D model is an accurate representation.
Summary:
All in all, this project was a blast; I was able to create an accurate 3D model of my face, which should be usable for the purpose of creating a custom face mask for me so I can go back to abusing my body playing basketball. However, I have to say that if I added up all the time and effort required to take all the photos, deal with Meshroom’s idiosyncrasies, actually print the full-scale model (24 hours, $8), and still have to take the plaster cast impression to verify the model, I might have been better off to just get the plaster cast impression made by a professional. OTOH, I learned a lot and had loads of fun, so…
Stay tuned!
Frank