Posted 04 April 2026
Well today I exceeded my boredom threshold, so something had to give. I worked out on my basketball court for an hour, flew a glider race in the Condor3 Soaring Flight Simulator, played an online bridge tournament on BBO, and I still hadn’t used up half the day. My workbench is empty, my two 3D printers are silent, and I can’t think of a thing to do. However, while I paced around with my hands in my pockets feeling sorry for myself, I caught sight of Wall-E3, my autonomous wall-following robot gathering dust in its charging cradle in the corner. That robot has gone through a number of iterations, starting with this post in early 2015 and ending with this post in late 2024. The goal of this almost decade-long project was to create a robot that could autonomously navigate around our house, scaring cats and humans alike and recharging itself whenever it got hungry. It did a really good job at the scaring part but unfortunately, I never got it to the point where it wouldn’t get stuck in one of our junk-filled guest bedrooms; close, but no cigar 😒.
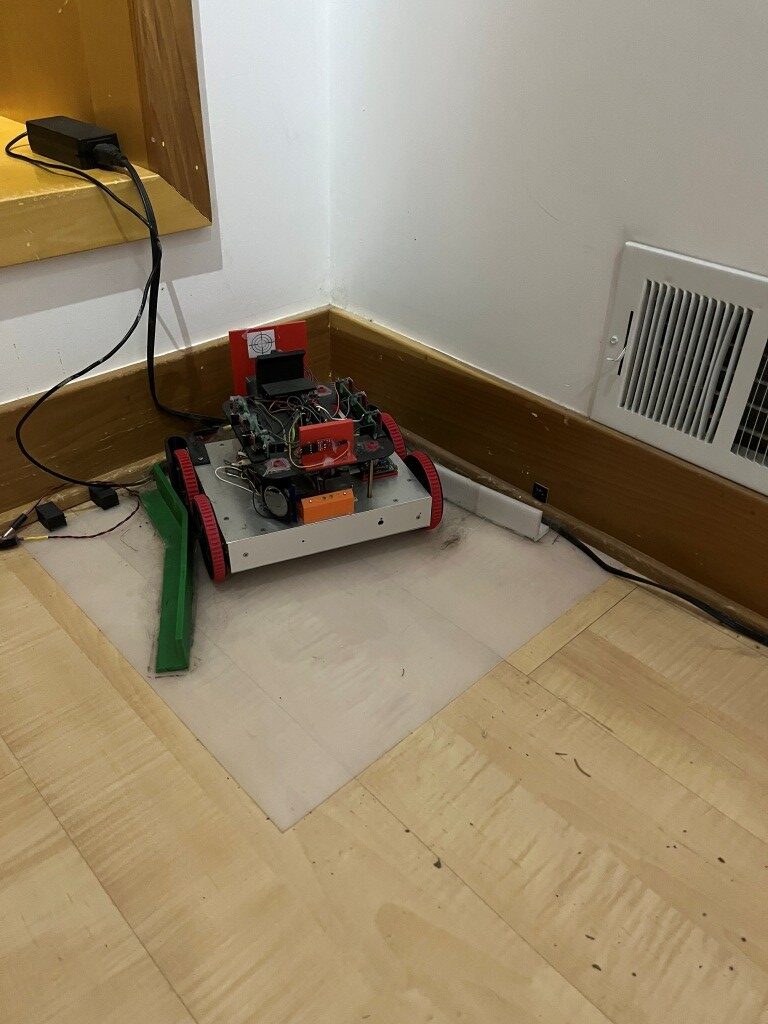
Looking at my robot, I realized that in the intervening decade, a lot had changed in the indoor navigation realm, in particular the ability to exploit video camera images for navigation in reasonably constrained environments. So, I decided to revisit my robot project to see if I could utilize the new technology to get closer to my goal of true autonomous navigation.
Part of my interest in starting a new run at the household navigation project has been my positive experience over the last year with Grok, X’s AI. Grok, despite some real issues that need to be kept in mind, is a GREAT research assistant. In the past, I might spend most of a week working my way through internet links and going down various rabbit holes trying to solve a subtle software or hardware problem but Grok can do the same thing in a few seconds. At this point I knew next to nothing about vision-based navigation systems, but I knew for sure that Grok would be able to distill the netiverse down to reasonably digestible chunks pretty quickly.
I started with the following prompt for Grok:
|
1 |
have a small 4-wheeled robot that uses front, side and rear distance sensors (LIDAR) along with angle information from a 6DOF solid-state gyro to autonomously navigate around my home. It works OK but always seems to run into 'special cases' where it gets stuck. I'm thinking of redoing the sensing package to use vision processing instead of just distances. Can you help me get started? |
In less than thirty seconds, Grok produced the following:
Absolutely—switching to vision processing is a smart move for handling those tricky “special cases” where pure distance sensors (like your LIDAR + gyro combo) fall short. Cameras give you way more information: color, texture, edges, and even semantic understanding (e.g., “that’s a chair leg” vs. just “something 30cm away”). This helps with low obstacles, reflective surfaces, dynamic items, or cluttered home environments that confuse LIDAR.
Since you already have a solid 6DOF gyro (IMU), you can fuse it with vision for excellent Visual-Inertial Odometry (VIO) or Visual SLAM (vSLAM). This is basically what modern robot vacuums do (vSLAM), but fully customizable for your wheeled robot.
Quick Reality Check Before Diving InVision isn’t perfect either:
- Sensitive to lighting changes (solution: good indoor lights or IR-capable cameras).
- Needs decent compute (Raspberry Pi 5 or equivalent works; older Pis may struggle with heavy SLAM).
- Depth from vision is usually “good enough” indoors but not as precise as LIDAR in perfect conditions.
Hybrid tip: You can keep your existing LIDAR/gyro as a backup while testing vision.Recommended Hardware to Get Started (2026-Friendly Options)You’ll replace/add a camera that provides both color and depth (RGB-D) or stereo for 3D perception. Top practical picks for small wheeled robots:
- Best overall: Luxonis OAK-D series (OAK-D Lite or Pro)
- Budget depth option: Arducam T2 RGBD ToF Camera (~$100)
- Classic: Intel RealSense D435/D455 (if you can find one) or similar RGB-D.
Mount the camera forward-facing (maybe add a second for 360° if budget allows). Keep your gyro—it will make odometry rock-solid when fused.What’s your current brain? (Raspberry Pi 4/5, Jetson, Arduino + companion computer, etc.?) Budget for the camera? That’ll let me refine this exactly.Software Stack – The Modern Way (ROS2 Recommended). The gold standard for this is ROS 2 (Robot Operating System) + Nav2 navigation stack. It handles mapping, localization, path planning, and obstacle avoidance out of the box.
Core vision libraries:
- OpenCV → Basic start (edge detection, simple avoidance).
- RTAB-Map or ORB-SLAM3 → Full visual SLAM (builds a 3D map while localizing).
- VINS-Fusion or OpenVINS → Perfect VIO that fuses your existing 6DOF gyro with camera data (highly accurate odometry).
All run great on Pi 5 with Ubuntu 24.04 + ROS 2 Jazzy (or newer).
This was a lot like drinking from a firehose, but within an hour or so I had a Raspberry Pi 5 kit and two different cameras (a cheap one arriving tomorrow, and a not-so-cheap one arriving in another week or so) on order. In the meantime I asked Grok to hunt up some tutorials and examples so I could start getting up to speed on all things ROS 2 Jazzy Robot Operating System) and SLAM (Simultaneous Localization and Mapping).
Hopefully in the next week or so I will have some hardware & software to play with, and maybe make a step or two in the direction of upgrading WallE3 to WallE4.
08 April 2026 Update:
Worked with Grok to start adding vision capability to my autonomous 4-wheel wall-tracking robot. The plan is to use a Luxonis OAK-D-Lite Fixed-Focus camera and a Raspberry Pi5 running Ubuntu 24.04 and ROS (Robot Operating System) to add vision processing to the robot. Because there was a long lead time for the Luxonis camera, we started with a cheaper (and faster delivery) alternative, the Arducam ToF Camera. Grok insisted the Arducam would work as a near-term solution until the Luxonis camera arrived, but it didn’t work out quite that way. The Arducam worked OK with the default Pi5 OS without ROS, but when we tried to add ROS and the drivers for the Arducam, we ran into a dead end. Then Grok was *sure* that we could simply replace the Pi5 OS with Ubuntu 24.04 LTS and everything would work – – – NOT! So now I’m waiting for the Luxonis so we can move forward again.
When I braced Grok about the readily apparent difference between what Grok thought was going to work fine and the actual result, I asked Grok to search for ANY successful implementation using Pi5, ROS and Arducam, and Grok could not come up with a single confirmed successful implementation. This is a real problem with Grok, one that the devs should be concerned about, but nobody seems to care.
Grok now uses several ‘agents’ to independently research user questions, and the eventual answer is a consensus (I think) of their findings. I have suggested that at least one of the agents should be dedicated to attempting to falsify the results of the others, but I have seen nothing to indicate this has actually gotten through to the devs. In this case, all the ‘red team’ agent would have to do is perform the above search for successful implementations and come up with ZERO, thereby making it obvious that starting with the Arducam instead of waiting for the Luxonis was probably not going to end well. On a positive note, I asked Grok to do the same search with the Luxonis instead of the Arducam, and it came back with several confirmed successful implementations.
Until Grok implements the ‘red team’ facility, users need to be aware that Grok will quite happily drive a user off a cliff, insisting all the way down that “this next fix will surely solve the problem”. Has anyone else had his happen?
16 April 2026 Update:
A lot has happened since my last post on this subject. Working with Grok, we finally got the OAK-D camera working on the Pi5, with real-time imagery displayed on a monitor connected to the Pi5. Of course, this is a LOOOONG way from actually implementing visual navigation on a robot, but ya gotta start somewhere!
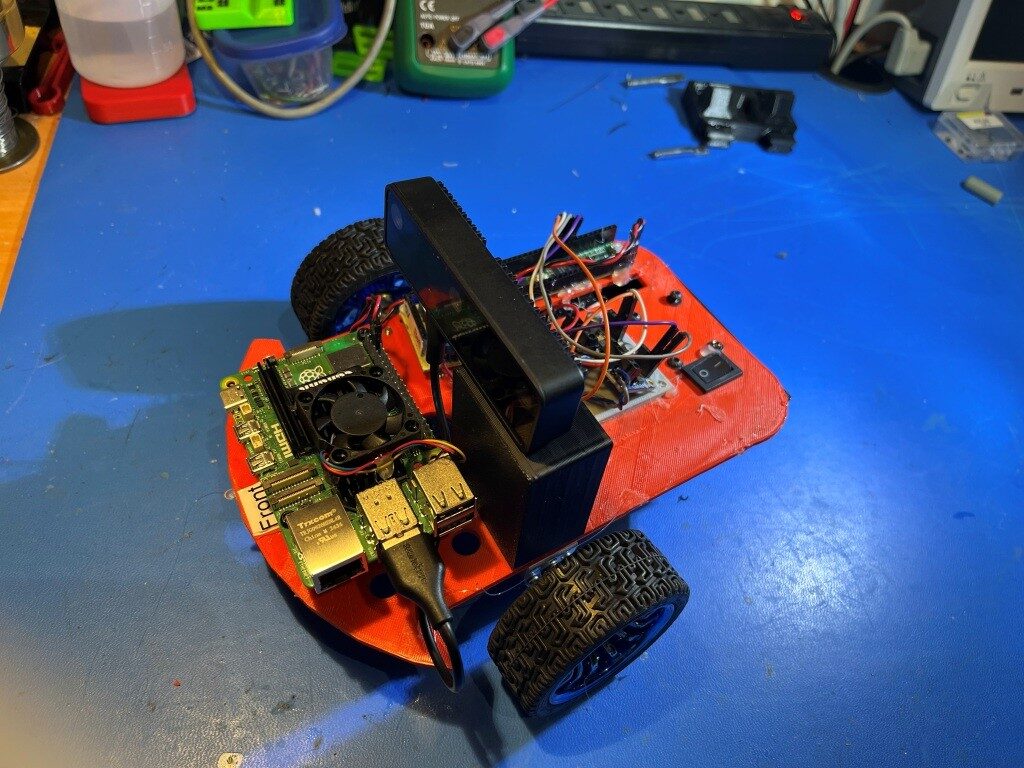
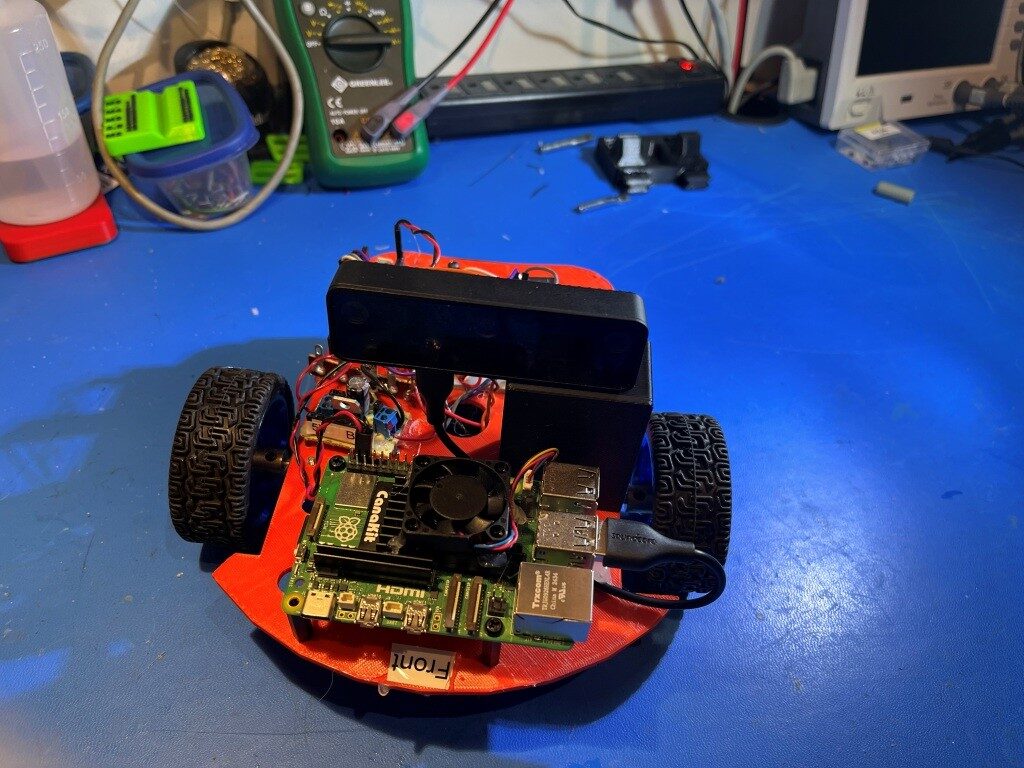
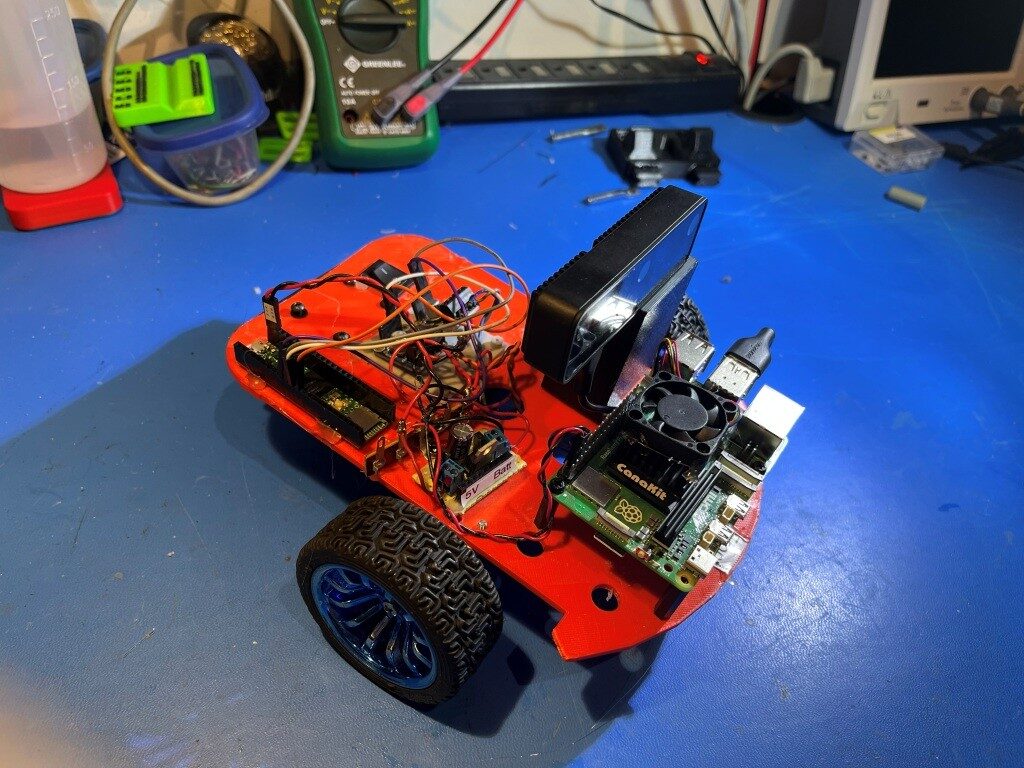
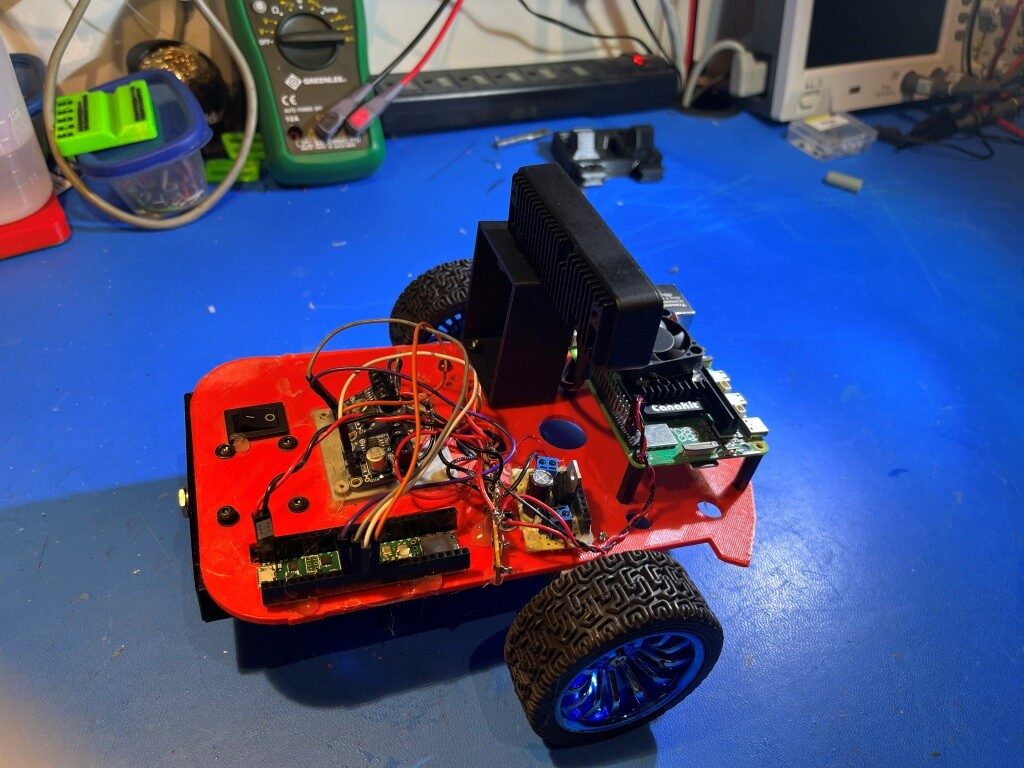
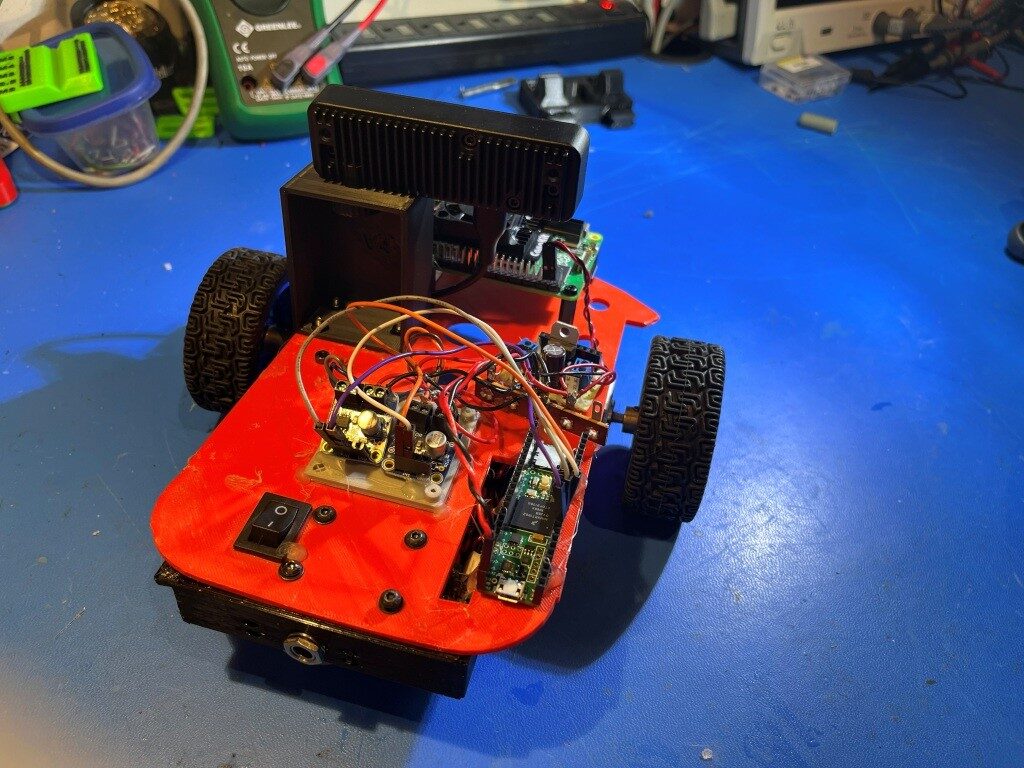
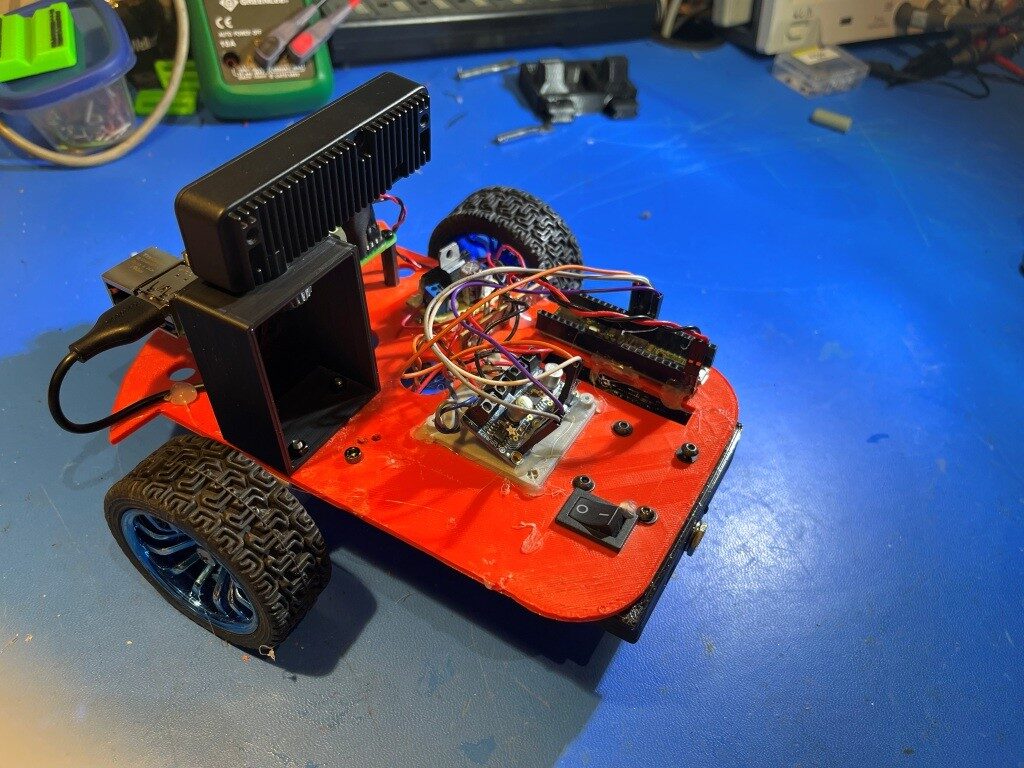
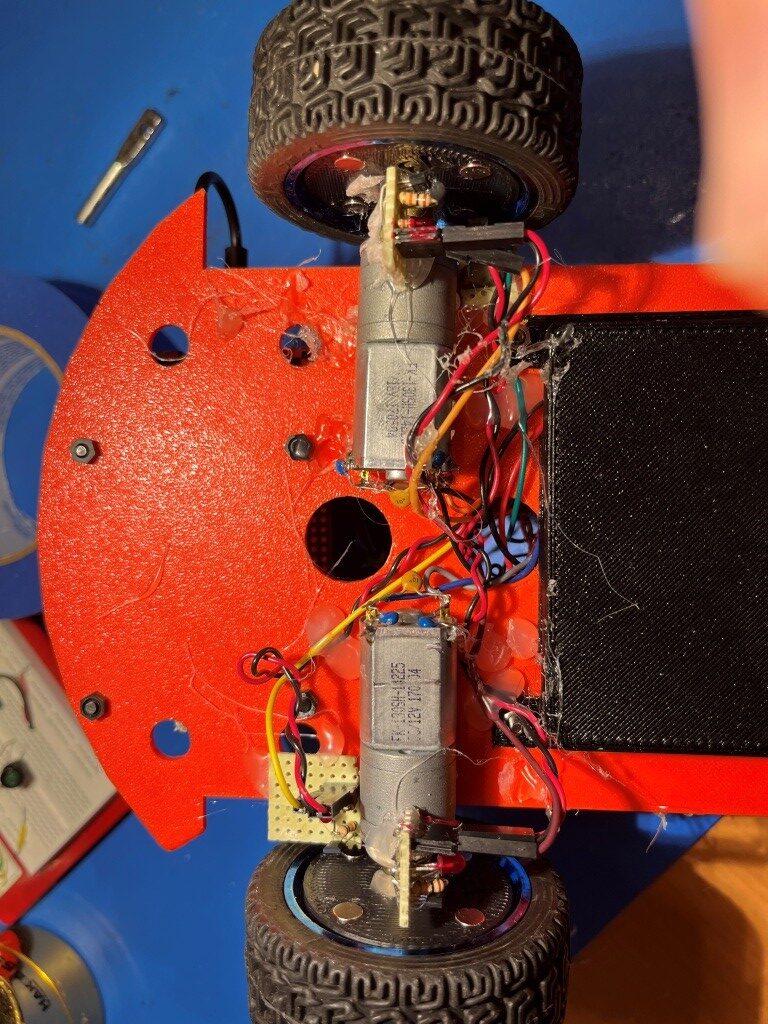
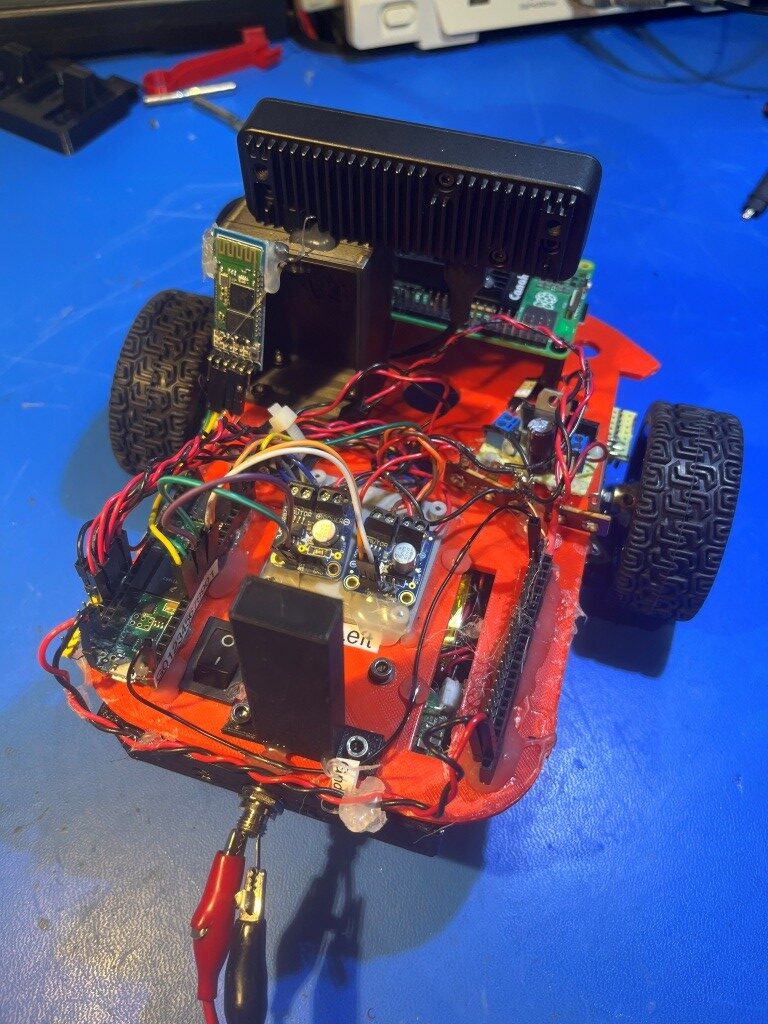
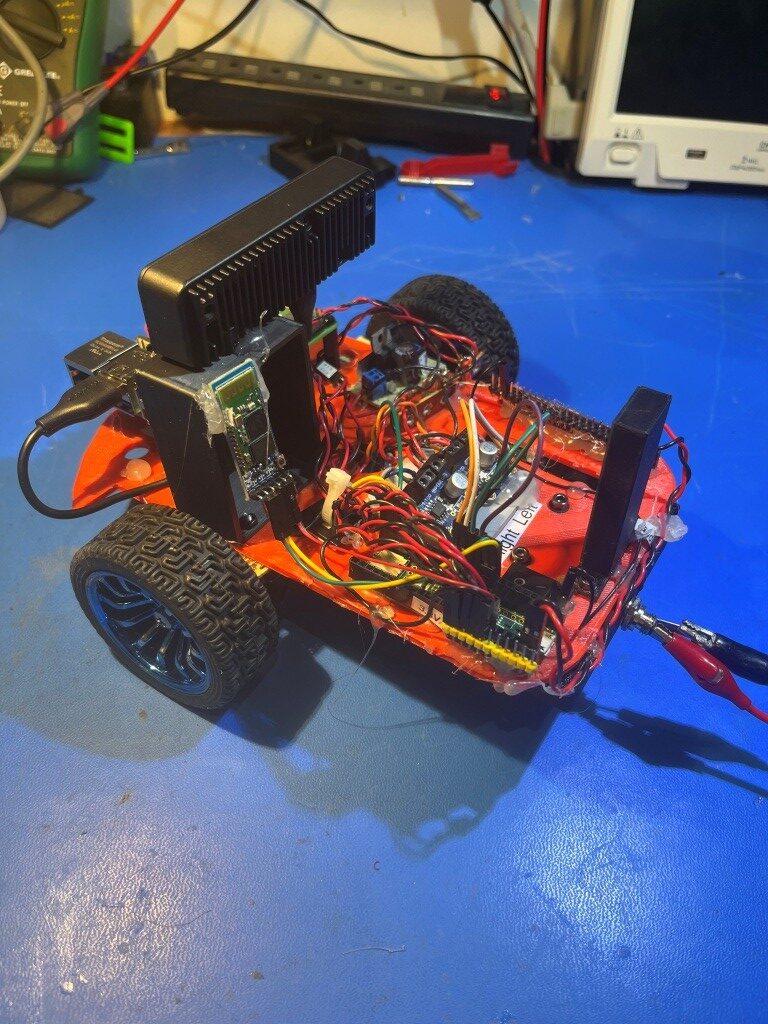
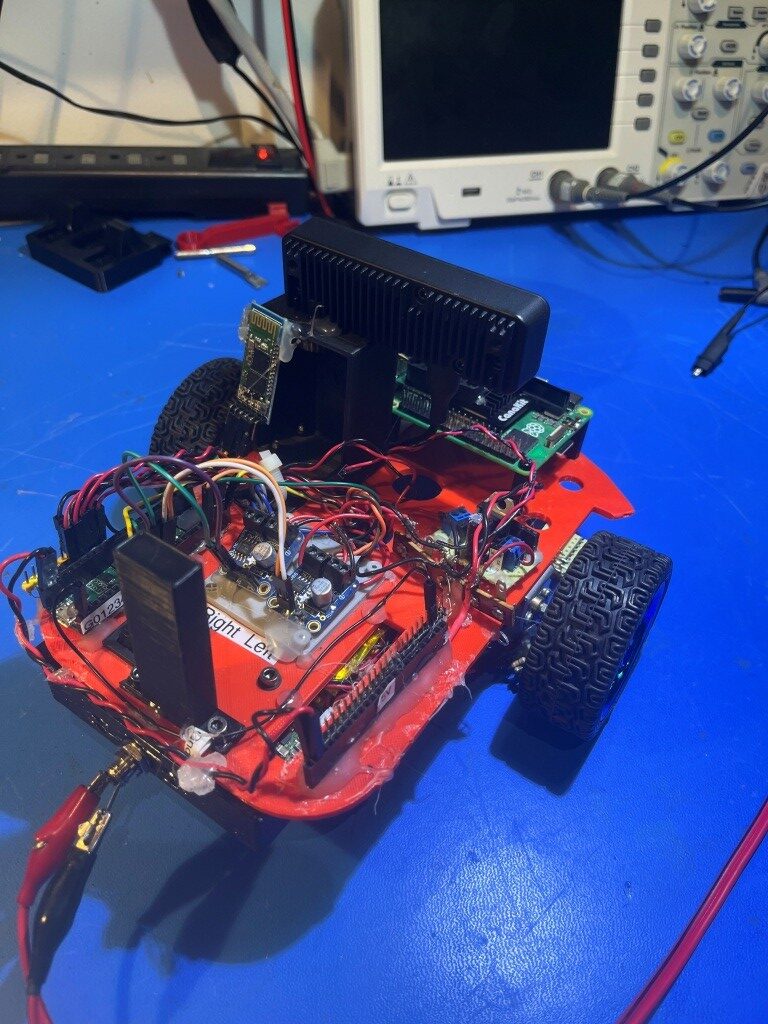
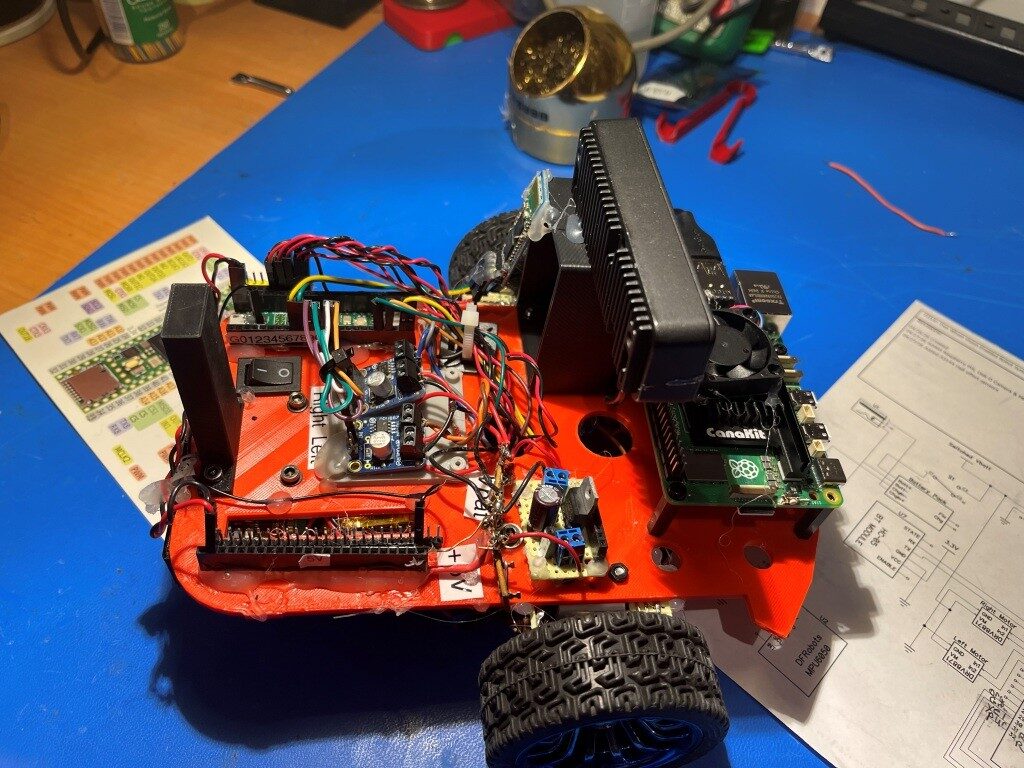
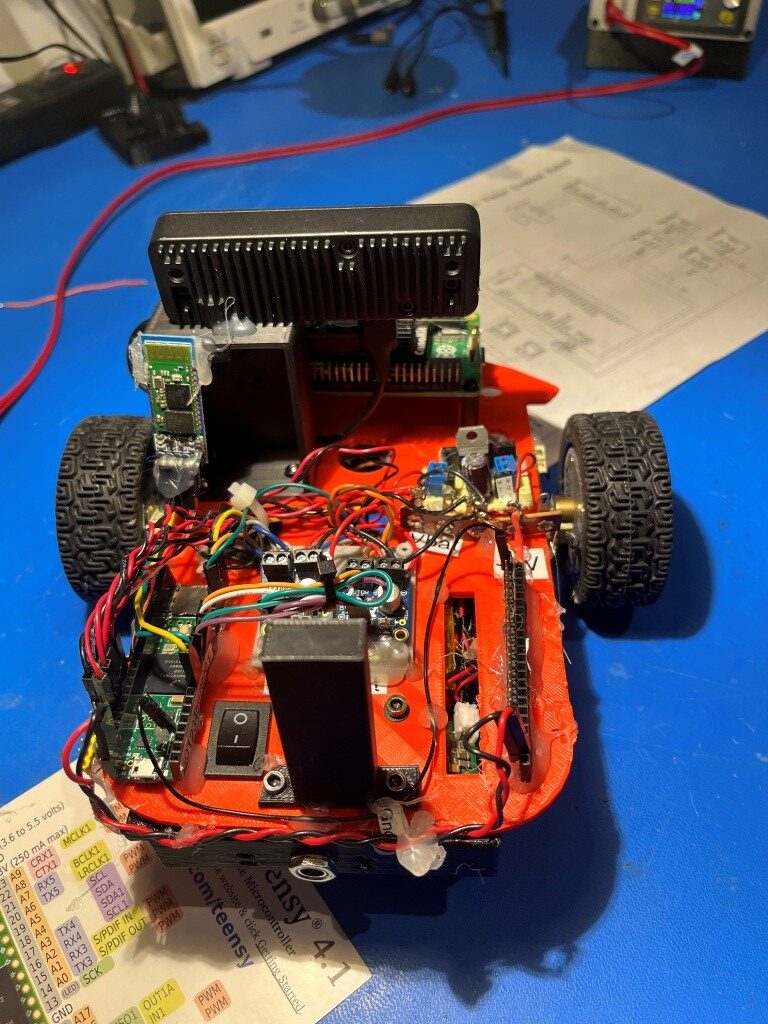
When considering how to move the Pi5 and Oak-D camera setup onto the robot, I decided to refresh my old 2-wheel (plus castering wheel) robot rather than trying to shoehorn the Pi5 and camera setup onto my 4-wheel robot. The 2-wheel robot already as a set of nice wheel motors, a pair of DRV8871 motor drivers and a battery/charger setup, and it isn’t being used for anything else at the moment. So, I stripped off the Uno Mega 2560 controller, installed the Pi5 and the camera at one end, and a Teensy 4.1 MCU on the other. I also installed an 8V-to-5V LDO voltage regulator that I had hanging around from a previous project. Here are some photos
Then I started working on the idea of installing magnets on the wheels and Hall-effect sensors on the chassis to produce wheel rotation rate information to integrate with vision processing. Based on a conversation with Grok, I ordered some A3144 Hall-effect sensors from Amazon. When they came in, I implemented a small plugboard circuit to test the sensor, as shown in the following short video:
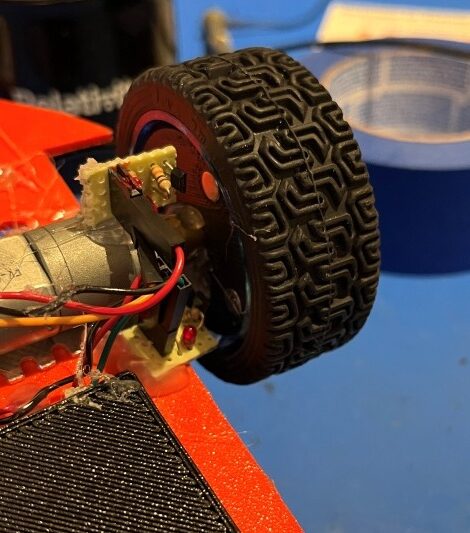
After I got this working, I created a printed magnet carrier for the wheels, and a small perfboard circuit mount for the sensor. I tested the setup by running the small motor test program Grok wrote for the Teensy 4.1, and the results are shown in the following video:
Here’s a scope trace grab of a typical half-speed wheel motor sequence:
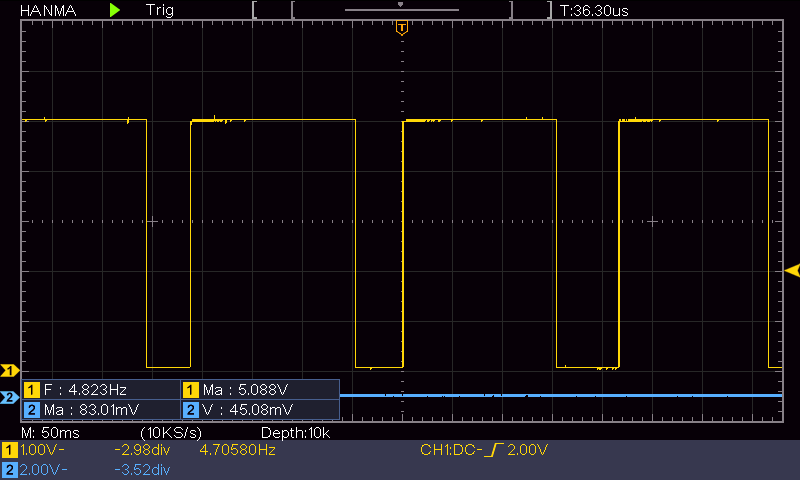
From the above trace, the measured frequency is 4.823Hz. There are four magnets, which implies that the wheel is turning at about 1.2RPS, or about 72RPM. The wheel diameter is about 67mm, which gives a wheel circumference of about 21cm. At the 1.2 RPS rate, this works out to about 0.24m/s.
Of course I’m not anywhere near done yet, as I need two sensors per wheel to be able to determine rotation direction so three more sensor circuits, and a second wheel magnet carrier and magnets for the other wheel. Still though, it’s a good start!
22 April 2026 Update:
I finally got all four A3144 Hall-effect sensor modules and the second wheel magnet carrier mounted and tested. As shown in the following photos, The Hall-effect sensor modules are mounted approximately 90 degrees from each other to provide effective direction sensing.
23 April 2026 Update:
After finishing the Hall-effect sensor project, I worked on implementing a wireless serial connection to the robot for remote status monitoring and for remote ‘Over The Air’ (OTA) programming. I have had this capability for years on the 4-wheel robot and it really paid off, so I didn’t want to get too far down the road with the 2-wheel version without having it. As Grok pointed out, I could use the wireless ethernet capability of the Raspberry Pi5 for this; wire a serial port on the Pi to a hardware serial port on the Teensy 4.1 and send updated .HEX files to the Teensy that way. However, I decided not to do this for three reasons; first and foremost, I disliked the idea of tying Teensy 4.1 program updates to a working Pi5, as that added another huge set of variables; secondly, the Pi5 draws a LOT of power and so I don’t want to have it running until absolutely required, and thirdly I completely solved the Teensy 3x/4x OTA problem some five years back (see this post, this post and this post) and can readily port the solution to the current configuration.
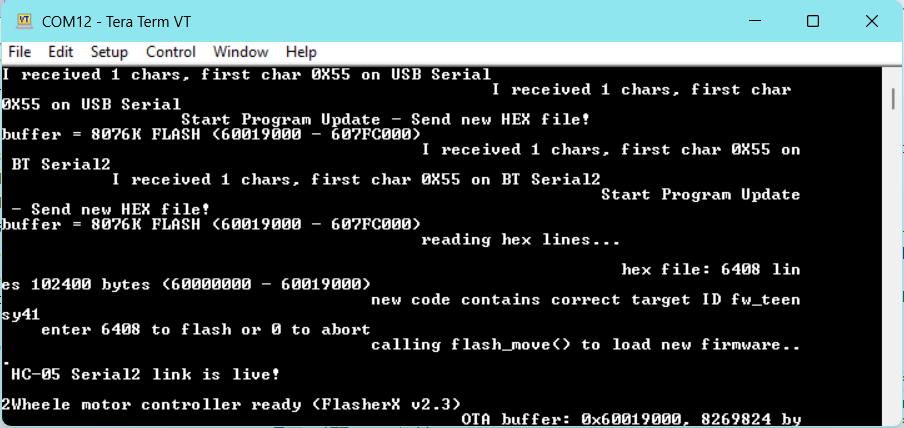
I mounted one of my spare HC-05 Bluetooth Serial modules to the back of my new camera support structure with hot glue and connected it to Serial2 (pins 7 & 8) on the Teensy 4.1. After the usual cussing and screwups getting the Tx & Rx lines connected properly, I was able to demonstrate simple pass-through serial-to-serial capability, so then I moved on to getting OTA working. First I created an Arduino project called ‘2WheelRobot_HC05_OTA1’. Then I cloned Joe Pasquariello’s FlasherX repository to my PC and copied the latest versions of FlashTxx.h/.cpp, FxUtil.h/.cpp, and FlasherTxx.ino from my local repo to the local folder of that project. Next I ported the ‘CheckForUserInput()’ function from one of my 4Wheel robot projects into the OTA1 project, removing everything but the ‘U’ (Update Firmware) case. After the usual number of mistakes and cussing, I got this working to the point where I could manually send a new .HEX file to the Teensy 4.1 using the HC-05 Bluetooth serial link and TerraTerm, as shown in the following screengrab:
The next step is to automate this procedure as I did back in 2021. I should be able to use the same ‘board.txt’ and ‘TeensyOTA1.ttl’ files from back then. At this point I decided to try my ‘symlink’ trick instead of copying the files directly. Here is the relevant text from ‘Symbolic Link HOWTO.txt’:
//04/19/24 Arduino projects now use an extra folder layer, so instead of
mklink C:\Users\Frank\Documents\Arduino\230918_WallE3_MoveTo_Test_V1\TeensyOTA1.ttl “C:\Users\Frank\Documents\Arduino\Robot Common Files\TeensyOTA1.ttl”
mklink C:\Users\Frank\Documents\Arduino\230918_WallE3_MoveTo_Test_V1\board.txt “C:\Users\Frank\Documents\Arduino\Robot Common Files\board.txt”
The commands need to be:
mklink C:\Users\Frank\Documents\Arduino\230918_WallE3_MoveTo_Test_V1\230918_WallE3_MoveTo_Test_V1\TeensyOTA1.ttl “C:\Users\Frank\Documents\Arduino\Robot Common Files\TeensyOTA1.ttl”
mklink C:\Users\Frank\Documents\Arduino\230918_WallE3_MoveTo_Test_V1\230918_WallE3_MoveTo_Test_V1\board.txt “C:\Users\Frank\Documents\Arduino\Robot Common Files\board.txt”
I opened a command prompt and pasted the first mklink command in, and then edited it to point to my ‘2WheelRobot_HC05_OTA1’ folder. When I was done, I had this command line:
|
1 2 3 4 5 |
C:\Windows\System32>mklink C:\Users\Frank\Documents\Arduino\2WheelRobot_HC05_OTA1\2WheelRobot_HC05_OTA1\TeensyOTA1.ttl "C:\Users\Frank\Documents\Arduino\Robot Common Files\TeensyOTA1.ttl" symbolic link created for C:\Users\Frank\Documents\Arduino\2WheelRobot_HC05_OTA1\2WheelRobot_HC05_OTA1\TeensyOTA1.ttl <<===>> C:\Users\Frank\Documents\Arduino\Robot Common Files\TeensyOTA1.ttl C:\Windows\System32>mklink C:\Users\Frank\Documents\Arduino\2WheelRobot_HC05_OTA1\2WheelRobot_HC05_OTA1\board.txt "C:\Users\Frank\Documents\Arduino\Robot Common Files\board.txt" symbolic link created for C:\Users\Frank\Documents\Arduino\2WheelRobot_HC05_OTA1\2WheelRobot_HC05_OTA1\board.txt <<===>> C:\Users\Frank\Documents\Arduino\Robot Common Files\board.txt |
After executing these commands, I confirmed that the ‘board.txt’ and ‘TeensyOTA1.ttl’ files now appear in the ‘C:\Users\Frank\Documents\Arduino\2WheelRobot_HC05_OTA1\2WheelRobot_HC05_OTA1’ folder – yay!
To confirm proper operation, I changed the ‘LED_ONOFF_MSEC’ parameter from 250 to 1000 in the .ino file, changed the COM port to COM12 and hit F5.
Rats! Close – but no Cigar! It started off OK and got to the point where TeraTerm should send the HEX file, and then I got this error message:
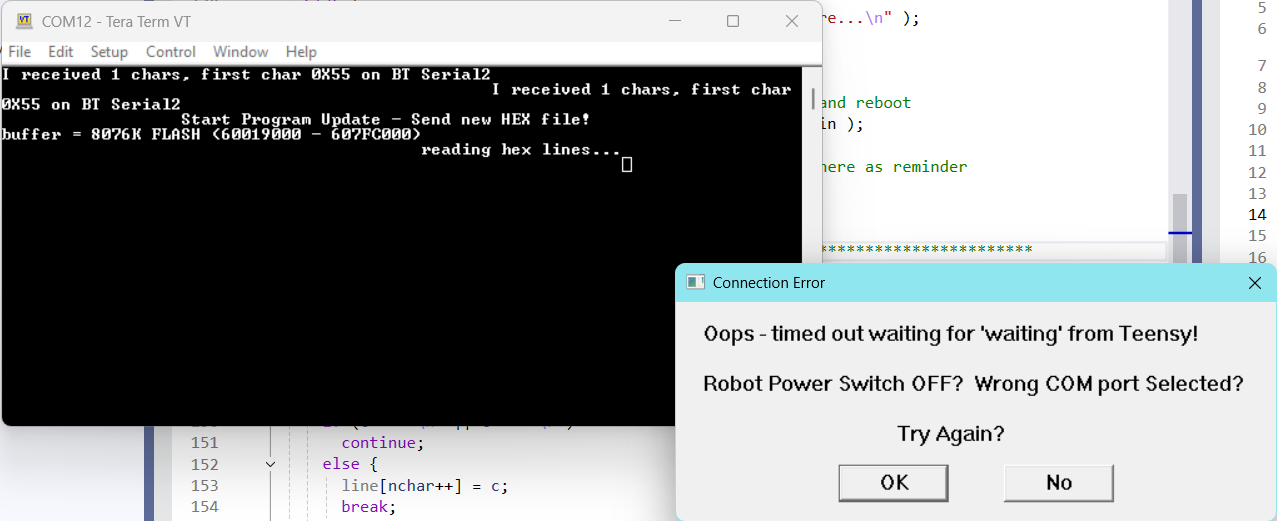
Hmm, turns out it actually worked – now the LED is blinking at 1000mSec ON, 1000mSec OFF, instead of 250 ON/OFF. So I tried again and this time I got “unable to connect to Teensy on COM12
25 April 2026 Update:
With a lot of help from Grok, I finally got to the point where I can now do ‘over-the-air’ (OTA) program updates to my 2-wheel robot via the onboard HC-05 BT serial port connected to the Teensy 4.1 Serial2 port (pins 7 & 8). For all the details, see the ’25 April 2026 Update’ section in this post.
At this point in the project, I have a 2 wheel robot with the following characteristics:
- Teensy 4.1 processor and HC-05 BT Serial (Serial2) allowing OTA program updates
- Dual DRV8871 motor controllers
- 7.4V (dual Lithium-Oxide) battery pack with 5V LDO voltage regulator
- Raspberry Pi5 micro-computer with ROS and other relevant software installed
- Luxonis OAK-D Lite camera connected to the Pi5 and functionally tested
- 4ea A3144 Hall-effect sensors mounted in physically quadrature pairs on each wheel, opposite a 4-magnet disc for speed & direction sensing.
At the moment the robot has no distance sensing capability, although the plan is to mount a pair of VL53L1X ToF sensors for side-distance monitoring.
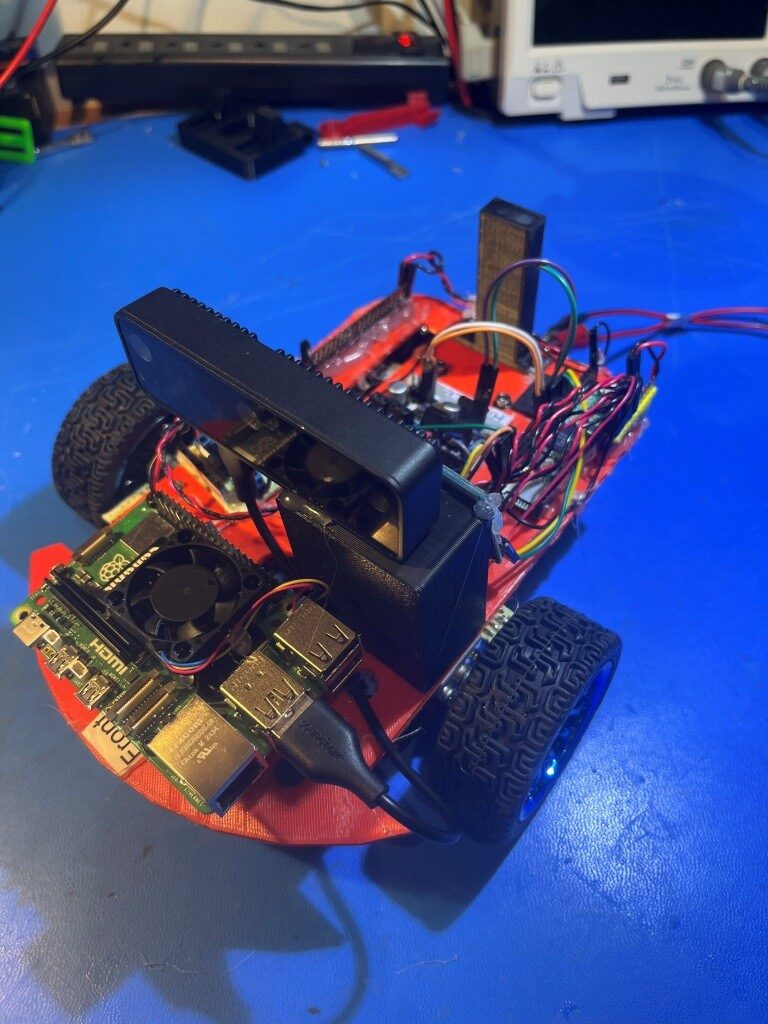
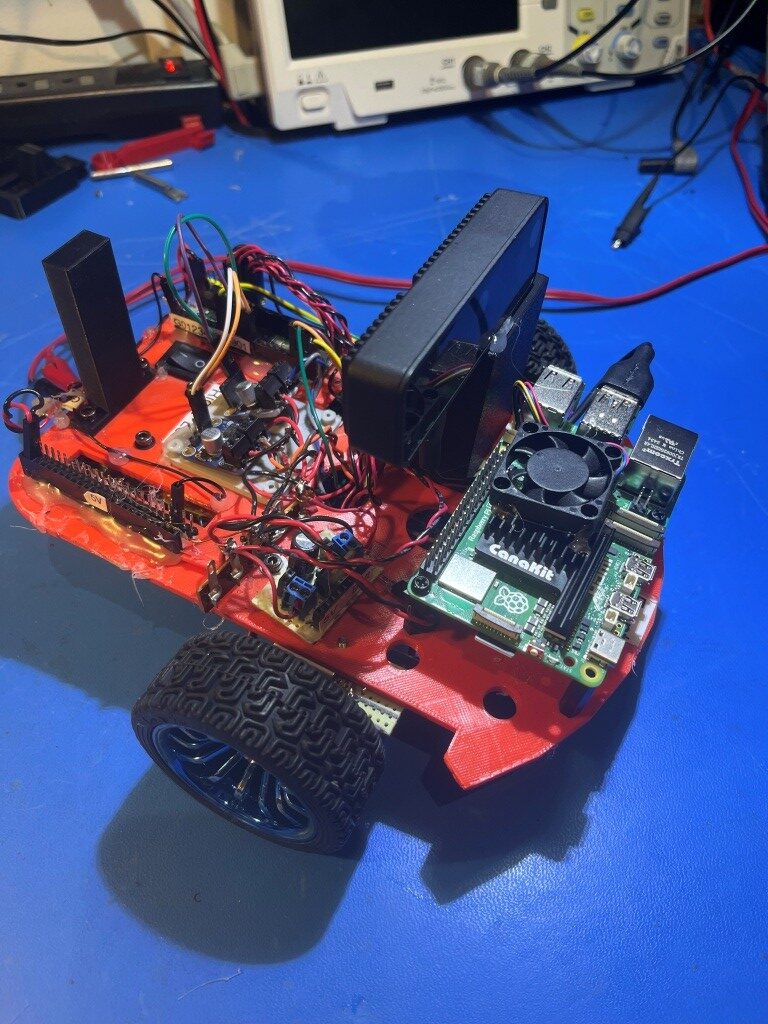
the Pi5 and camera are not yet connected, as their current draw is significant and may require an upgraded battery and regulator for practical use. Here are some photos of the current robot configuration:
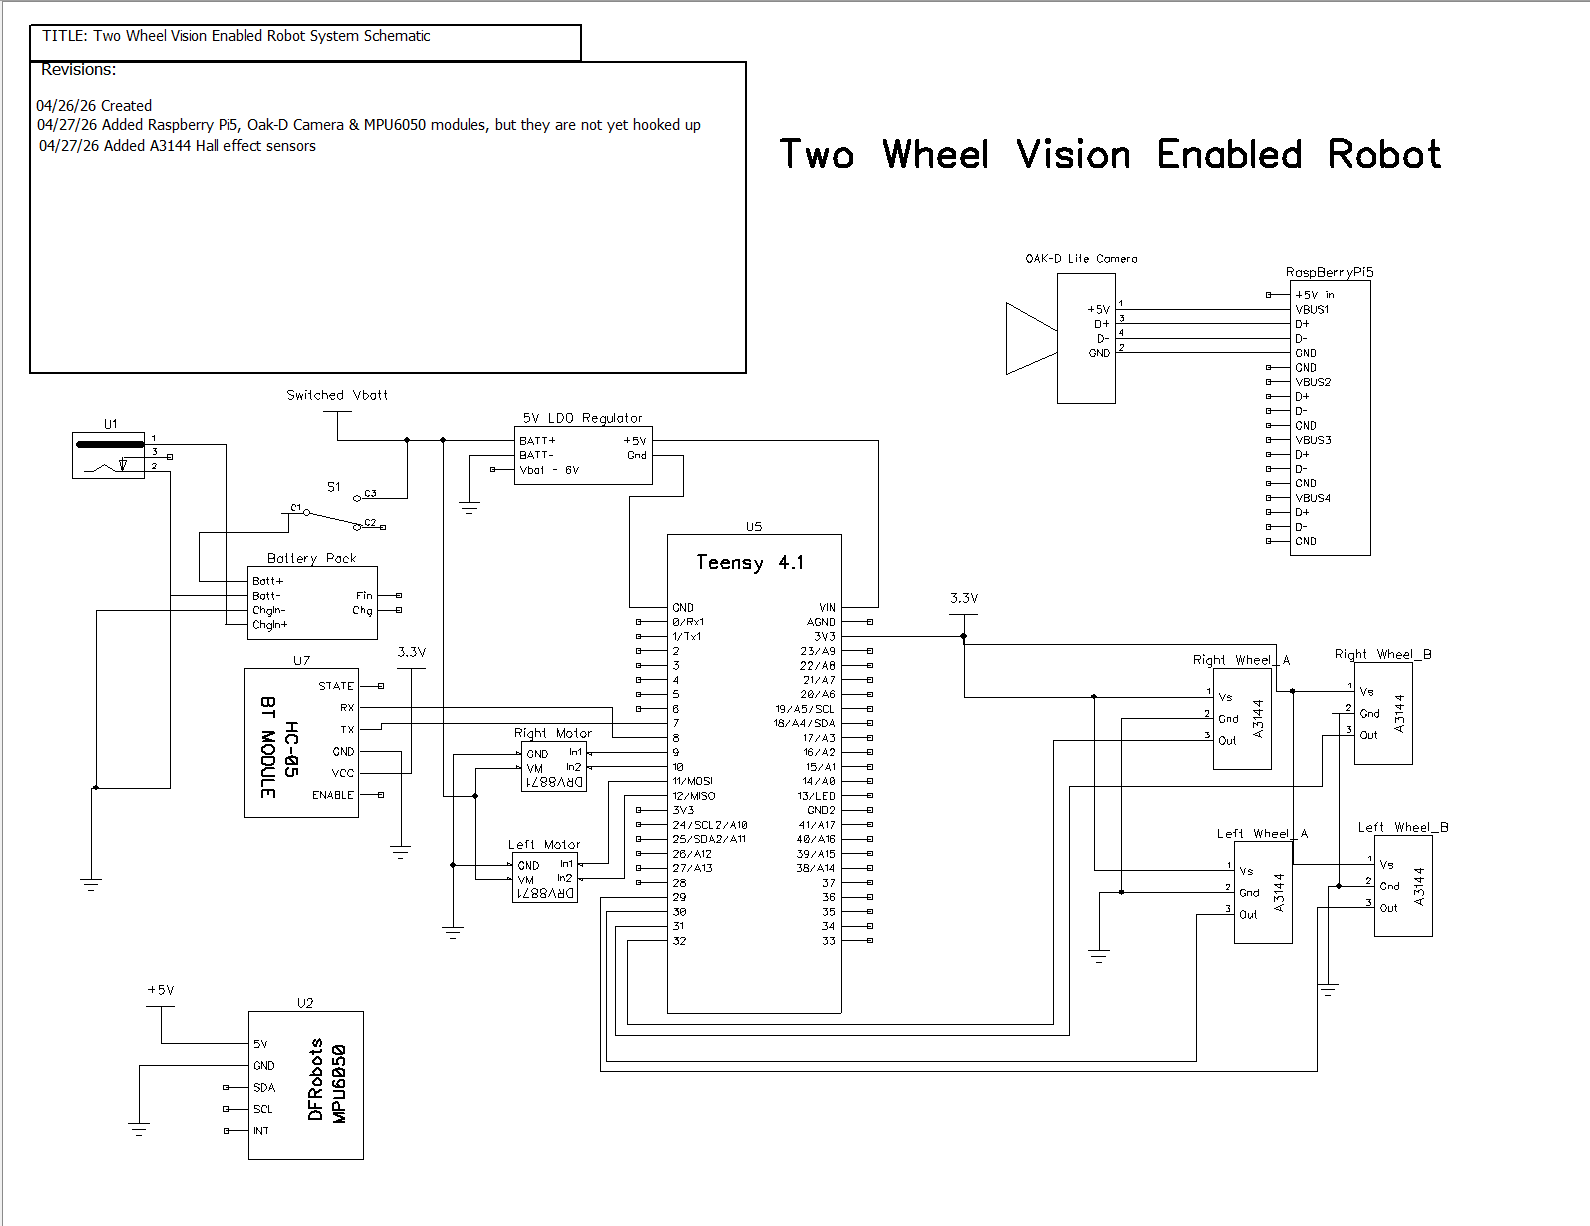
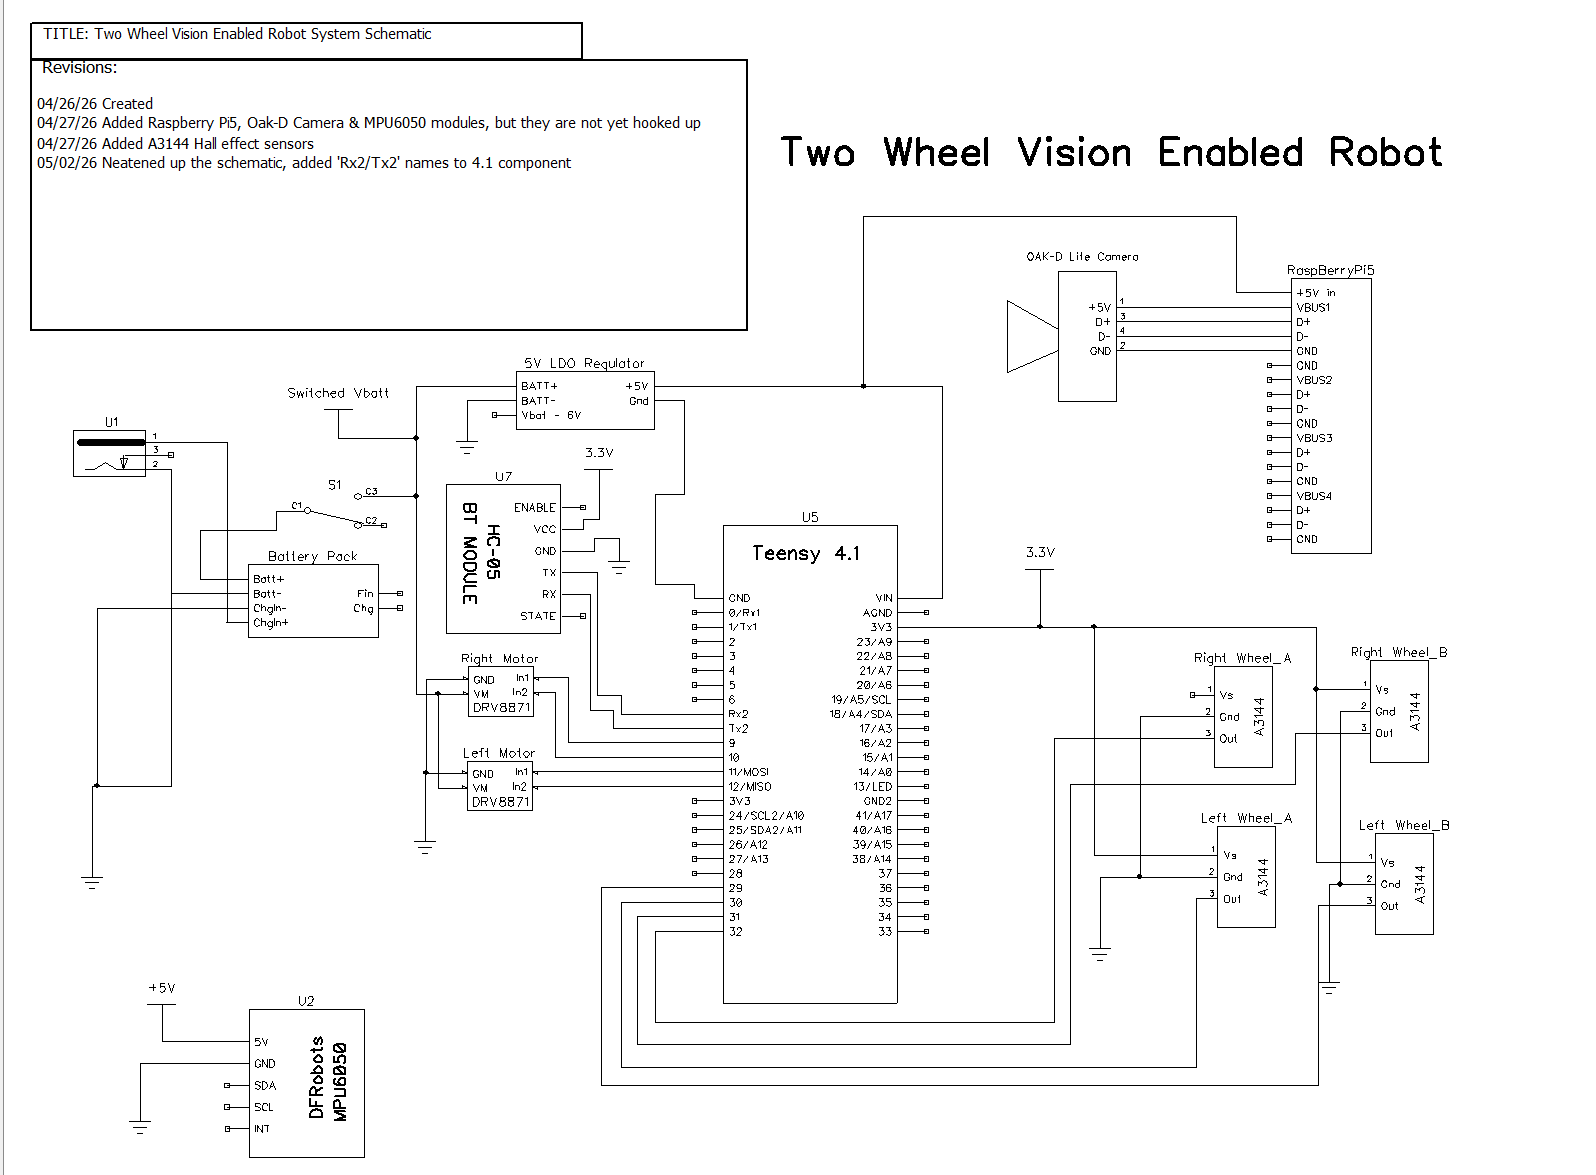
Here is the current system schematic. Note that theRaspberry Pi5, Luxonis OAK-D camera and MPU6050 6DoF gyro have not yet been incorporated into the system.
And here is the complete Teensy 4.1 sketch that was used to verify OTA programming capabilities.
|
1 2 3 4 5 6 7 8 9 10 11 12 13 14 15 16 17 18 19 20 21 22 23 24 25 26 27 28 29 30 31 32 33 34 35 36 37 38 39 40 41 42 43 44 45 46 47 48 49 50 51 52 53 54 55 56 57 58 59 60 61 62 63 64 65 66 67 68 69 70 71 72 73 74 75 76 77 78 79 80 81 82 83 84 85 86 87 88 89 90 91 92 93 94 95 96 97 98 99 100 101 102 103 |
/* Name: 2Wheel_HC05_OTA2.ino Created: 4/25/2026 Author: FRANK_XPS_9530\Frank Purpose: OTA updates over HC05 Bluetooth on Serial2 Notes: //04/25/26 this project uses the new (2022) FlashTxx/FXUtil file configuration */ //04/25/26 - can't do this here - must edit FlashTxx.h line 79-ish for this //#define RAM_BUFFER_SIZE 0x40000 // 256 KB RAM buffer - fixes the "max address too large" error on Teensy 4.1 #include "FXUtil.h" // hex parsing + update_firmware() extern "C" { #include "FlashTxx.h" // Teensy 4.1 flash primitives } uint32_t buffer_addr, buffer_size; elapsedMillis MsecSinceLastLEDToggle; void setup() { //04/25/26 can't wait for Serial (hardwire USB) as it probably isn't connected. //Just use 2sec delay instead Serial.begin(115200); delay(2000); Serial2.begin(115200); // HC05 on Serial2 while (!Serial2) {} pinMode(LED_BUILTIN, OUTPUT); Serial2.println(F("\n=== HC05 OTA Ready on Serial2 - send 'U' to start update ===")); Serial2.flush(); MsecSinceLastLEDToggle = 0; } void loop() { if (Serial2.available()) { CheckForUserInput(); } if (MsecSinceLastLEDToggle >= 100) { MsecSinceLastLEDToggle -= 100; digitalWrite(LED_BUILTIN, !digitalRead(LED_BUILTIN)); } } //04/25/26 copied from 4-wheel robot project and removed all the other control cases. //I will add the other cases for motor control back in later. void CheckForUserInput() { if (Serial2.available() > 0) { int incomingByte = Serial2.read(); Serial2.print("I received: "); Serial2.println(incomingByte, HEX); switch (incomingByte) { case 0x55: // 'U' case 0x75: // 'u' { Serial2.println(F("Start Program Update - Send new HEX file!")); // exact string your TeensyOTA1.ttl macro expects Serial2.println(F("waiting for hex lines...")); if (firmware_buffer_init(&buffer_addr, &buffer_size) == 0) { Serial2.printf("unable to create buffer\n"); Serial2.flush(); for (;;) {} } Serial2.printf("buffer = %1luK %s (%08lX - %08lX)\n", buffer_size / 1024, IN_FLASH(buffer_addr) ? "FLASH" : "RAM", buffer_addr, buffer_addr + buffer_size); while (Serial2.available()) { Serial2.read(); } update_firmware(&Serial2, &Serial2, buffer_addr, buffer_size); Serial2.printf("erase FLASH buffer / free RAM buffer...\n"); firmware_buffer_free(buffer_addr, buffer_size); Serial2.flush(); REBOOT; break; } } } } |
27 April 2026 Update:
I ran into a problem with the way the ‘quadrature’ Hall-effect sensor module was mounted on the wheel motors. I had simply hot-glued them to the motor casing, but after a day or so the module fell off, so I needed something a little more permanent.
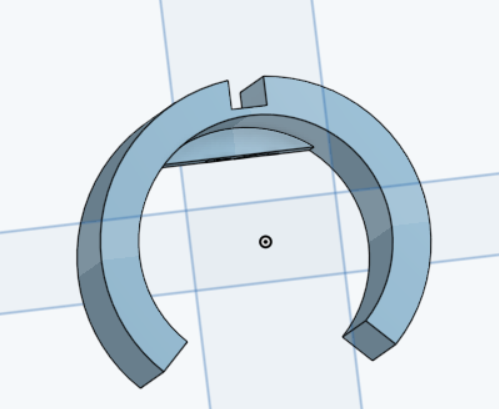
I designed a printed piece to snap-fit onto the motor body, with a slot in the top for the Hall-effect sensor perfboard, as shown below:
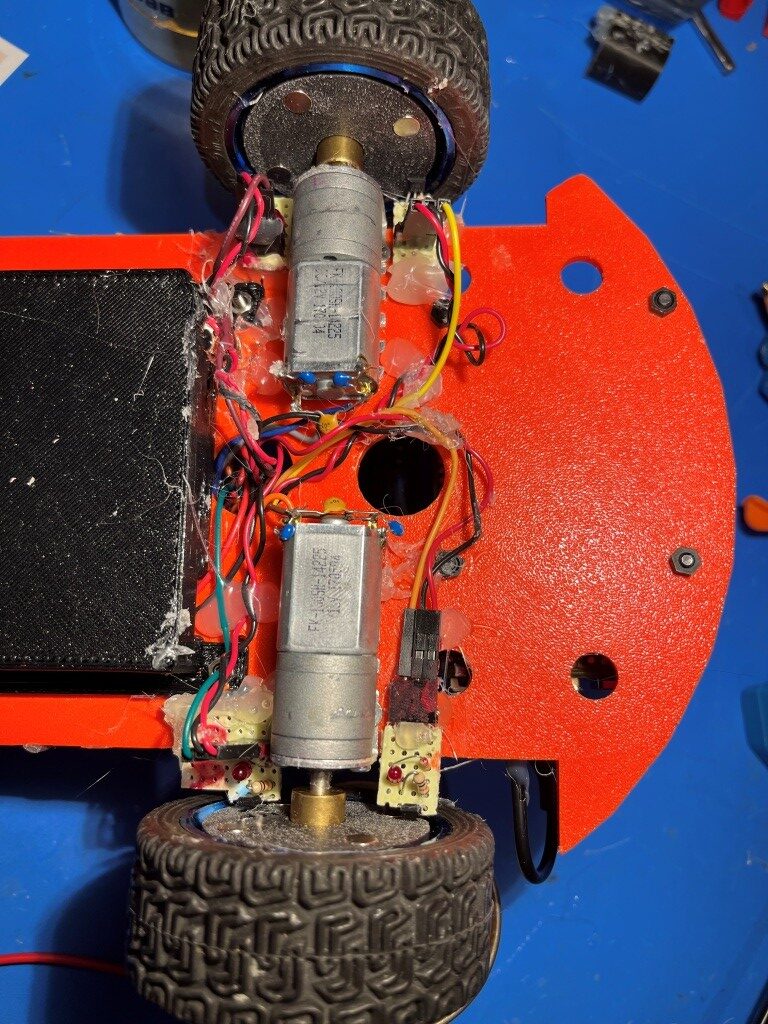
Here is a photo showing the Hall-effect sensor modules mounted on the underside of the robot.
02 May 2026 Update:
As it turns out, the above ‘physical quadrature’ arrangement was optimally bad, because it does not provide the 00 01 10 11 activation sequence required for accurate speed and direction sensing. After figuring this out, I wound up manually adjusting the position of one of the sensor modules to get the proper sequence, and then hot gluing the module down at that point. The following photo shows the somewhat messy current arrangement.
My plan is to design another version of the motor mount for a more permanent installation.
I also spent some time neatening up the topside of the robot and updating the schematic, as shown in the following photos.
04 May 2026 Update:
Grok and I worked together to remove a lot of unneeded PID code and add forward & reverse tick-count based motion control. Now the robot will move forward or backward a specified distance with a command such as “D, 0.3” or “D, -0.5” (meters). It will also stop in response to an ‘S’ command. Here’s the full code:
|
1 2 3 4 5 6 7 8 9 10 11 12 13 14 15 16 17 18 19 20 21 22 23 24 25 26 27 28 29 30 31 32 33 34 35 36 37 38 39 40 41 42 43 44 45 46 47 48 49 50 51 52 53 54 55 56 57 58 59 60 61 62 63 64 65 66 67 68 69 70 71 72 73 74 75 76 77 78 79 80 81 82 83 84 85 86 87 88 89 90 91 92 93 94 95 96 97 98 99 100 101 102 103 104 105 106 107 108 109 110 111 112 113 114 115 116 117 118 119 120 121 122 123 124 125 126 127 128 129 130 131 132 133 134 135 136 137 138 139 140 141 142 143 144 145 146 147 148 149 150 151 152 153 154 155 156 157 158 159 160 161 162 163 164 165 166 167 168 169 170 171 172 173 174 175 176 177 178 179 180 181 182 183 184 185 186 187 188 189 190 191 192 193 194 195 196 197 198 199 200 201 202 203 204 205 206 207 208 209 210 211 212 213 214 215 216 217 218 219 220 221 222 223 224 225 226 227 228 229 230 231 232 233 234 235 236 237 238 239 240 241 242 243 244 245 246 247 248 249 250 251 252 253 254 255 256 257 258 259 260 261 262 263 264 265 266 267 268 269 270 271 272 273 274 275 276 277 278 279 280 281 282 283 284 285 286 287 288 289 290 291 292 293 294 295 296 297 298 299 300 301 302 303 304 305 306 307 308 309 310 311 312 313 314 315 316 317 318 319 320 321 322 323 324 325 326 327 328 329 330 331 332 333 334 |
/* Name: 2WheelEncoderNoPID_OTA.ino Created: 5/2/2026 5:55:27 PM Author: FRANK_XPS_9530\Frank */ // ================================================================ // Fixed PWM + Tick-Based Odometry - Teensy 4.1 // Minimal, reliable, no PID. Encoders renamed to leftTick/rightTick // Date: 28 April 2026 // ================================================================ //05/03/2026 Added OTA and positive/negative movement capability #include <Arduino.h> #include <Encoder.h> #include "FXUtil.h" // hex parsing + update_firmware() extern "C" { #include "FlashTxx.h" // Teensy 4.1 flash primitives } uint32_t buffer_addr, buffer_size; // ------------------- PIN DEFINITIONS ------------------- #define LEFT_ENC_A 30 #define LEFT_ENC_B 29 #define RIGHT_ENC_A 32 #define RIGHT_ENC_B 31 #define LEFT_IN1 11 #define LEFT_IN2 12 #define RIGHT_IN1 9 #define RIGHT_IN2 10 #define LED_PIN 13 // ------------------- TUNABLES (your proven values) ------------------- const int DRIVE_PWM = 175; // base PWM const int PWM_OFFSET = 7; // left +7, right -7 → nearly straight const float WHEEL_RADIUS_MM = 33.0; const float TICKS_PER_REV = 16.0; // ------------------- ENCODERS (renamed as requested) ------------------- Encoder leftTick(LEFT_ENC_A, LEFT_ENC_B); Encoder rightTick(RIGHT_ENC_A, RIGHT_ENC_B); // 11/21/21 rev to accomodate cmd input from either serial, and output to both // 12/25/21 another try at using pointer for Serial object Stream* pStream = 0; #define TELEMETRY_PERIOD_MSEC 100 long startLeftTicks = 0; long startRightTicks = 0; // ------------------- GLOBALS ------------------- bool distanceMode = false; long targetTicks = 0; long travelTicks = 0; char cmdBuffer[64]; uint8_t cmdIdx = 0; bool bStopped = true; bool bForward = true; void setup() { //04/25/26 can't wait for Serial (hardwire USB) as it probably isn't connected. //Just use 2sec delay instead Serial.begin(115200); delay(2000); //Serial2 via HC-05 BT link Serial2.begin(115200); // HC05 on Serial2 while (!Serial2) {} //05/02/26 set pointer to Serial or Serial2 and then use the pointer for output if (Serial) { pStream = (Stream*)&Serial; pStream->printf("pStream set to Serial\n"); } else if (Serial2) { pStream = (Stream*)&Serial2; pStream->printf("pStream set to Serial2\n"); } else { pStream = 0; } if (pStream) { pStream->println("Fixed PWM + Tick-Based Odometry with HC-05 OTA"); pStream->println("Commands: D,distance_m or S"); pStream->printf("Msec\tL_Tick\tR_Tick\n"); pStream->println(F("\n=== HC05 OTA Ready on Serial2 - send 'U' to start update ===")); pStream->flush(); } pinMode(LED_PIN, OUTPUT); pinMode(LEFT_IN1, OUTPUT); pinMode(LEFT_IN2, OUTPUT); pinMode(RIGHT_IN1, OUTPUT); pinMode(RIGHT_IN2, OUTPUT); } void loop() { unsigned long now = millis(); long avgTicks = getAvgTicks(); // Telemetry every Telemetry_Period_ms if (now % TELEMETRY_PERIOD_MSEC == 0 && !bStopped) { pStream->printf("%lu\t%ld\t%ld\n", now, leftTick.read(), rightTick.read()); } // Distance reached? if (bForward && avgTicks >= targetTicks) { pStream->println("Target ticks reached - stopping!"); StopBothMotors(); bStopped = true; } else if (!bForward && avgTicks <= targetTicks) { pStream->println("Target ticks (%d) reached - stopping!"); StopBothMotors(); bStopped = true; } digitalWrite(LED_PIN, !digitalRead(LED_PIN)); CheckForUserInput(); } //04/25/26 copied from 4-wheel robot project and removed all the other control cases. void CheckForUserInput() { if (pStream->available() > 0) { int incomingByte = pStream->read(); pStream->print("I received: "); pStream->println(incomingByte, HEX); //} switch (incomingByte) { case 0x44: // 'D' Move a specified distance case 0x64: // 'd' { String inputString = pStream->readString(); // Reads until timeout or buffer empty pStream->printf("You entered: %s\n", inputString.c_str()); inputString.trim(); // Remove leading/trailing whitespace if (inputString.length() > 0) { // === ADAPTED PARSING STARTS HERE === if (inputString.startsWith(",")) { String numStr = inputString.substring(1); // remove the leading comma numStr.trim(); // remove any space after the comma float distance = numStr.toFloat(); if (distance > 0.0f) { float circumference = 2.0f * 3.14159265f * (WHEEL_RADIUS_MM / 1000.0f); float targetRevs = distance / circumference; //targetTicks = (long)(targetRevs * TICKS_PER_REV + 0.5f); travelTicks = (long)(targetRevs * TICKS_PER_REV + 0.5f); startLeftTicks = leftTick.read(); startRightTicks = rightTick.read(); targetTicks = getAvgTicks() + travelTicks; distanceMode = true; //pStream->printf("Driving %.3f m (%ld ticks)\n", distance, targetTicks); pStream->printf("Driving %.3f m (%ld ticks)\n", distance, targetTicks); //05/03/26 now using MoveForward/Reverse functions MoveForward(DRIVE_PWM + PWM_OFFSET, DRIVE_PWM - PWM_OFFSET); bStopped = false; bForward = true; } else if (distance < 0.0f) { float circumference = 2.0f * 3.14159265f * (WHEEL_RADIUS_MM / 1000.0f); float targetRevs = distance / circumference; //targetTicks = (long)(targetRevs * TICKS_PER_REV + 0.5f); targetTicks = (long)(targetRevs * TICKS_PER_REV - 0.5f); startLeftTicks = leftTick.read(); startRightTicks = rightTick.read(); distanceMode = true; pStream->printf("Driving %.3f m (%ld ticks)\n", distance, targetTicks); //05/03/26 now using MoveForward/Reverse functions MoveReverse(DRIVE_PWM - PWM_OFFSET, DRIVE_PWM + PWM_OFFSET); bStopped = false; bForward = false; } else { pStream->println("Error: Distance must be greater than or less than 0."); } } else { pStream->println("Invalid format. Expected ,<distance> after D/d"); pStream->printf("Received after D/d: '%s'\n", inputString.c_str()); } // === ADAPTED PARSING ENDS HERE === } else { pStream->println("No valid input received."); } break; // always good practice } case 0x53: // 'S' Stop both motors case 0x73: // 's' { pStream->println("Received:S -- Stopping!"); StopBothMotors(); bStopped = true; while (1) { digitalWrite(LED_PIN, !digitalRead(LED_PIN)); delay(500); } } case 0x55: // 'U' case 0x75: // 'u' { pStream->println(F("Start Program Update - Send new HEX file!")); // exact string your TeensyOTA1.ttl macro expects pStream->println(F("waiting for hex lines...")); if (firmware_buffer_init(&buffer_addr, &buffer_size) == 0) { pStream->printf("unable to create buffer\n"); pStream->flush(); for (;;) {} } pStream->printf("buffer = %1luK %s (%08lX - %08lX)\n", buffer_size / 1024, IN_FLASH(buffer_addr) ? "FLASH" : "RAM", buffer_addr, buffer_addr + buffer_size); while (pStream->available()) { pStream->read(); } update_firmware(&Serial2, &Serial2, buffer_addr, buffer_size); pStream->printf("erase FLASH buffer / free RAM buffer...\n"); firmware_buffer_free(buffer_addr, buffer_size); pStream->flush(); REBOOT; break; } } } } void StopBothMotors() { analogWrite(LEFT_IN1, 0); analogWrite(LEFT_IN2, 0); analogWrite(RIGHT_IN1, 0); analogWrite(RIGHT_IN2, 0); } //05/03/26 copied from T35_WallE3_V4.ino & adapted for DRV8871 drivers void MoveForward(int leftspeednum, int rightspeednum) { //Purpose: Move ahead continuously //Provenence: G. Frank Paynter 05/03/2026 //Inputs: // leftspeednum = integer denoting speed (0=stop, 255 = full speed) // rightspeednum = integer denoting speed (0=stop, 255 = full speed) //Outputs: both drive Motors energized with the specified speed //Notes: //05/03/26 copied from T35_WallE3_V4.ino & adapted for DRV8871 drivers analogWrite(LEFT_IN1, leftspeednum); digitalWrite(LEFT_IN2, LOW); analogWrite(RIGHT_IN1, leftspeednum); digitalWrite(RIGHT_IN2, LOW); } void MoveReverse(int leftspeednum, int rightspeednum) { //Purpose: Move ahead continuously //Provenence: G. Frank Paynter 05/03/2026 //Inputs: // leftspeednum = integer denoting speed (0=stop, 255 = full speed) // rightspeednum = integer denoting speed (0=stop, 255 = full speed) //Outputs: both drive Motors energized with the specified speed //Notes: //05/03/26 copied from T35_WallE3_V4.ino & adapted for DRV8871 drivers analogWrite(LEFT_IN2, leftspeednum); digitalWrite(LEFT_IN1, LOW); analogWrite(RIGHT_IN2, rightspeednum); digitalWrite(RIGHT_IN1, LOW); } long getAvgTicks() { long curLeft = leftTick.read(); long curRight = rightTick.read(); long avg = (curLeft - startLeftTicks + curRight - startRightTicks) / 2; return avg; } |
I also had Grok generate a Python script to automate the task of creating symlinks to my custom ‘board.txt’ and ‘TeensyOTA1.ttl’ files necessary for OTA updates. Now I can double-click a desktop shortcut, point to a folder, and have the above two files appear magically as symlinks to the files in my new “C:\Users\Frank\Documents\Arduino\Robot Common Files 2026” folder. This is wonderful time-saver and I only wish I had done this earlier. Here’s the code:
|
1 2 3 4 5 6 7 8 9 10 11 12 13 14 15 16 17 18 19 20 21 22 23 24 25 26 27 28 29 30 31 32 33 34 35 36 37 38 39 40 41 42 43 44 45 46 47 48 49 50 51 52 53 54 55 56 57 58 59 60 61 62 63 64 65 66 67 68 69 70 71 72 73 74 75 76 77 78 79 80 81 82 83 84 85 86 87 88 89 90 91 92 93 94 95 96 97 98 99 100 101 102 103 104 105 106 107 108 |
import sys import os import ctypes from pathlib import Path import subprocess import tkinter as tk from tkinter import filedialog, messagebox def is_admin(): try: return ctypes.windll.shell32.IsUserAnAdmin() except: return False def run_as_admin(): """Force UAC elevation if not already running as admin""" if is_admin(): return script = sys.argv[0] try: ctypes.windll.shell32.ShellExecuteW(None, "runas", sys.executable, f'"{script}"', None, 1) sys.exit(0) # exit the non-elevated instance except: messagebox.showerror("Elevation Failed", "Could not get Administrator rights.\n\n" "Right-click the .py or .exe → Run as administrator.") sys.exit(1) def select_target_folder(): root = tk.Tk() root.withdraw() root.attributes('-topmost', True) folder = filedialog.askdirectory( title="Select your Arduino project folder", initialdir=r"C:\Users\Frank\Documents\Arduino" ) root.destroy() return Path(folder) if folder else None def create_symlinks(target_dir: Path): common_dir = Path(r"C:\Users\Frank\Documents\Arduino\Robot Common Files 2026") if not common_dir.exists(): messagebox.showerror("Error", f"Common folder not found:\n{common_dir}") return False files_to_link = ["board.txt", "TeensyOTA1.ttl"] success_count = 0 for fname in files_to_link: source_file = common_dir / fname link_file = target_dir / fname # Remove old link if it exists if link_file.exists() or link_file.is_symlink(): try: os.unlink(link_file) print(f"Removed existing link: {fname}") except Exception as e: print(f"Warning: Could not remove {fname}: {e}") if not source_file.exists(): print(f"Warning: Source file missing: {source_file}") continue cmd = f'mklink "{link_file}" "{source_file}"' print(f"Running: {cmd}") try: result = subprocess.run(cmd, shell=True, capture_output=True, text=True) if result.returncode == 0: print(f"✓ Created: {fname}") success_count += 1 else: print(f"✗ Failed: {fname}") print(result.stderr.strip()) except Exception as e: print(f"✗ Exception: {e}") if success_count == len(files_to_link): messagebox.showinfo("Success!", f"All {success_count} symlinks created successfully!\n\n" f"Target folder:\n{target_dir}") return True else: messagebox.showwarning("Partial Success", f"Only {success_count} of {len(files_to_link)} links created.") return False if __name__ == "__main__": run_as_admin() # ← This forces the UAC prompt every time print("=== Arduino Common Files Link Creator ===\n") target_dir = select_target_folder() if not target_dir: sys.exit(0) if not target_dir.exists(): messagebox.showerror("Error", f"Folder does not exist:\n{target_dir}") sys.exit(1) create_symlinks(target_dir) input("\nPress Enter to close this window...") |
05 May 2026 Update:
I added a tick-count reset ‘R/r’ operation to the available commands in the ‘CheckForUserInput() function. At this point the robot will go forwards and backwards by a set distance (tick count), will stop on command, and the tick count can be reset to zero at any time. Here is the ‘final’ code:
|
1 2 3 4 5 6 7 8 9 10 11 12 13 14 15 16 17 18 19 20 21 22 23 24 25 26 27 28 29 30 31 32 33 34 35 36 37 38 39 40 41 42 43 44 45 46 47 48 49 50 51 52 53 54 55 56 57 58 59 60 61 62 63 64 65 66 67 68 69 70 71 72 73 74 75 76 77 78 79 80 81 82 83 84 85 86 87 88 89 90 91 92 93 94 95 96 97 98 99 100 101 102 103 104 105 106 107 108 109 110 111 112 113 114 115 116 117 118 119 120 121 122 123 124 125 126 127 128 129 130 131 132 133 134 135 136 137 138 139 140 141 142 143 144 145 146 147 148 149 150 151 152 153 154 155 156 157 158 159 160 161 162 163 164 165 166 167 168 169 170 171 172 173 174 175 176 177 178 179 180 181 182 183 184 185 186 187 188 189 190 191 192 193 194 195 196 197 198 199 200 201 202 203 204 205 206 207 208 209 210 211 212 213 214 215 216 217 218 219 220 221 222 223 224 225 226 227 228 229 230 231 232 233 234 235 236 237 238 239 240 241 242 243 244 245 246 247 248 249 250 251 252 253 254 255 256 257 258 259 260 261 262 263 264 265 266 267 268 269 270 271 272 273 274 275 276 277 278 279 280 281 282 283 284 285 286 287 288 289 290 291 292 293 294 295 296 297 298 299 300 301 302 303 304 305 306 307 308 309 310 311 312 313 314 315 316 317 318 319 320 321 322 323 324 325 326 327 328 329 330 331 332 333 334 335 336 337 338 339 340 341 342 343 344 345 346 347 348 349 350 351 352 353 354 355 356 357 358 359 360 361 362 363 364 365 366 367 368 369 370 371 372 373 374 375 376 377 378 379 380 381 382 383 384 385 386 387 388 389 390 391 392 393 394 395 396 397 398 399 400 401 402 403 404 405 406 407 408 409 410 411 412 413 414 415 416 417 418 419 420 421 422 423 424 425 426 427 428 429 430 431 432 433 434 435 436 437 438 439 440 441 442 443 444 445 446 447 448 449 450 451 452 453 454 455 456 457 458 459 460 461 462 463 464 465 466 467 468 469 470 471 472 473 474 475 476 477 478 479 480 481 482 483 484 485 486 487 488 489 490 491 492 493 494 495 496 497 498 499 500 501 502 503 504 505 506 507 508 509 510 511 512 513 514 515 516 517 518 519 520 521 522 523 524 525 526 527 528 529 530 531 532 533 534 535 536 537 538 539 540 541 542 543 544 545 546 547 548 549 550 551 552 553 554 555 556 557 558 559 560 561 562 563 564 565 566 567 568 569 570 571 572 573 574 575 576 577 578 579 580 581 582 583 584 585 586 587 588 589 590 591 592 593 594 595 596 597 598 599 600 601 602 603 604 605 606 607 608 609 610 611 612 613 614 615 616 617 618 619 620 621 622 623 624 625 626 627 628 629 630 631 632 633 634 635 636 637 638 639 640 641 642 643 644 645 646 647 648 649 650 651 652 653 654 655 |
/* Name: 2WheelEncoderNoPID_OTA_Refactored.ino Author: Frank Paynter (with refinements) Date: 2026-05-03 Teensy 4.1 + DRV8871 + Encoders + HC-05 OTA Commands: D,<meters> (positive forward, negative reverse) S (stop) U (OTA update) Notes: 05/04/26 added //#define NO_MOTORS so I can debug without motors running */ //#define NO_MOTORS //added 05/05/26 // ================================================================ // PIN DEFINITIONS // ================================================================ const uint8_t LEFT_ENC_A = 30; const uint8_t LEFT_ENC_B = 29; const uint8_t RIGHT_ENC_A = 32; const uint8_t RIGHT_ENC_B = 31; const uint8_t LEFT_IN1 = 11; const uint8_t LEFT_IN2 = 12; const uint8_t RIGHT_IN1 = 9; const uint8_t RIGHT_IN2 = 10; const uint8_t LED_PIN = 13; // ================================================================ // TUNABLES // ================================================================ const int BASE_PWM = 175; const int PWM_OFFSET = 7; const float WHEEL_RADIUS_M = 0.033f; const float TICKS_PER_REV = 16.0f; const unsigned long TELEMETRY_MS = 100; // ================================================================ // INCLUDES AND GLOBALS // ================================================================ #include <Arduino.h> #include <Encoder.h> #include "FXUtil.h" extern "C" { #include "FlashTxx.h" } Encoder leftEnc(LEFT_ENC_A, LEFT_ENC_B); Encoder rightEnc(RIGHT_ENC_A, RIGHT_ENC_B); Stream* pStream = nullptr; struct Odometry { long startAvgTicks = 0; long targetDeltaTicks = 0; bool active = false; bool forward = true; } odom; unsigned long lastTelemetry = 0; // ================================================================ // MOTOR CONTROL // ================================================================ void drive(int leftPWM, int rightPWM) { #ifndef NO_MOTORS if (leftPWM >= 0) { analogWrite(LEFT_IN1, leftPWM); digitalWrite(LEFT_IN2, LOW); } else { analogWrite(LEFT_IN2, -leftPWM); digitalWrite(LEFT_IN1, LOW); } if (rightPWM >= 0) { analogWrite(RIGHT_IN1, rightPWM); digitalWrite(RIGHT_IN2, LOW); } else { analogWrite(RIGHT_IN2, -rightPWM); digitalWrite(RIGHT_IN1, LOW); } #endif // !NO_MOTORS } void stopMotors() { //Serial2.println("In StopMotors()"); // keep your debug print #ifndef NO_MOTORS // === ROBUST STOP FOR DRV8871 + Teensy 4.1 === // 1. Explicitly kill any active PWM signals on ALL four pins analogWrite(LEFT_IN1, 0); analogWrite(LEFT_IN2, 0); analogWrite(RIGHT_IN1, 0); analogWrite(RIGHT_IN2, 0); // 2. Force both inputs LOW on each motor → clean coast stop digitalWrite(LEFT_IN1, LOW); digitalWrite(LEFT_IN2, LOW); digitalWrite(RIGHT_IN1, LOW); digitalWrite(RIGHT_IN2, LOW); #endif // !NO_MOTORS } // ================================================================ // ODOMETRY // ================================================================ long getAvgTicks() { return (leftEnc.read() + rightEnc.read()) / 2; } float metersToTicks(float meters) { const float circ = 2.0f * 3.14159265f * WHEEL_RADIUS_M; return meters * (TICKS_PER_REV / circ); } // ================================================================ // SETUP // ================================================================ void setup() { Serial.begin(115200); delay(2000); Serial2.begin(115200); while (!Serial2) {} pStream = Serial ? (Stream*)&Serial : (Stream*)&Serial2; pStream->println("\n=== 2-Wheel Encoder + OTA Ready ==="); pStream->println("Commands: D,<meters> S U"); pStream->println("Msec\tL_Tick\tR_Tick"); pinMode(LED_PIN, OUTPUT); pinMode(LEFT_IN1, OUTPUT); pinMode(LEFT_IN2, OUTPUT); pinMode(RIGHT_IN1, OUTPUT); pinMode(RIGHT_IN2, OUTPUT); stopMotors(); } // ================================================================ // LOOP // ================================================================ void loop() { unsigned long now = millis(); if (now - lastTelemetry >= TELEMETRY_MS) { if (odom.active) { pStream->printf("%lu\t%ld\t%ld\n", now, leftEnc.read(), rightEnc.read()); } lastTelemetry = now; } if (odom.active) { long progress = getAvgTicks() - odom.startAvgTicks; bool reached = odom.forward ? (progress >= odom.targetDeltaTicks) : (progress <= odom.targetDeltaTicks); if (reached) { pStream->println("Target reached - stopping!"); stopMotors(); odom.active = false; } } digitalWrite(LED_PIN, !digitalRead(LED_PIN)); checkForUserInput(); } // ================================================================ // COMMAND PARSER // ================================================================ //void checkForUserInput() //{ // Serial2.printf("In checkForUserInput()"); // // if (!pStream->available()) // { // return; // } // // char cmd = pStream->read(); // pStream->printf("Received: 0x%02X\n", cmd); // // switch (cmd) // { // case 'D': // case 'd': // { // String arg = pStream->readStringUntil('\n'); // arg.trim(); // // if (arg.startsWith(",")) // { // float distMeters = arg.substring(1).toFloat(); // // if (distMeters == 0.0f) // { // pStream->println("Error: distance cannot be zero"); // break; // } // // long deltaTicks = (long)metersToTicks(distMeters); // // odom.startAvgTicks = getAvgTicks(); // odom.targetDeltaTicks = deltaTicks; // odom.forward = (distMeters > 0); // odom.active = true; // // pStream->printf("Driving %.3f m (%ld ticks)\n", distMeters, deltaTicks); // // int leftPwm, rightPwm; // if (odom.forward) // { // leftPwm = BASE_PWM + PWM_OFFSET; // rightPwm = BASE_PWM - PWM_OFFSET; // } // else // { // leftPwm = BASE_PWM - PWM_OFFSET; // rightPwm = BASE_PWM + PWM_OFFSET; // } // // drive(odom.forward ? leftPwm : -leftPwm, // odom.forward ? rightPwm : -rightPwm); // } // else // { // pStream->println("Invalid: expected D,<meters>"); // } // break; // } // // case 'S': // case 's': // { // pStream->println("Stop command received"); // stopMotors(); // odom.active = false; // while (1) // { // digitalWrite(LED_PIN, !digitalRead(LED_PIN)); // delay(500); // } // break; // } // case 'U': // case 'u': // { // pStream->println(F("Start Program Update - Send new HEX file!")); // // // exact string your TeensyOTA1.ttl macro expects // //pStream->println(F("waiting for hex lines...")); // Serial2.println(F("waiting for hex lines...")); // // uint32_t buffer_addr, buffer_size; // if (firmware_buffer_init(&buffer_addr, &buffer_size) == 0) // { // //pStream->println("Failed to init buffer"); // Serial2.println("Failed to init buffer"); // return; // } // // // clear any leftover characters in the receive buffer // while (pStream->available()) // { // //pStream->read(); // Serial2.read(); // } // // update_firmware(&Serial2, &Serial2, buffer_addr, buffer_size); // // firmware_buffer_free(buffer_addr, buffer_size); // REBOOT; // break; // } // } //} // ================================================================ // COMMAND PARSER (USB + Bluetooth safe) // ================================================================ // ================================================================ // COMMAND PARSER (USB + Bluetooth safe) // ================================================================ void checkForUserInput() { // Check both ports so commands work from USB (when plugged in) OR Bluetooth if (Serial.available()) processCommand(Serial); if (Serial2.available()) processCommand(Serial2); } // Helper that does the actual work (keeps code DRY) //void processCommand(Stream& serial_port) //{ // char cmd = serial_port.read(); // serial_port.printf("Received: 0x%02X\n", cmd); // // switch (cmd) // { // case 'D': // case 'd': // { // String arg = serial_port.readStringUntil('\n'); // arg.trim(); // // if (arg.startsWith(",")) // { // float distMeters = arg.substring(1).toFloat(); // // if (distMeters == 0.0f) // { // serial_port.println("Error: distance cannot be zero"); // break; // } // // long deltaTicks = (long)metersToTicks(distMeters); // // odom.startAvgTicks = getAvgTicks(); // odom.targetDeltaTicks = deltaTicks; // odom.forward = (distMeters > 0); // odom.active = true; // // serial_port.printf("Driving %.3f m (%ld ticks)\n", distMeters, deltaTicks); // // int leftPwm, rightPwm; // if (odom.forward) // { // leftPwm = BASE_PWM + PWM_OFFSET; // rightPwm = BASE_PWM - PWM_OFFSET; // } // else // { // leftPwm = BASE_PWM - PWM_OFFSET; // rightPwm = BASE_PWM + PWM_OFFSET; // } // // drive(odom.forward ? leftPwm : -leftPwm, // odom.forward ? rightPwm : -rightPwm); // } // else // { // serial_port.println("Invalid: expected D,<meters>"); // } // break; // } // // case 'R': // case 'r': // { // serial_port.println("Resetting Tick Counts"); // stopMotors(); // odom.active = false; // leftEnc.write(0); // rightEnc.write(0); // // serial_port.printf("Tick Counts Now %lu, %lu\n", leftEnc.read(), rightEnc.read() ); // break; // } // // case 'S': // case 's': // { // serial_port.println("Stop command received"); // stopMotors(); // odom.active = false; // while (1) // { // digitalWrite(LED_PIN, !digitalRead(LED_PIN)); // delay(500); // } // break; // } // // case 'U': // case 'u': // { // // === FORCE OUTPUT TO SERIAL2 (Bluetooth) - critical for the macro === // Serial2.println(F("Start Program Update - Send new HEX file!")); // Serial2.println(F("waiting for hex lines...")); // // delay(50); // give HC-05 time to transmit the message // // uint32_t buffer_addr, buffer_size; // if (firmware_buffer_init(&buffer_addr, &buffer_size) == 0) // { // Serial2.println("Failed to init buffer"); // return; // } // // // clear any leftover data in Bluetooth buffer // while (Serial2.available()) // { // Serial2.read(); // } // // update_firmware(&Serial2, &Serial2, buffer_addr, buffer_size); // firmware_buffer_free(buffer_addr, buffer_size); // REBOOT; // break; // } // } //} // Helper that does the actual work (keeps code DRY) //void processCommand(Stream& serial_port) //{ // if (!serial_port.available()) return; // // char cmd = serial_port.read(); // serial_port.printf("Received: 0x%02X ('%c')\n", cmd, cmd); // // switch (cmd) // { // case 'D': // case 'd': // { // String arg = serial_port.readStringUntil('\n'); // arg.trim(); // // if (arg.startsWith(",")) // { // float distMeters = arg.substring(1).toFloat(); // // if (distMeters == 0.0f) // { // serial_port.println("Error: distance cannot be zero"); // break; // } // // long deltaTicks = (long)metersToTicks(distMeters); // // odom.startAvgTicks = getAvgTicks(); // odom.targetDeltaTicks = deltaTicks; // odom.forward = (distMeters > 0); // odom.active = true; // // serial_port.printf("Driving %.3f m (%ld ticks)\n", distMeters, deltaTicks); // // int leftPwm, rightPwm; // if (odom.forward) // { // leftPwm = BASE_PWM + PWM_OFFSET; // rightPwm = BASE_PWM - PWM_OFFSET; // } // else // { // leftPwm = BASE_PWM - PWM_OFFSET; // rightPwm = BASE_PWM + PWM_OFFSET; // } // // drive(odom.forward ? leftPwm : -leftPwm, // odom.forward ? rightPwm : -rightPwm); // } // else // { // serial_port.println("Invalid: expected D,<meters>"); // } // break; // } // // case 'R': // case 'r': // { // serial_port.println("Resetting Tick Counts"); // stopMotors(); // odom.active = false; // leftEnc.write(0); // rightEnc.write(0); // // serial_port.printf("Tick Counts Now %ld, %ld\n", leftEnc.read(), rightEnc.read()); // // consume any leftover newline/CR that the terminal may have sent // serial_port.readStringUntil('\n'); // break; // } // // case 'S': // case 's': // { // serial_port.println("Stop command received"); // stopMotors(); // odom.active = false; // while (1) // { // digitalWrite(LED_PIN, !digitalRead(LED_PIN)); // delay(500); // } // break; // } // // case 'U': // case 'u': // { // Serial2.println(F("Start Program Update - Send new HEX file!")); // Serial2.println(F("waiting for hex lines...")); // // delay(50); // // uint32_t buffer_addr, buffer_size; // if (firmware_buffer_init(&buffer_addr, &buffer_size) == 0) // { // Serial2.println("Failed to init buffer"); // return; // } // // while (Serial2.available()) // { // Serial2.read(); // } // // update_firmware(&Serial2, &Serial2, buffer_addr, buffer_size); // firmware_buffer_free(buffer_addr, buffer_size); // REBOOT; // break; // } // // default: // // This will show you exactly what character arrived // serial_port.printf("Unknown command: 0x%02X ('%c') — ignoring\n", cmd, cmd); // // consume rest of line so leftover \r\n doesn't confuse future commands // serial_port.readStringUntil('\n'); // break; // } //} // Helper that does the actual work (keeps code DRY) void processCommand(Stream& serial_port) { if (!serial_port.available()) return; // === Special fast-path for single-character OTA command (critical for macro) === char firstChar = serial_port.peek(); // look without consuming if (firstChar == 'U' || firstChar == 'u') { serial_port.read(); // consume the 'U' serial_port.printf("Received: 0x%02X ('%c')\n", firstChar, firstChar); // === FORCE OUTPUT TO SERIAL2 (Bluetooth) - critical for the macro === Serial2.println(F("Start Program Update - Send new HEX file!")); Serial2.println(F("waiting for hex lines...")); delay(50); // give HC-05 time to transmit the message uint32_t buffer_addr, buffer_size; if (firmware_buffer_init(&buffer_addr, &buffer_size) == 0) { Serial2.println("Failed to init buffer"); return; } while (Serial2.available()) { Serial2.read(); } update_firmware(&Serial2, &Serial2, buffer_addr, buffer_size); firmware_buffer_free(buffer_addr, buffer_size); REBOOT; return; // important - exit early } // === Normal line-based parsing for all other commands === String line = serial_port.readStringUntil('\n'); line.trim(); if (line.length() == 0) return; serial_port.printf("Received command: '%s'\n", line.c_str()); line.toUpperCase(); if (line.startsWith("D,") || line.startsWith("DIST,")) { int commaIndex = line.indexOf(','); String numStr = line.substring(commaIndex + 1); float distMeters = numStr.toFloat(); if (distMeters == 0.0f) { serial_port.println("Error: distance cannot be zero"); return; } long deltaTicks = (long)metersToTicks(distMeters); odom.startAvgTicks = getAvgTicks(); odom.targetDeltaTicks = deltaTicks; odom.forward = (distMeters > 0); odom.active = true; serial_port.printf("Driving %.3f m (%ld ticks)\n", distMeters, deltaTicks); int leftPwm, rightPwm; if (odom.forward) { leftPwm = BASE_PWM + PWM_OFFSET; rightPwm = BASE_PWM - PWM_OFFSET; } else { leftPwm = BASE_PWM - PWM_OFFSET; rightPwm = BASE_PWM + PWM_OFFSET; } drive(odom.forward ? leftPwm : -leftPwm, odom.forward ? rightPwm : -rightPwm); } else if (line == "R" || line == "RESET") { serial_port.println("Resetting Tick Counts"); stopMotors(); odom.active = false; leftEnc.write(0); rightEnc.write(0); serial_port.printf("Tick Counts Now %ld, %ld\n", leftEnc.read(), rightEnc.read()); } else if (line == "S" || line == "STOP") { serial_port.println("Stop command received"); stopMotors(); odom.active = false; //while (1) //{ // digitalWrite(LED_PIN, !digitalRead(LED_PIN)); // delay(500); //} } else { serial_port.printf("Unknown command: '%s'\n", line.c_str()); serial_port.println("Valid commands: D,<meters> RESET STOP OTA"); } } |
The next big step in the Teensy code will be to integrate the MPU6050 6DoF gyro into the code so that the robot can make accurate PID-controlled specified-angle turns
Stay tuned,
Frank