My wife got me a brand-new Dewalt DWS713 Miter Saw for Christmas, and boy is it nice! Sure beats the heck out of my old plastic miter box, that’s for sure. After playing with it for a while and making some gorgeous cuts, I decided I wanted to try my hand at adding a cut line shadow modification.
After doing some web research, I found this post, of a guy who added a cut line shadow system to Bosch miter saw, and this Thingiverse design for a LED mounting shroud. So, I ordered an LED lamp similar to the one used in the video, and downloaded the Thingiverse shroud design so I could print one here on my 3D printer.
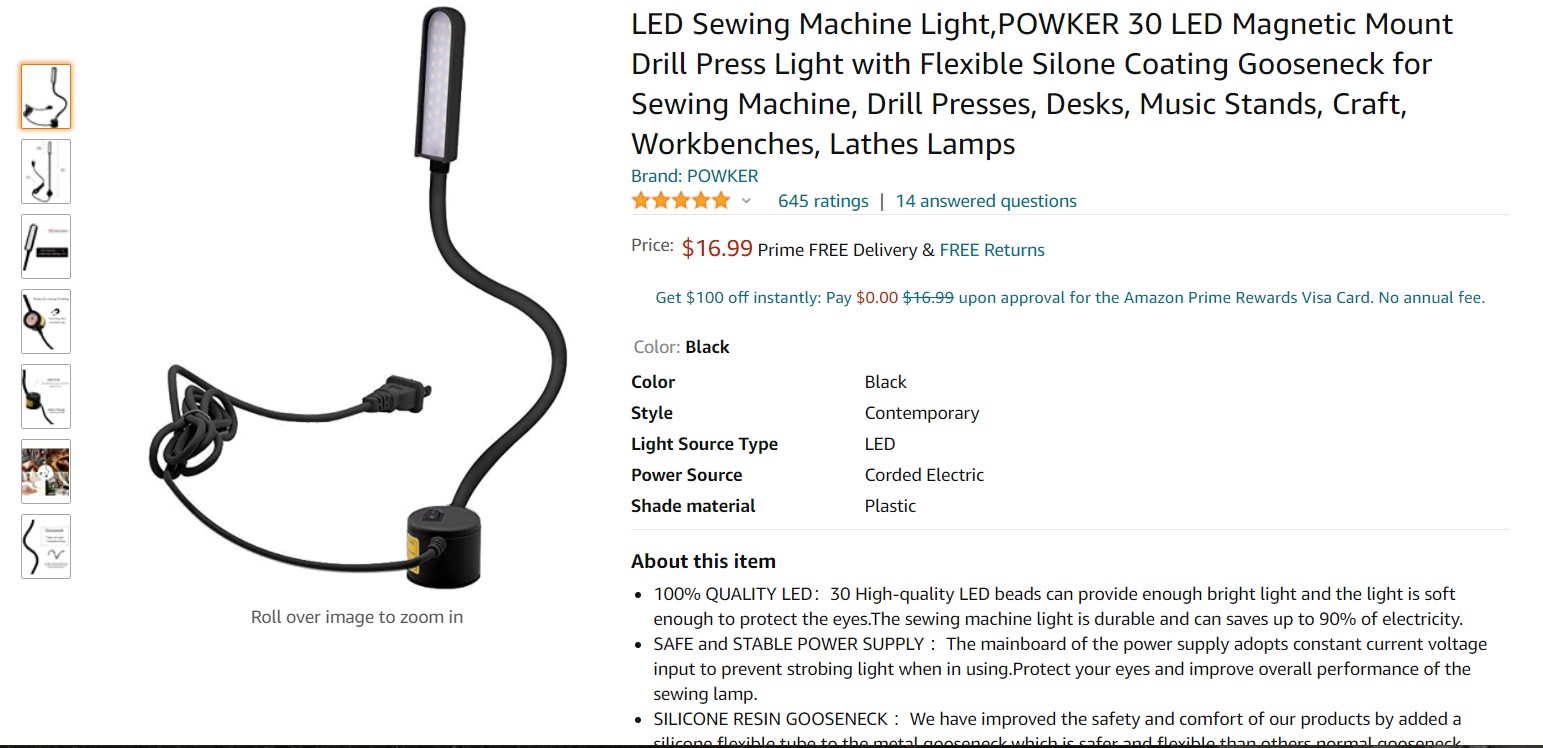
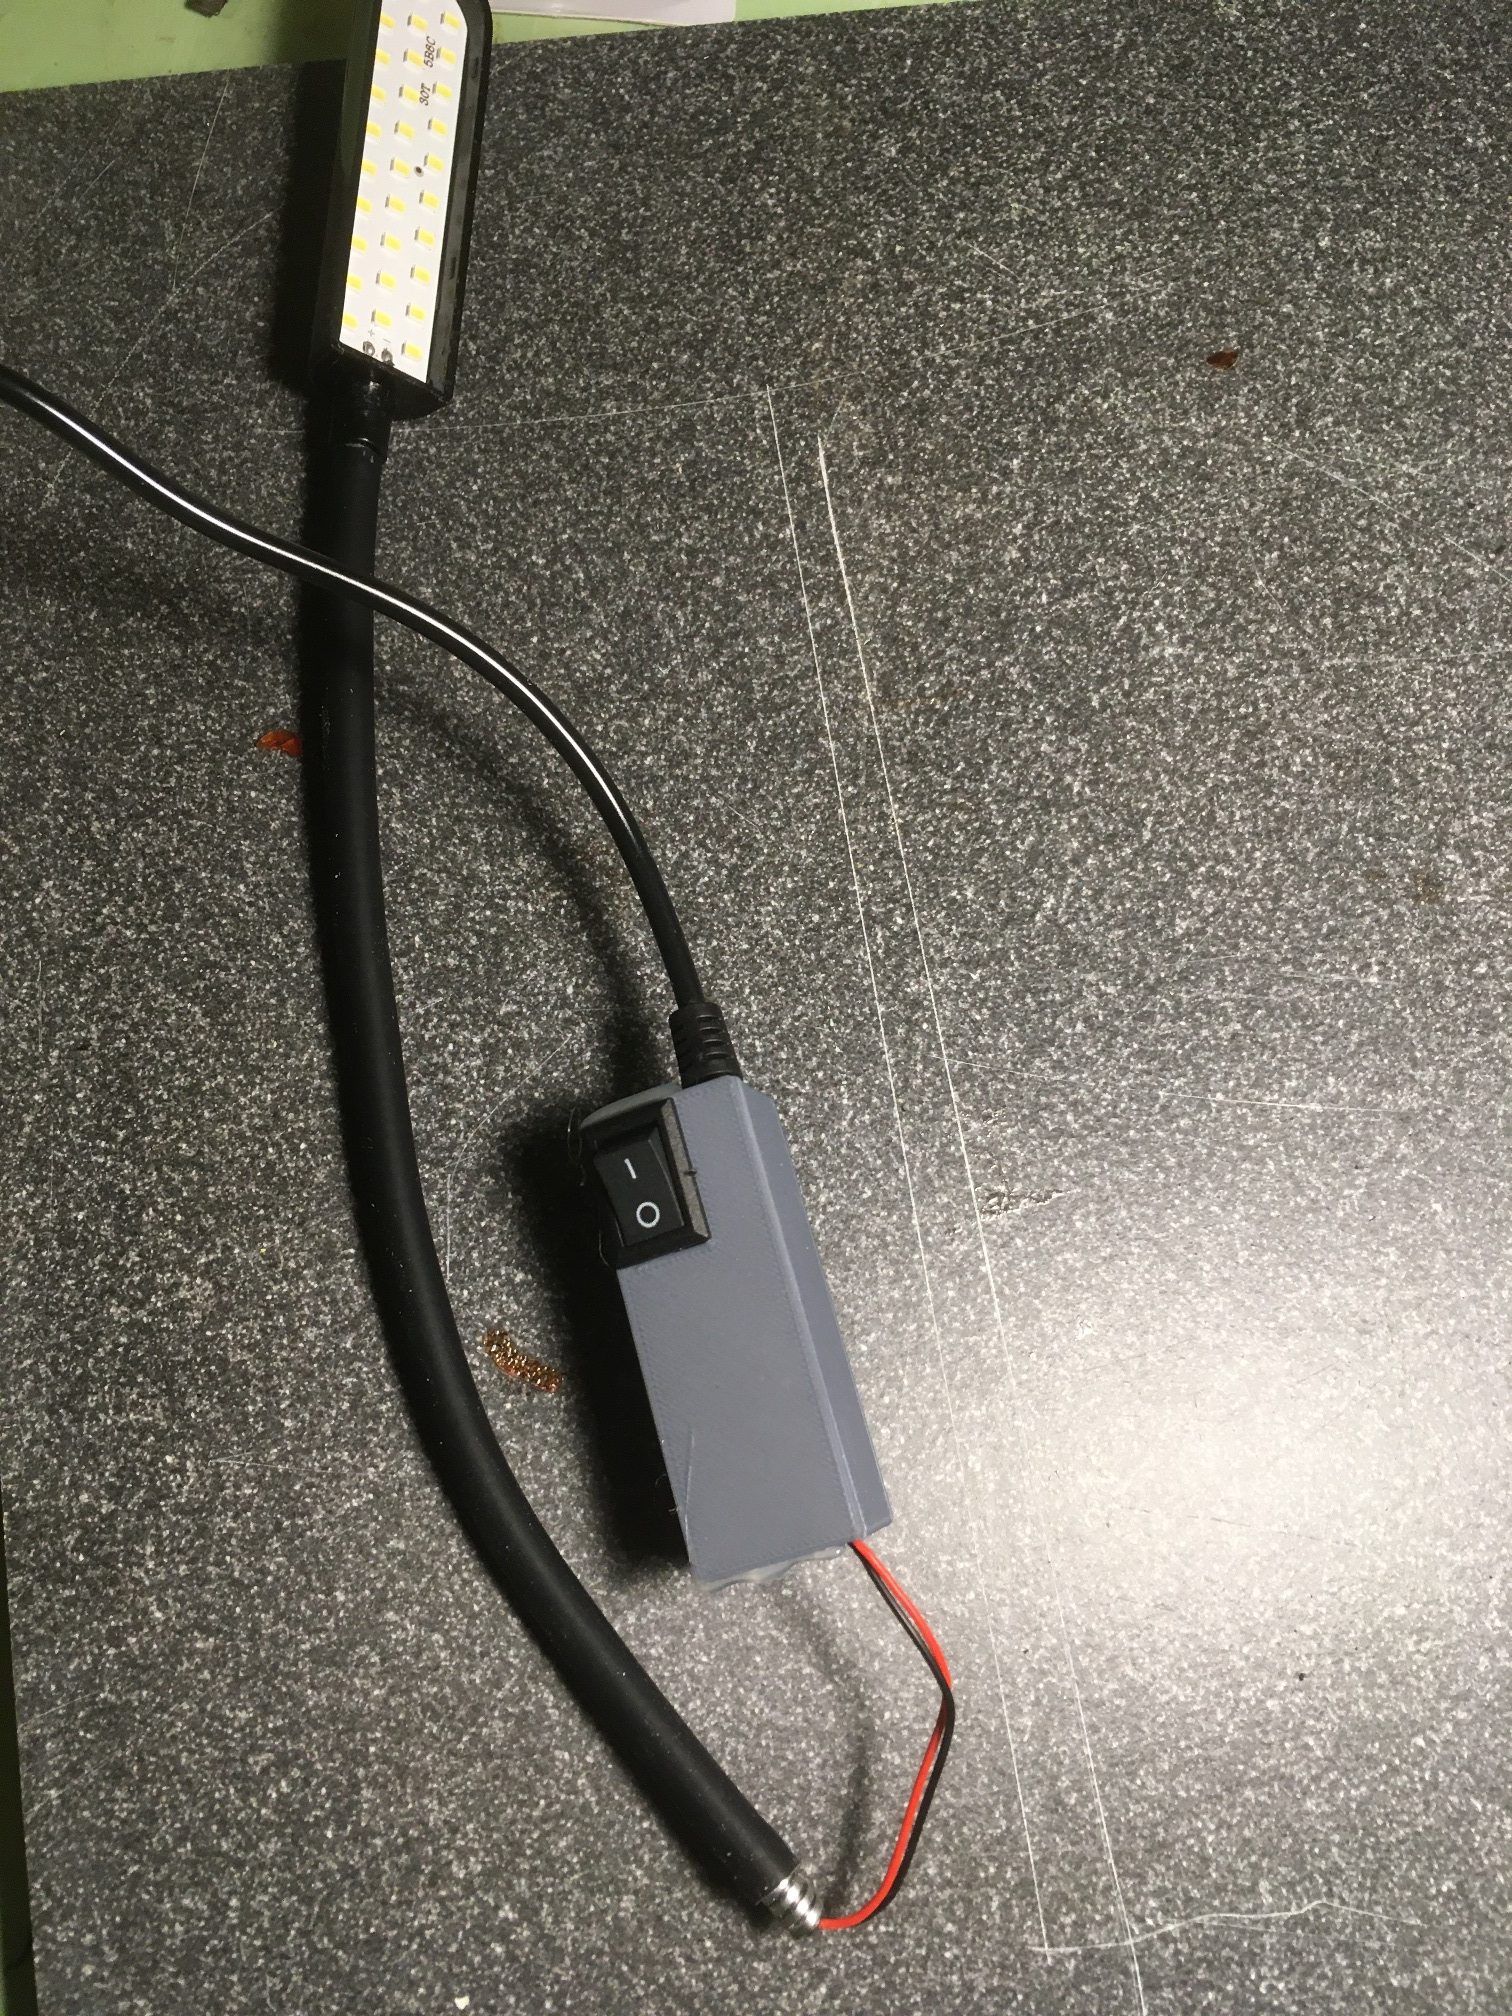
The LED lamp comes with a small cylindrical control module containing an ON/OFF switch and an AC/CD converter, as shown here
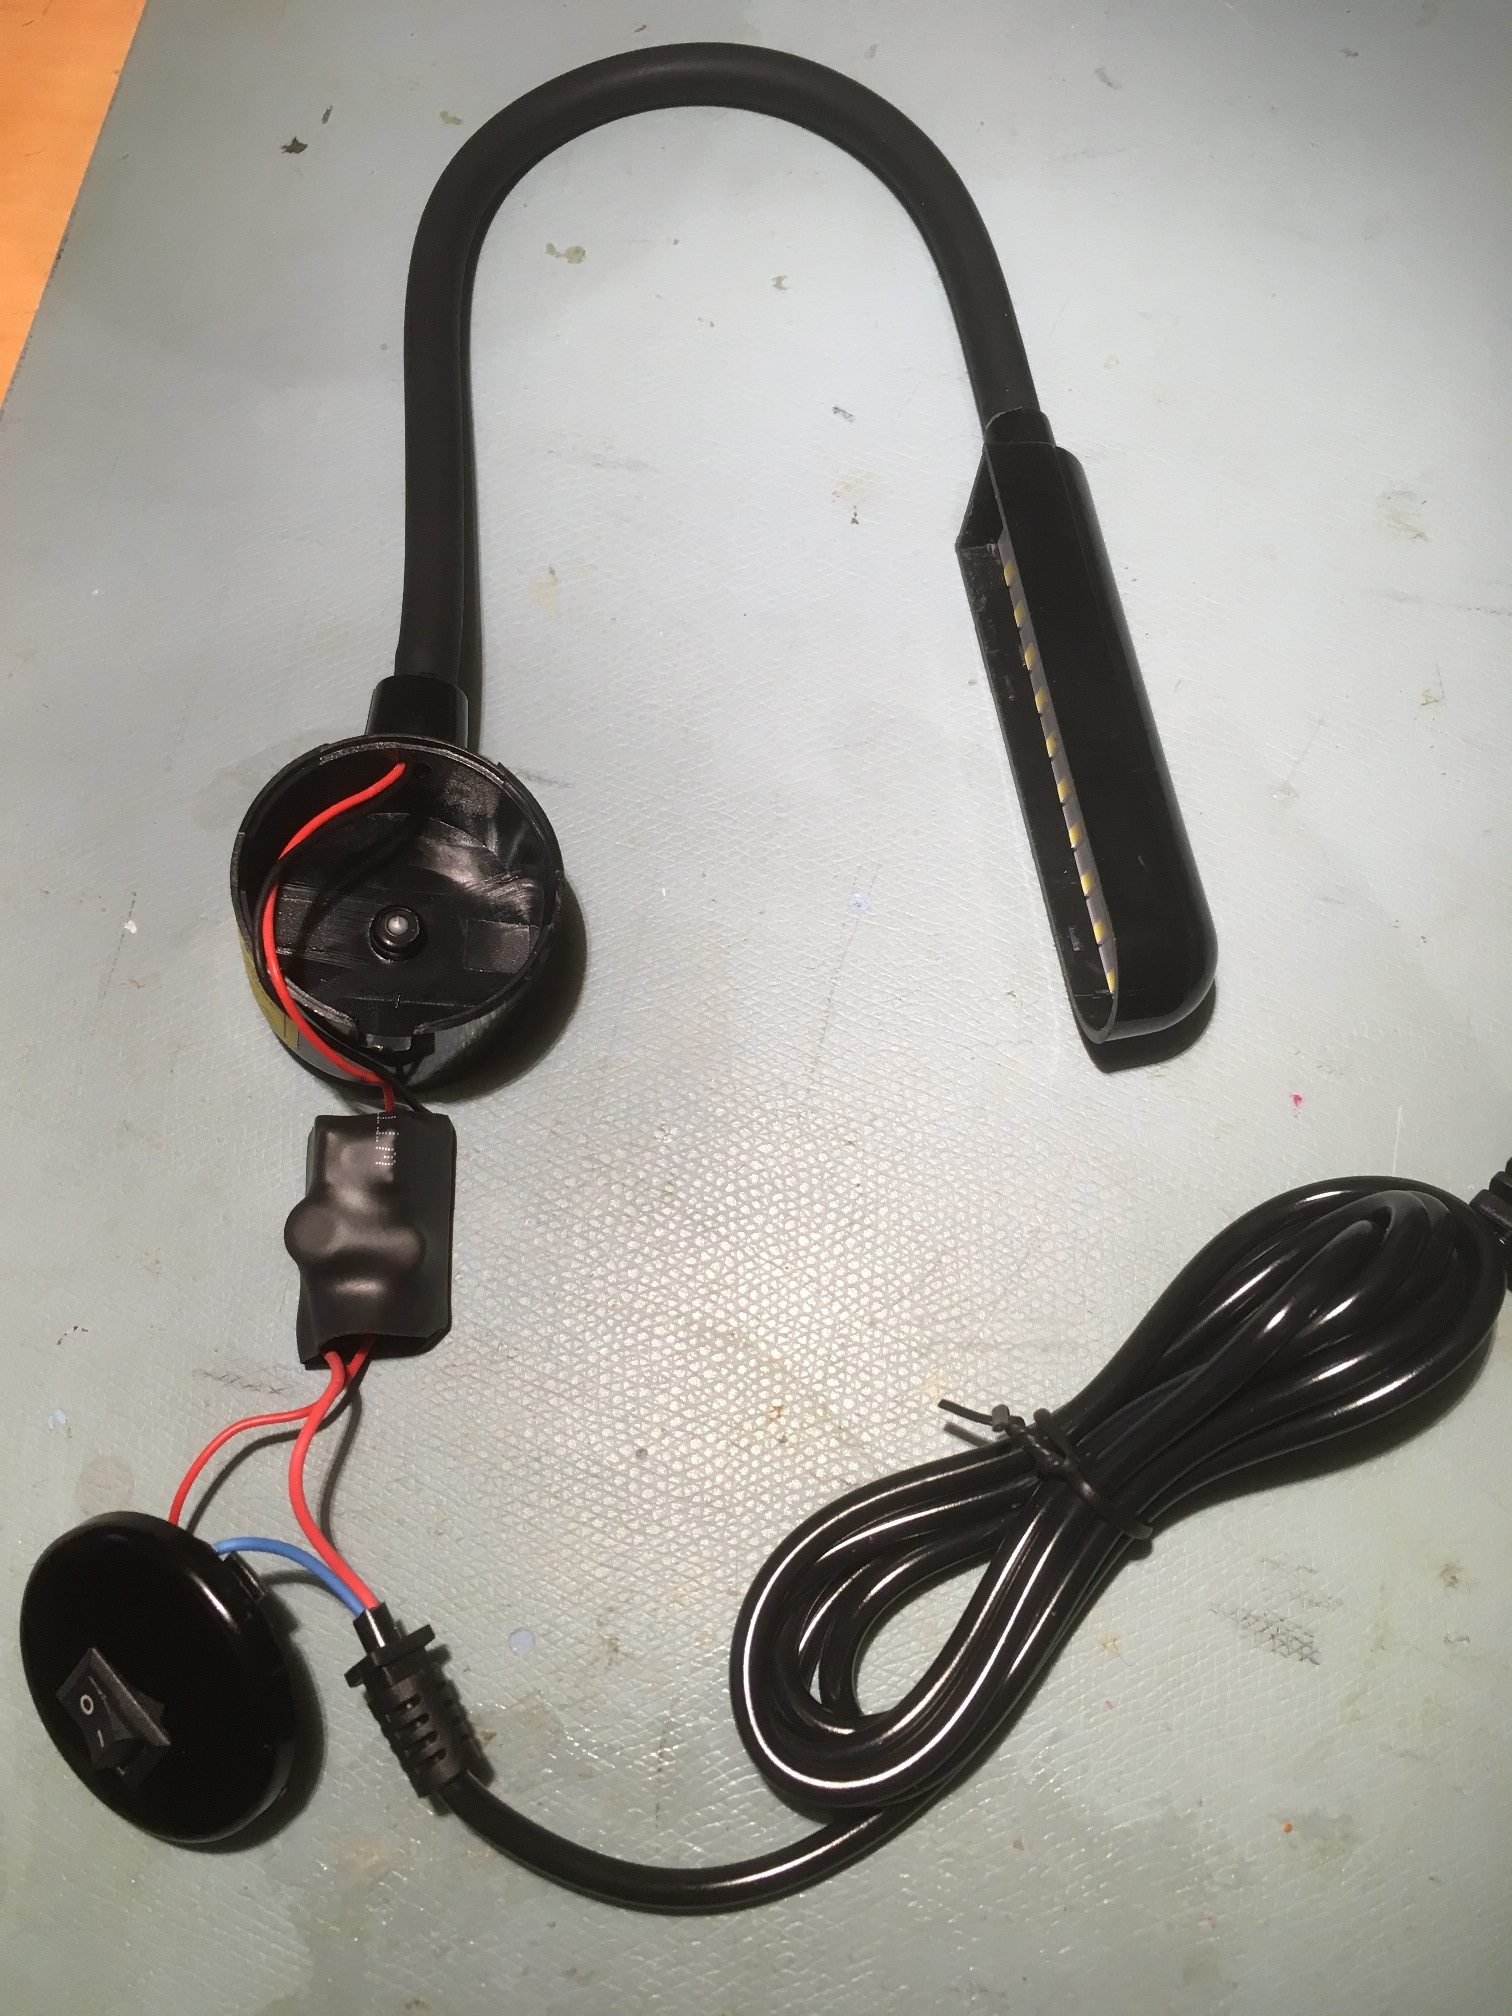
As described in the video showing how to mount a cut line shadow LED to a Bosch miter saw, the gooseneck part of the LED lamp wasn’t long enough to allow full travel of the blade guard. So I cut the gooseneck away from the magnetic base, and fabricated a new housing for the AC/DC converter and (because I managed to screw up the original one) a new, larger ON/OFF switch.
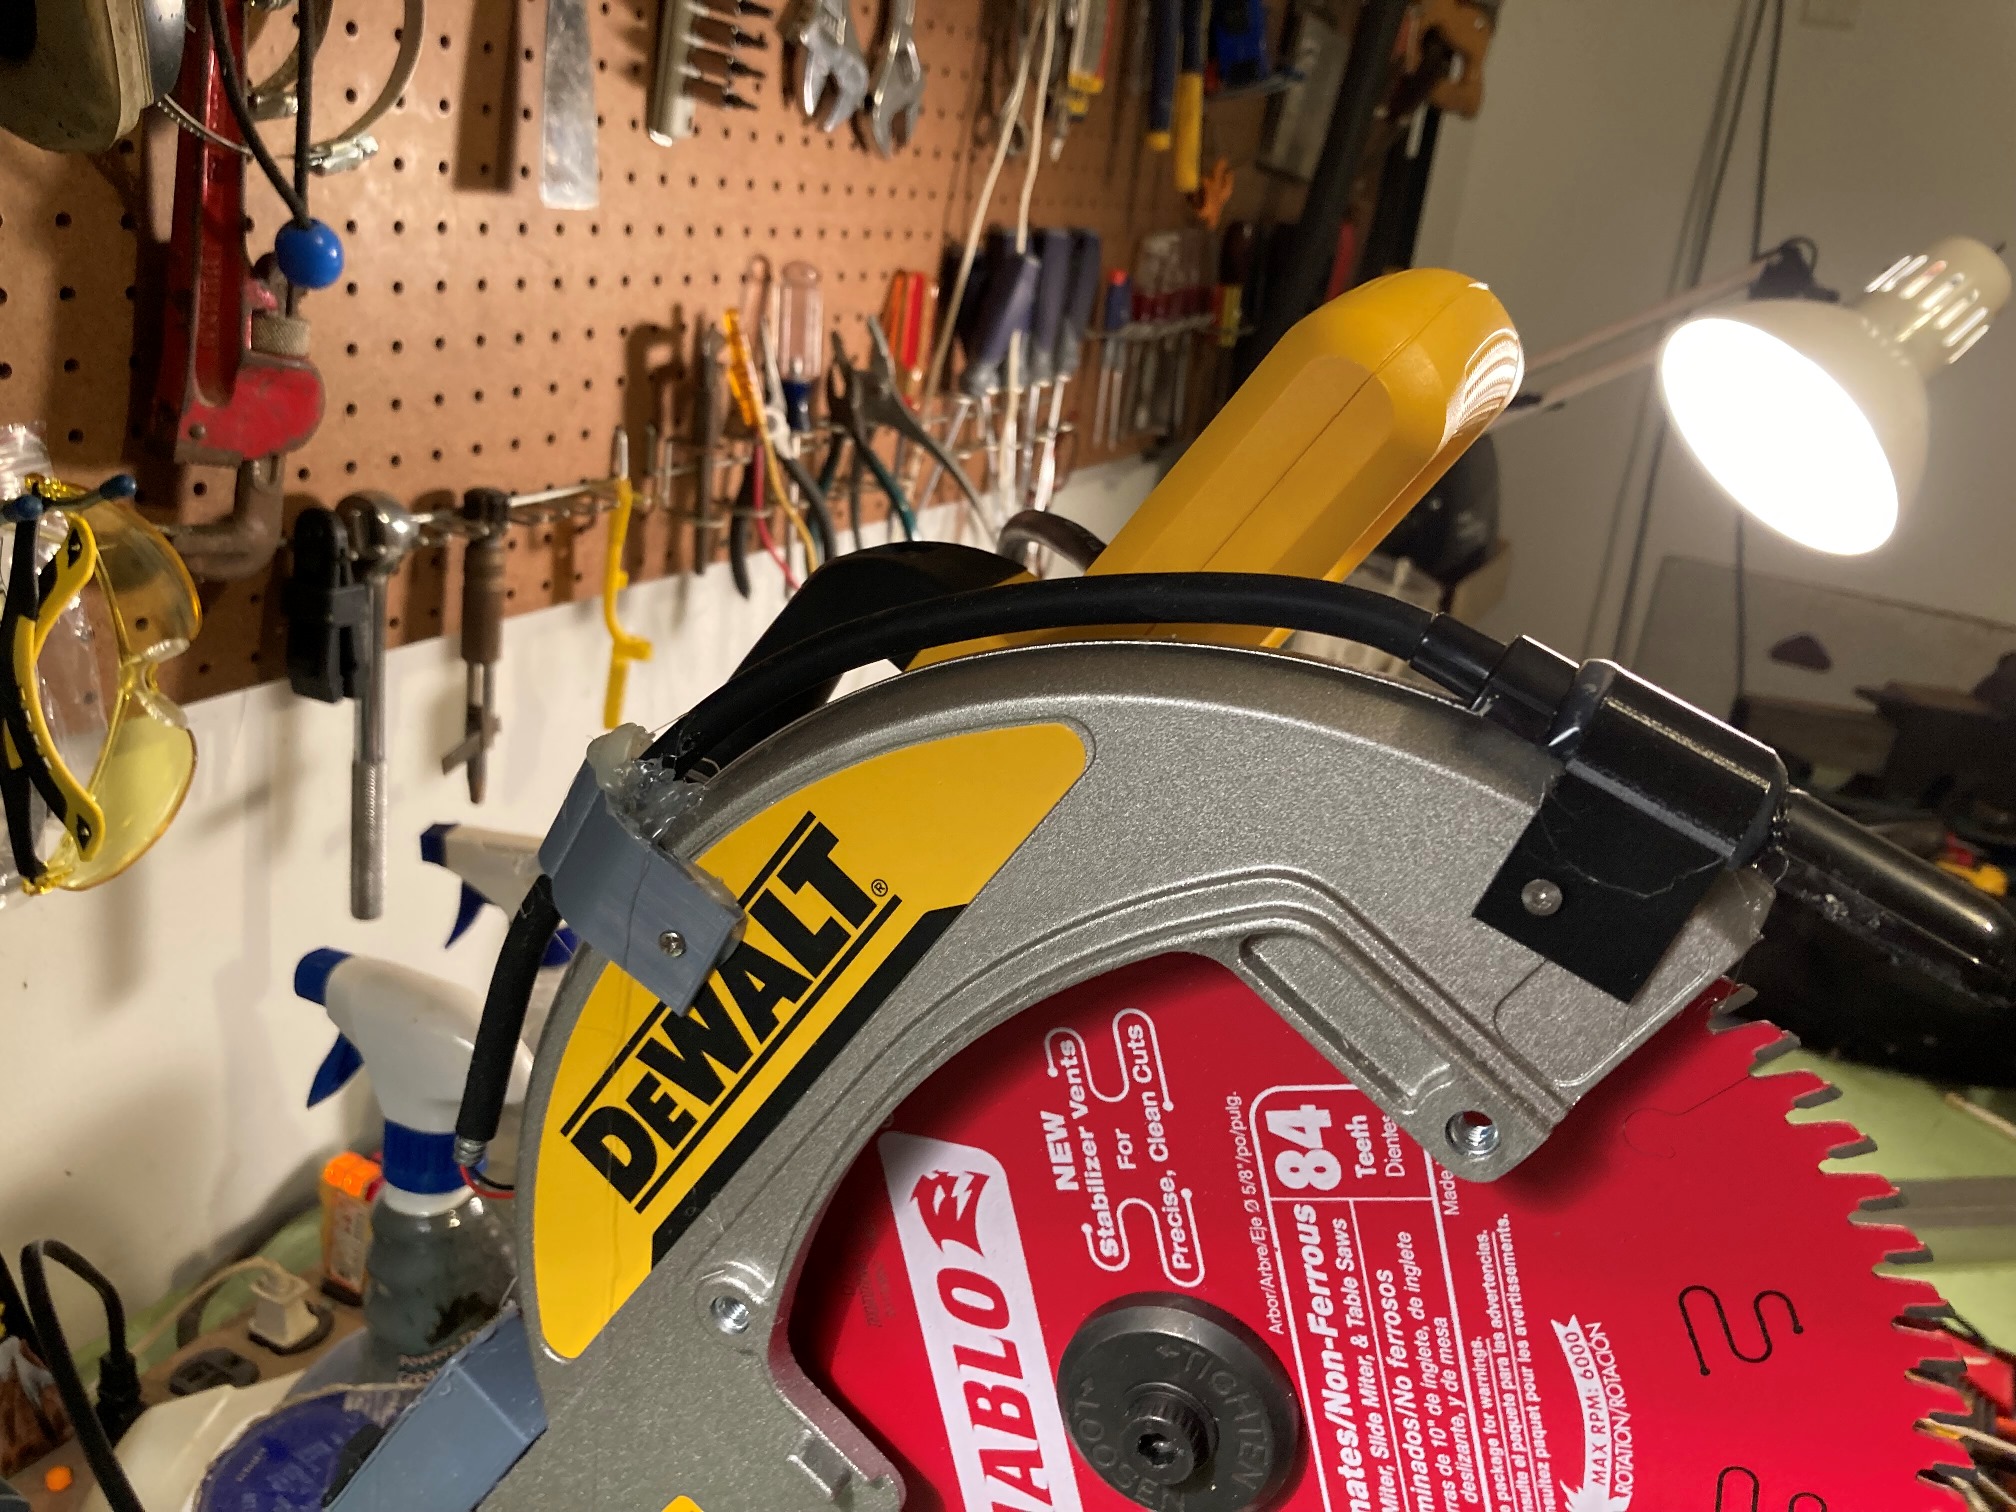
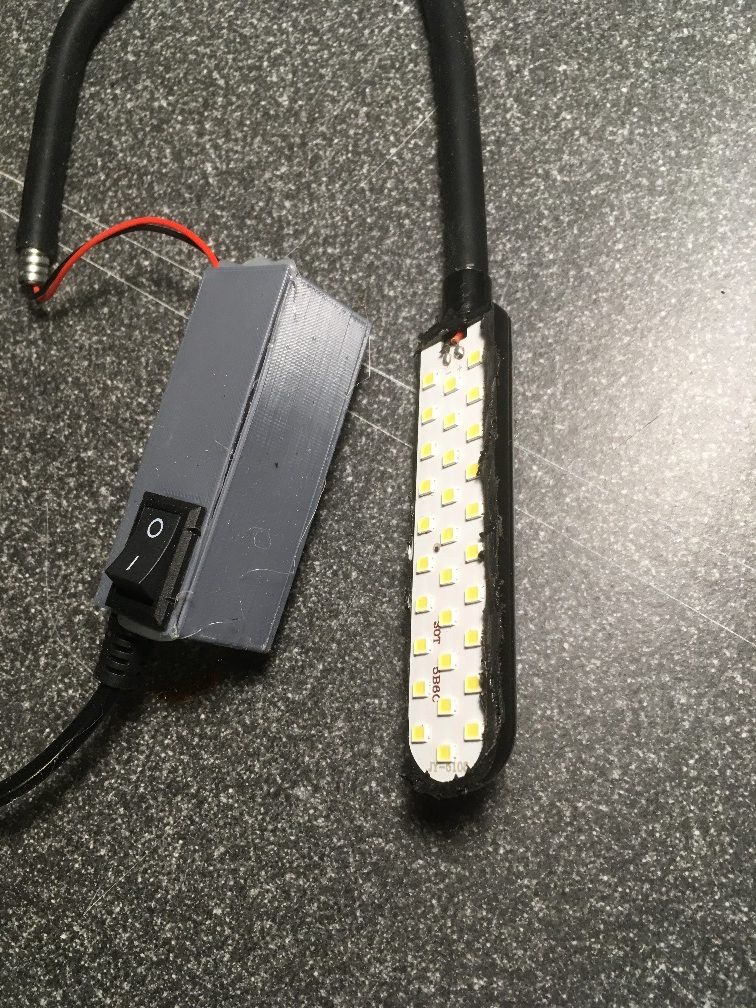
With the added length gained by replacing the original cylindrical enclosure, I was able to mount the LED at the front end of the blade housing and still allow full travel of the retractable blade guard. However, I discovered that I needed to reduce the height of the LED lamp housing slightly, to allow more clearance for the retractable blade guard travel, as shown
Here is a photo of the LED assembly temporarily attached to the miter saw, with the retractable blade guard removed
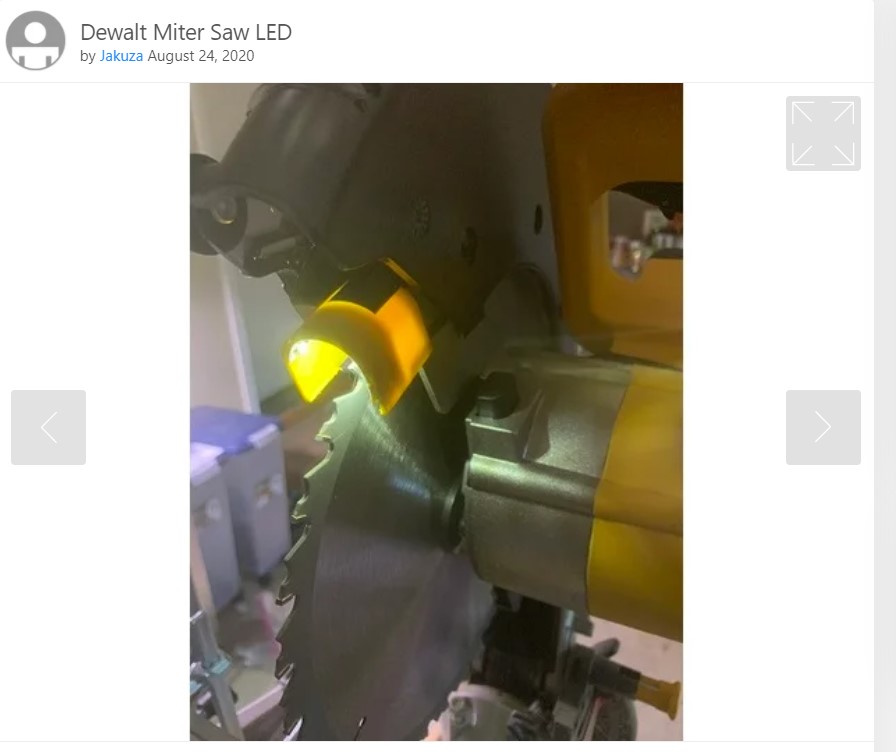
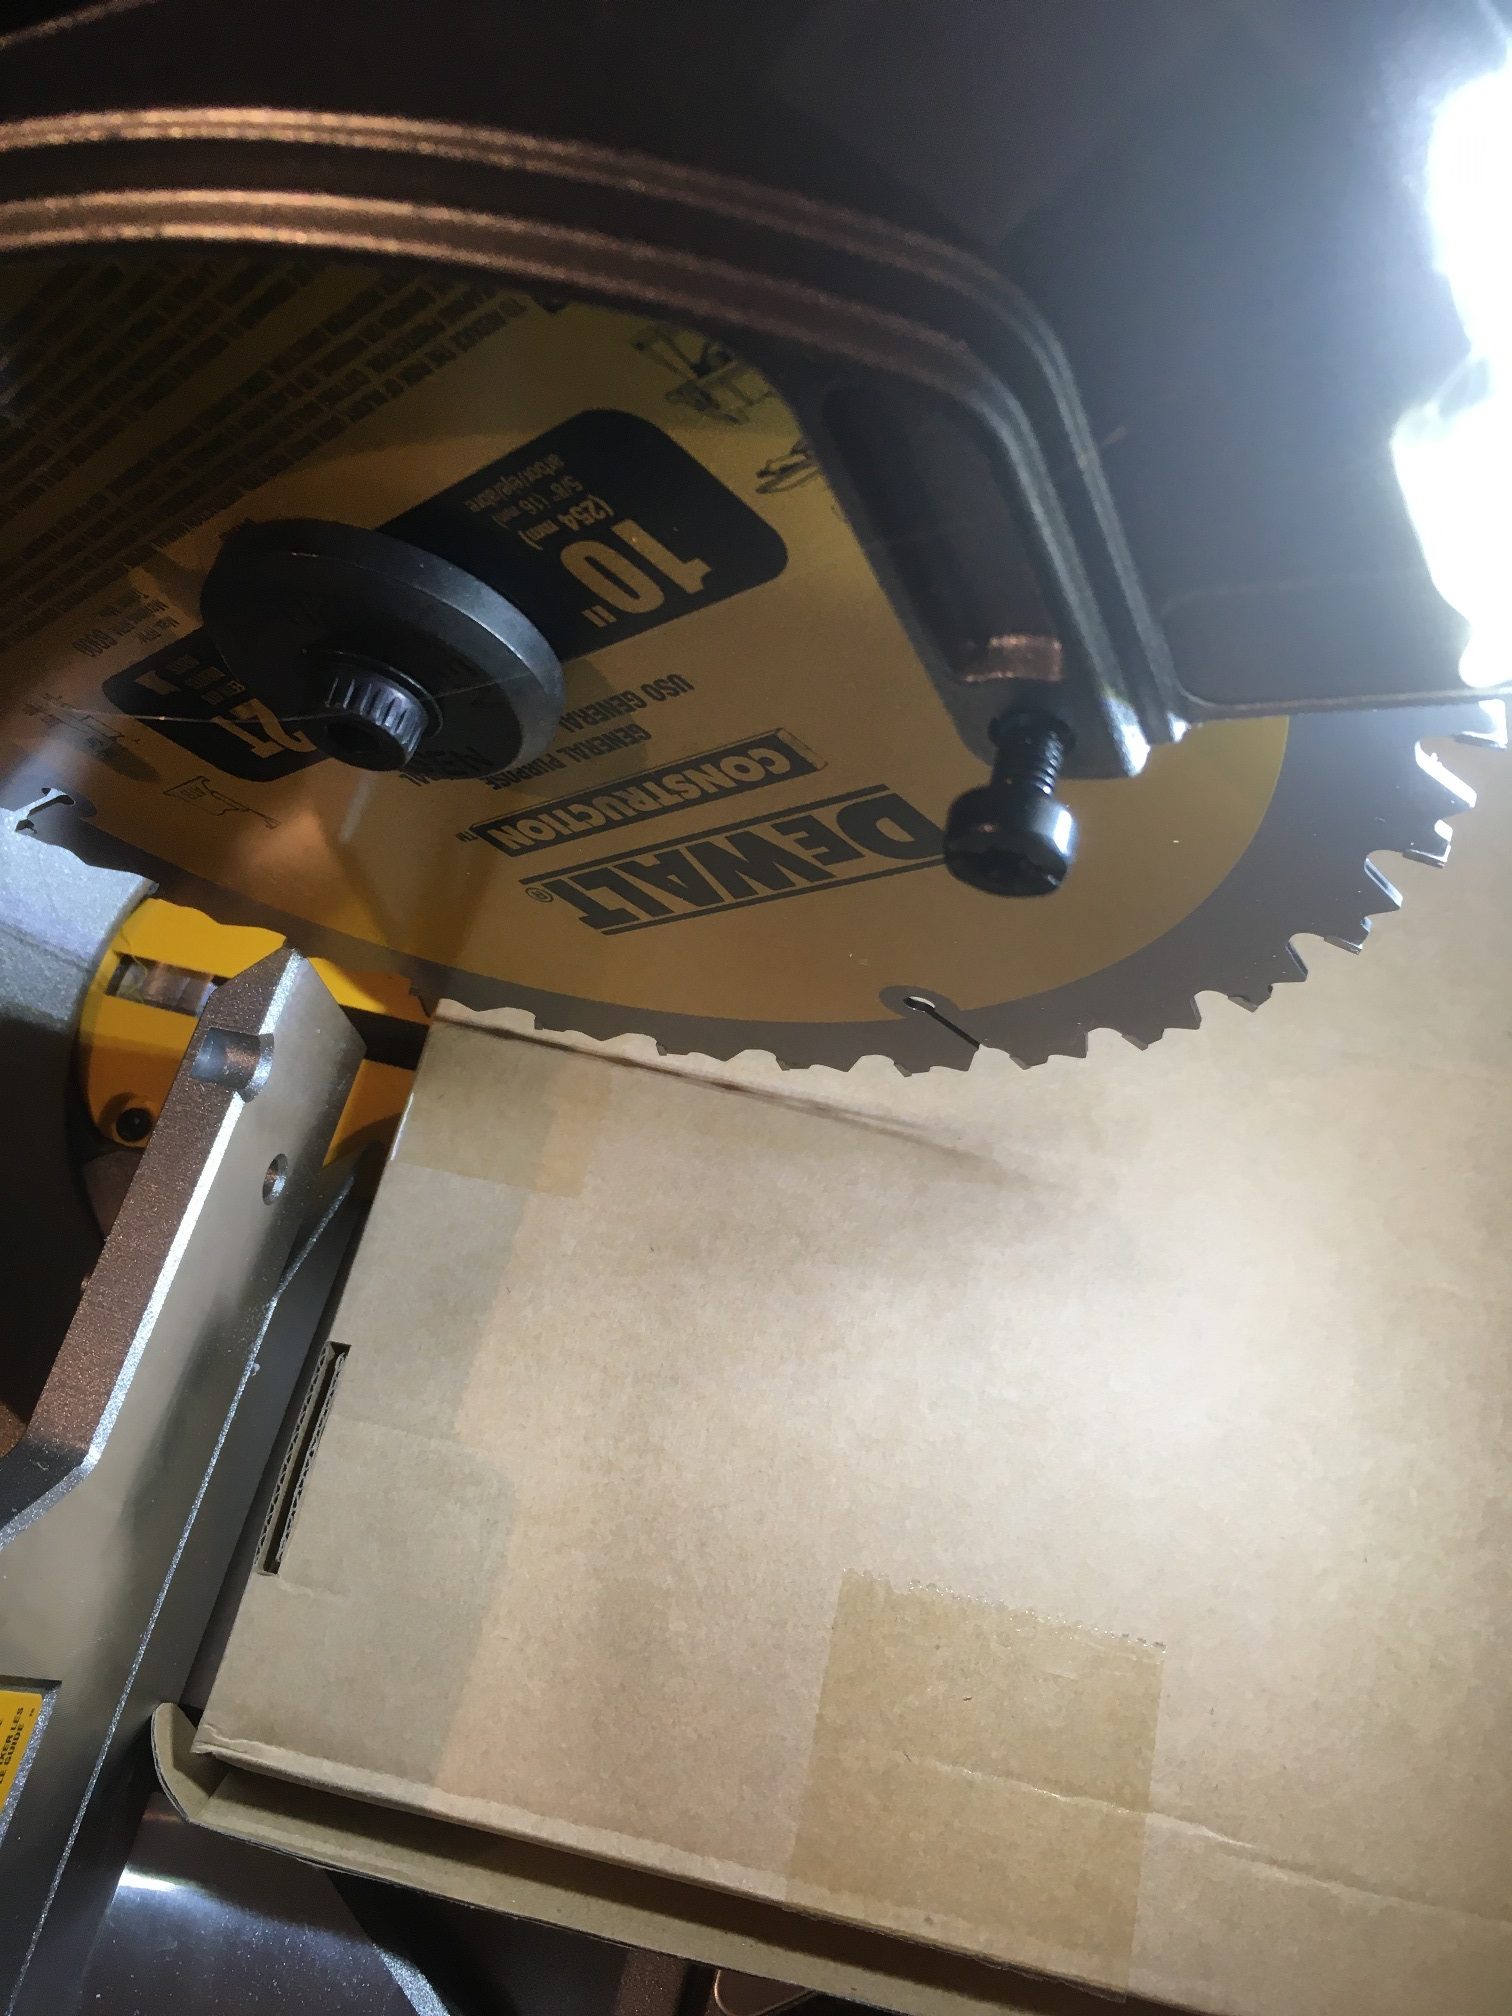
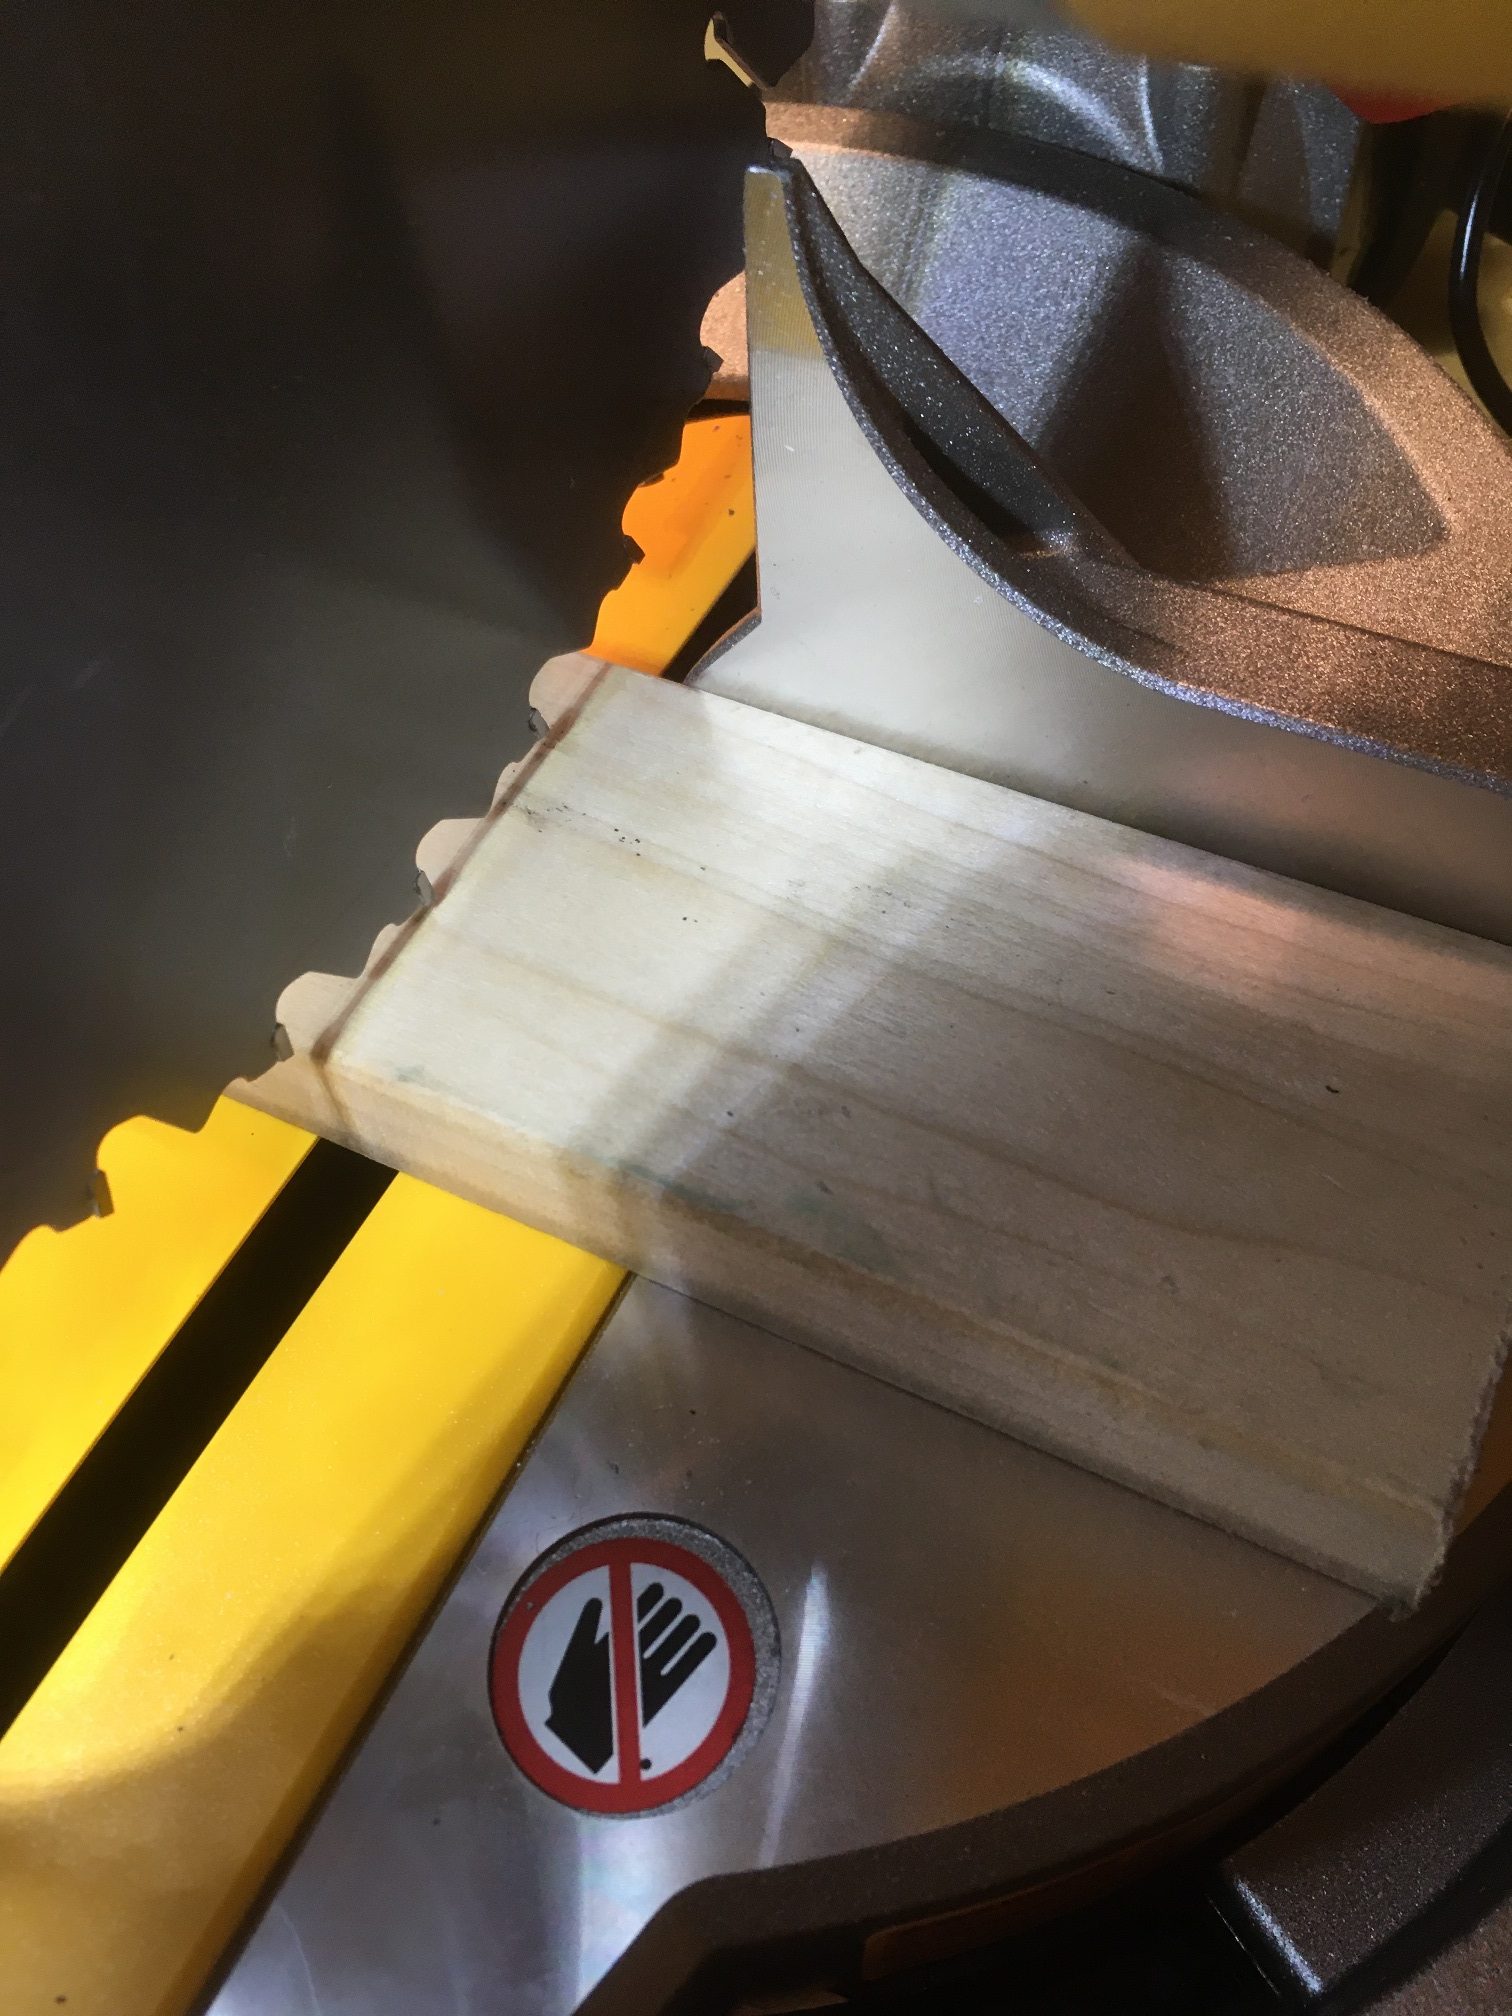
This temporary setup produced a nice cut line shadow as shown below
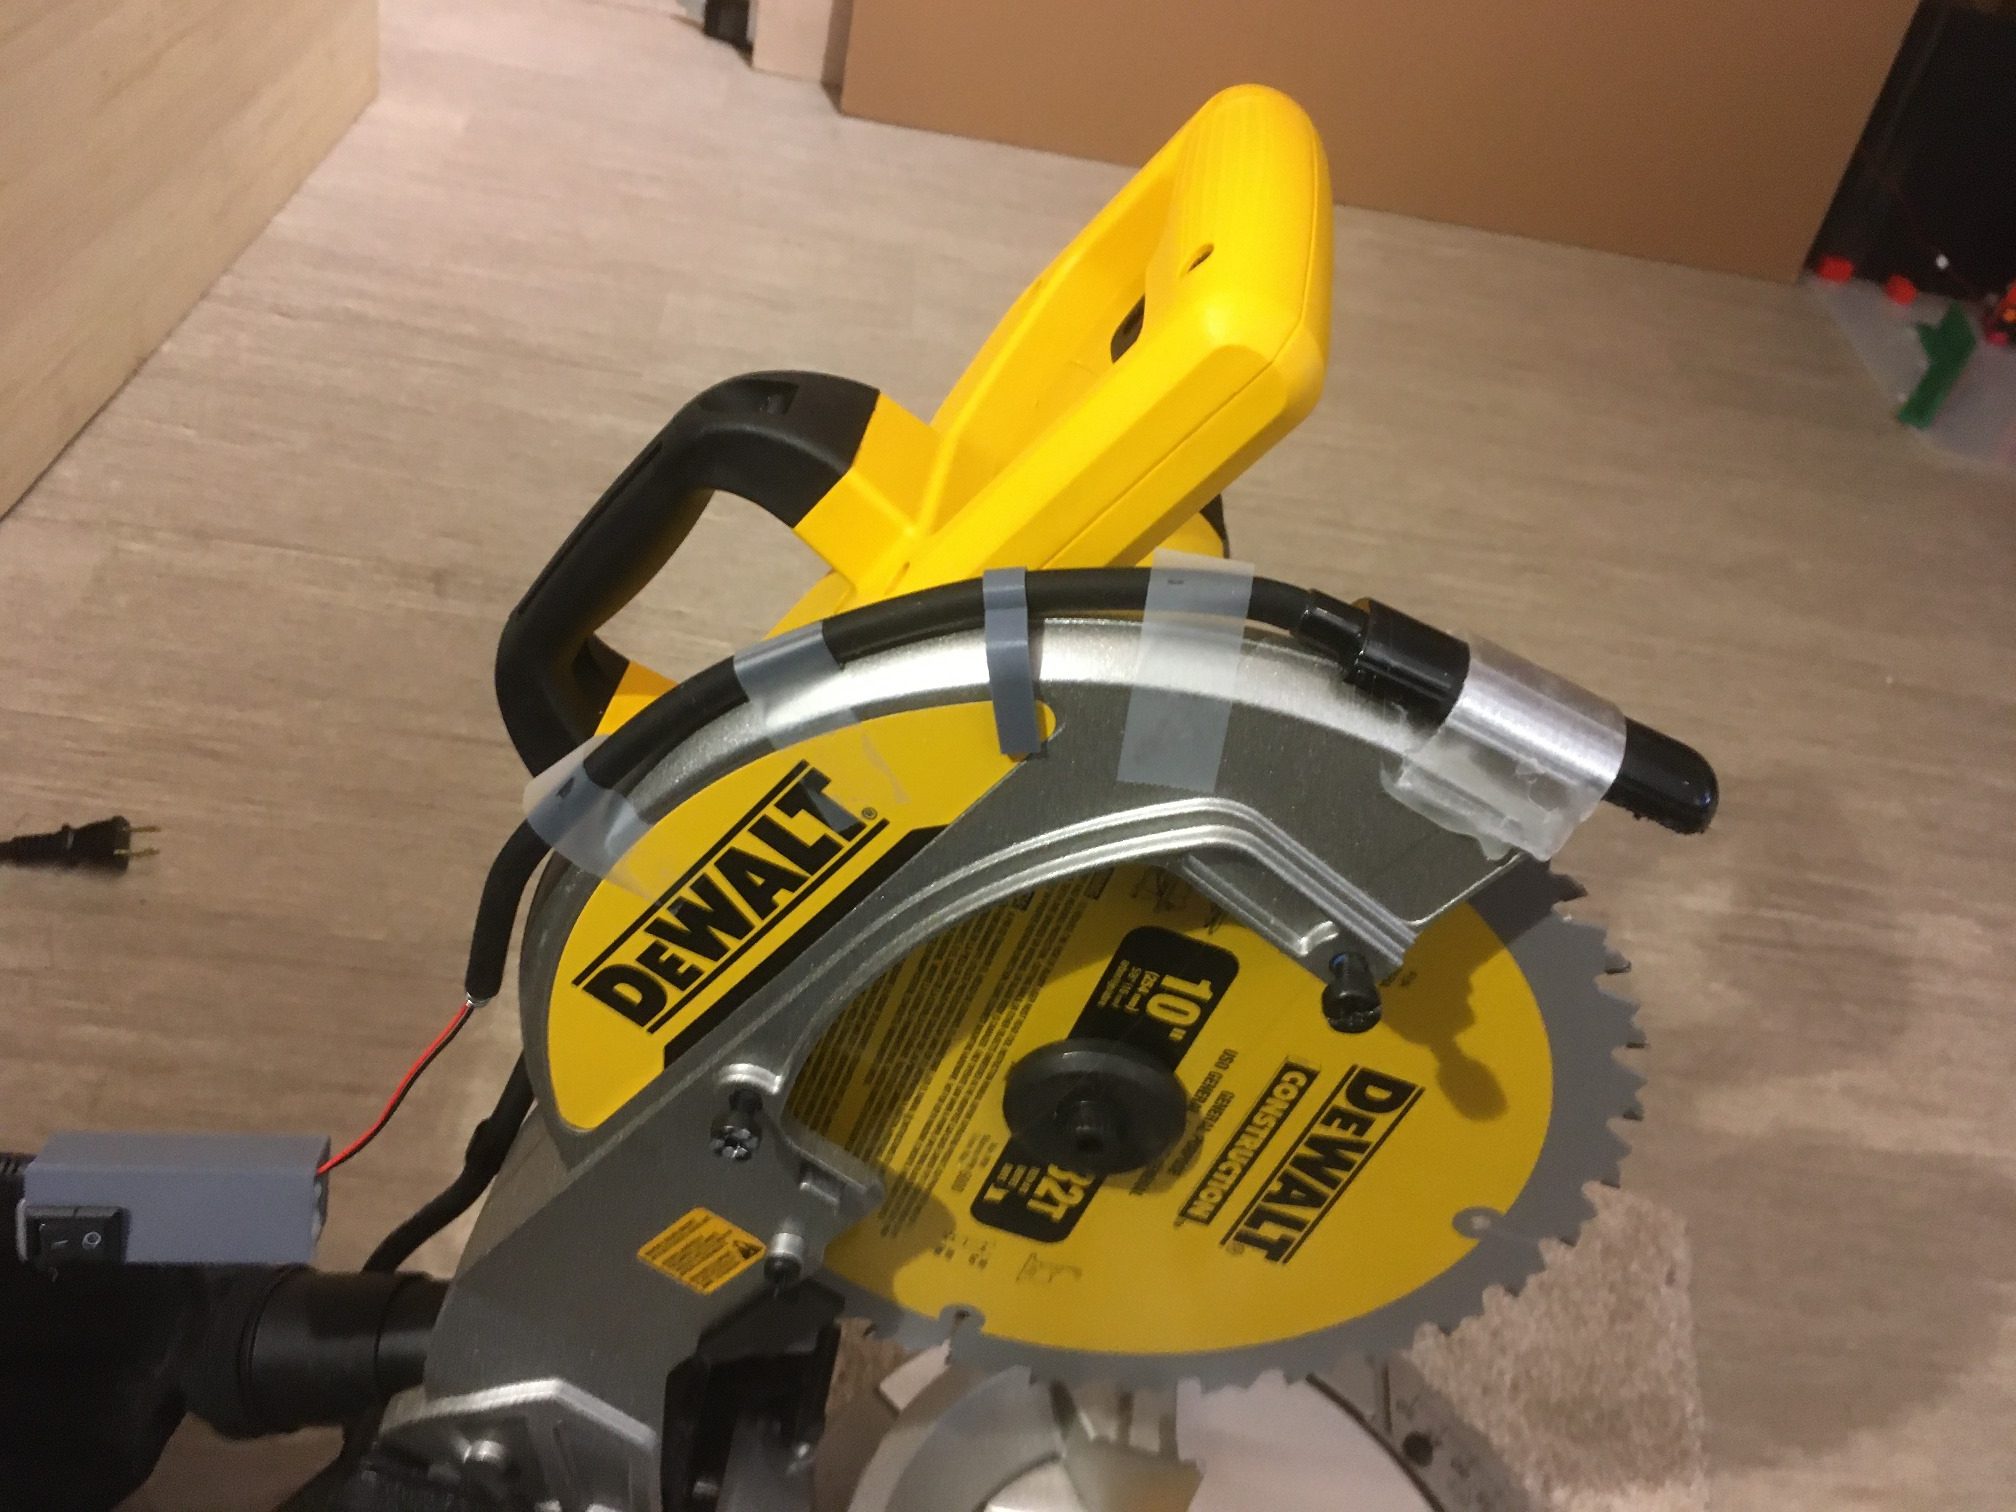
The photo below shows the completed assembly, with the gooseneck attached to the blade housing via a 3D-printed gooseneck retainer clip and two 3mm machine screws (the blade housing was drilled & tapped for 3mm), and the control housing mounted to the rear of the blade housing.

The final product seems to work fairly well, as demonstrated in the following photo
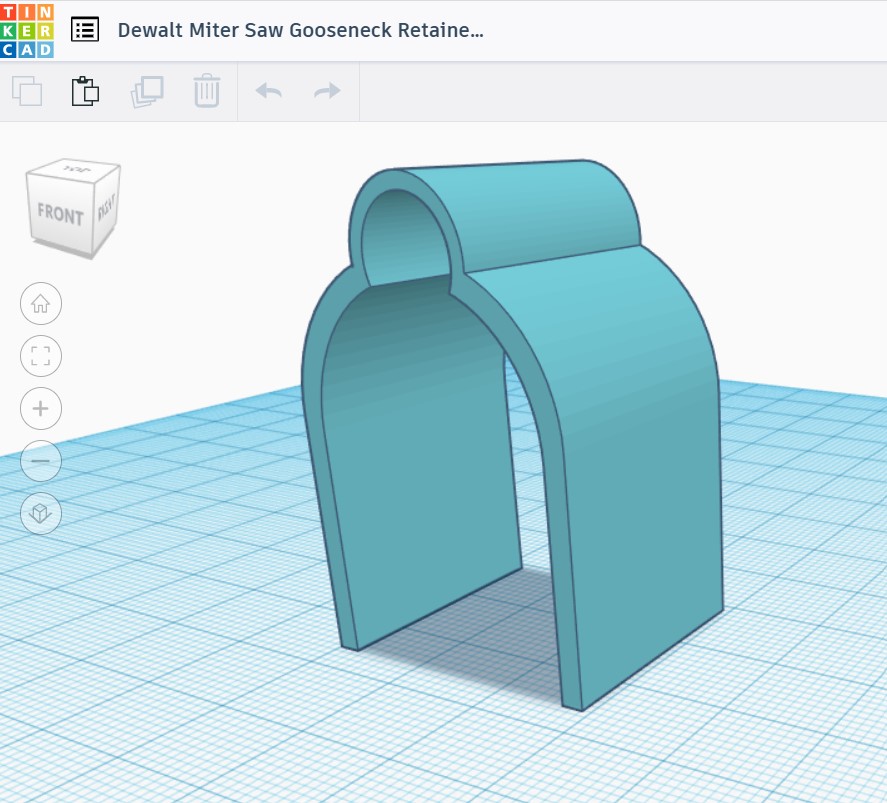
Here is a photo of the 3D-printed gooseneck retainer clip
I used hot glue to temporarily attach the clip to the blade housing, and then drilled through the clip and into the housing with a 3mm tap drill. Then I removed the clip, tapped the housing for a 3mm screw, and then re-drilled the clip for a 3mm clearance hole, then re-assembled using 2ea 3mm x 6mm machine screws.
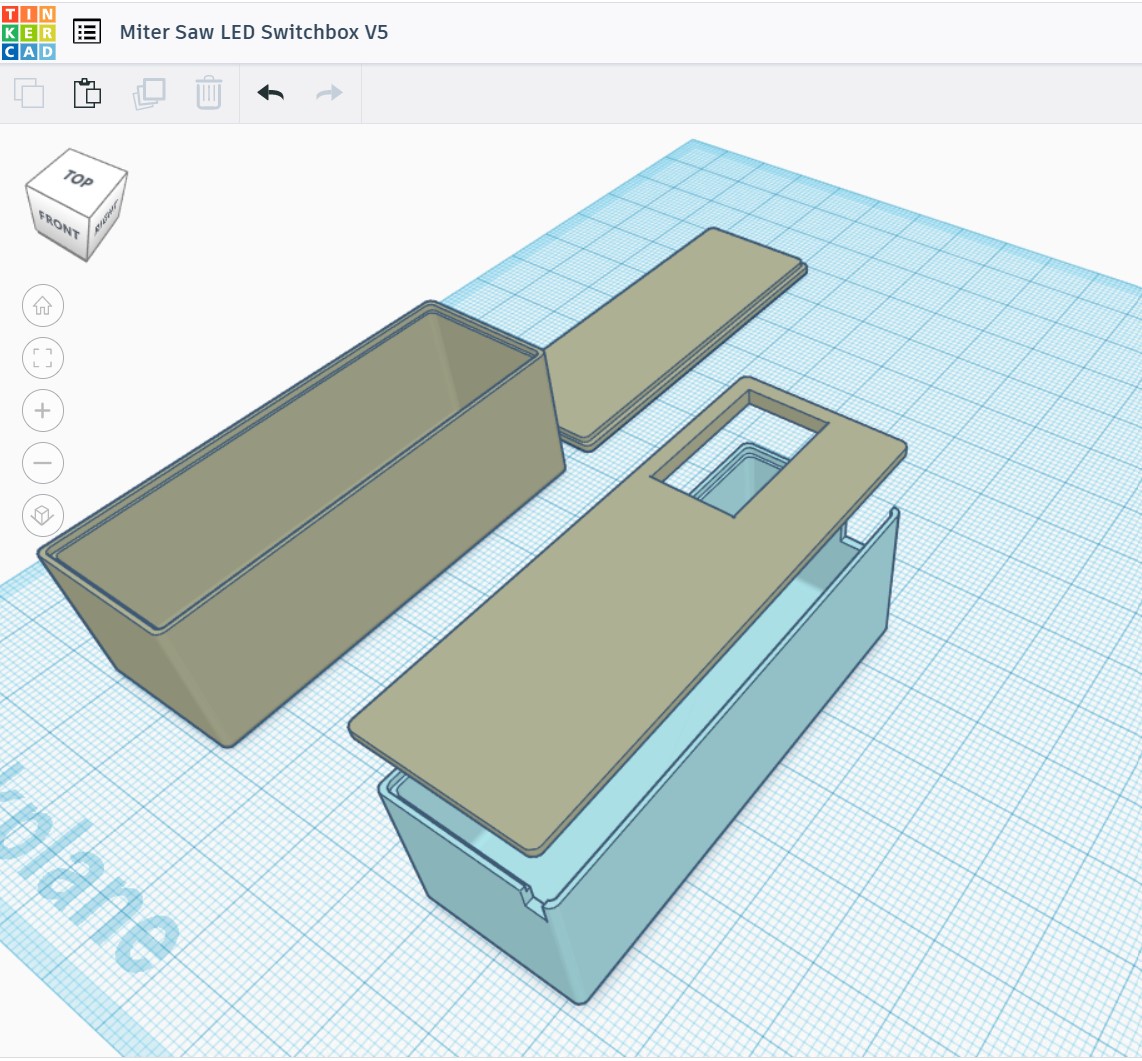
Here is a screenshot showing the rounded-corner enclosure I designed to hold the ON/OFF switch and the AC/DC converter
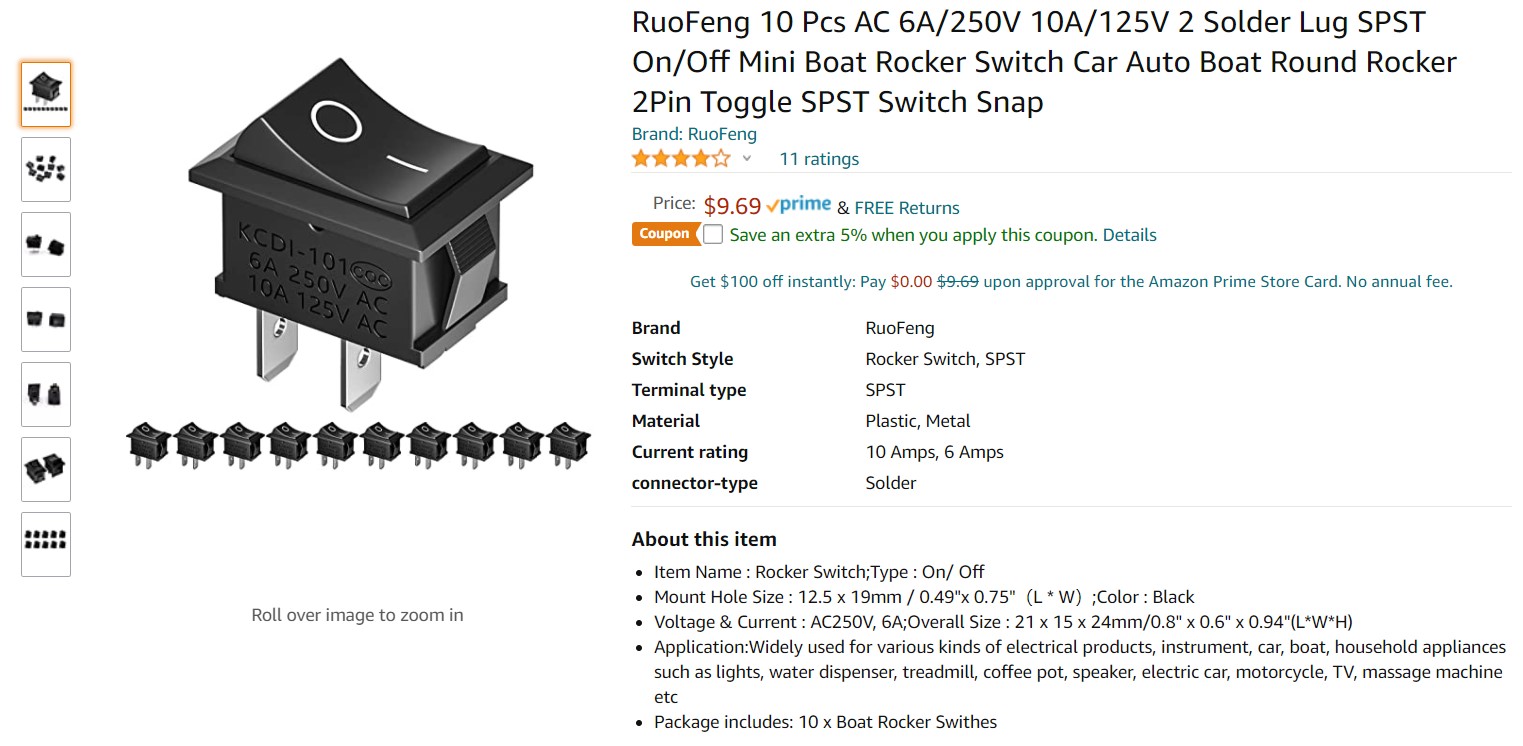
Because I managed to screw up the original ON/OFF switch, I used this switch I had in my parts bin, from an earlier project
All the 3-D printable parts are on Thingiverse here.
27 October 2021 Update:
While changing blades the other day, I noticed that the front LED lamp holder had come loose from the top of the blade guard – the hot glue attachment of the holder had detached from the metal. So, I printed up a new lamp holder with longer sides and this time attached it with 3mm screws to 3mm tapped holes in the blade guard, as shown in the following photo: