Posted 08 March 2026
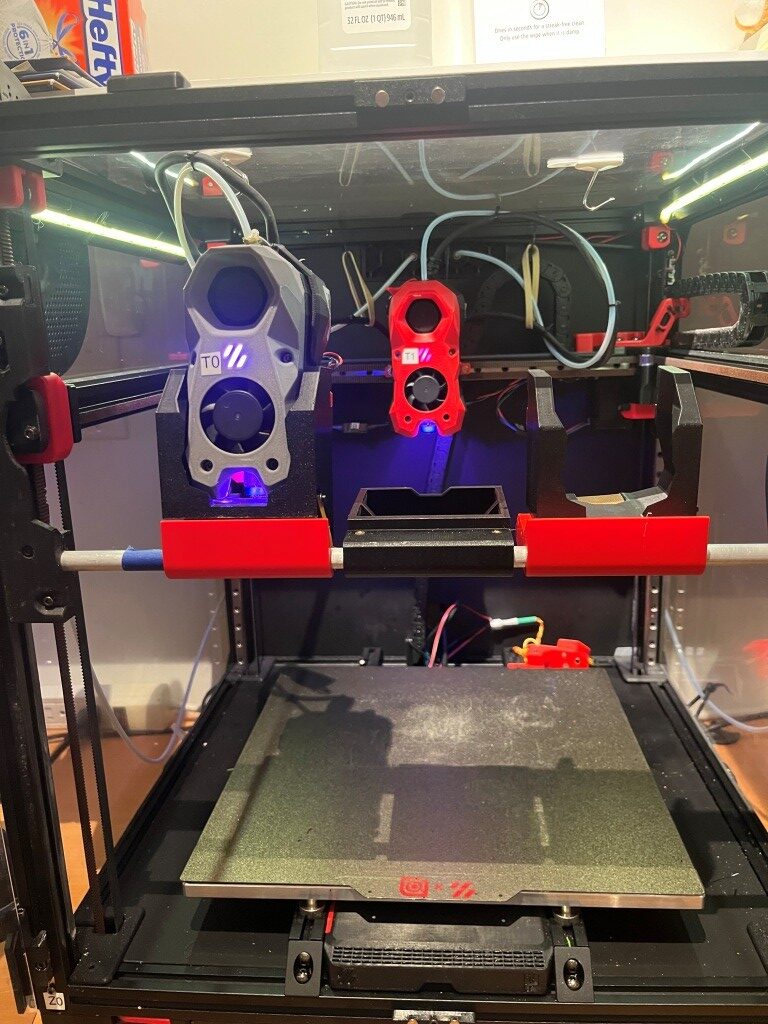
I’m still having problems (see also this post) with the Neopixel LED string on my T1 (red) Stealthburner toolhead. It stops working, then I wiggle some wires on the toolhead and it starts working again – temporarily.
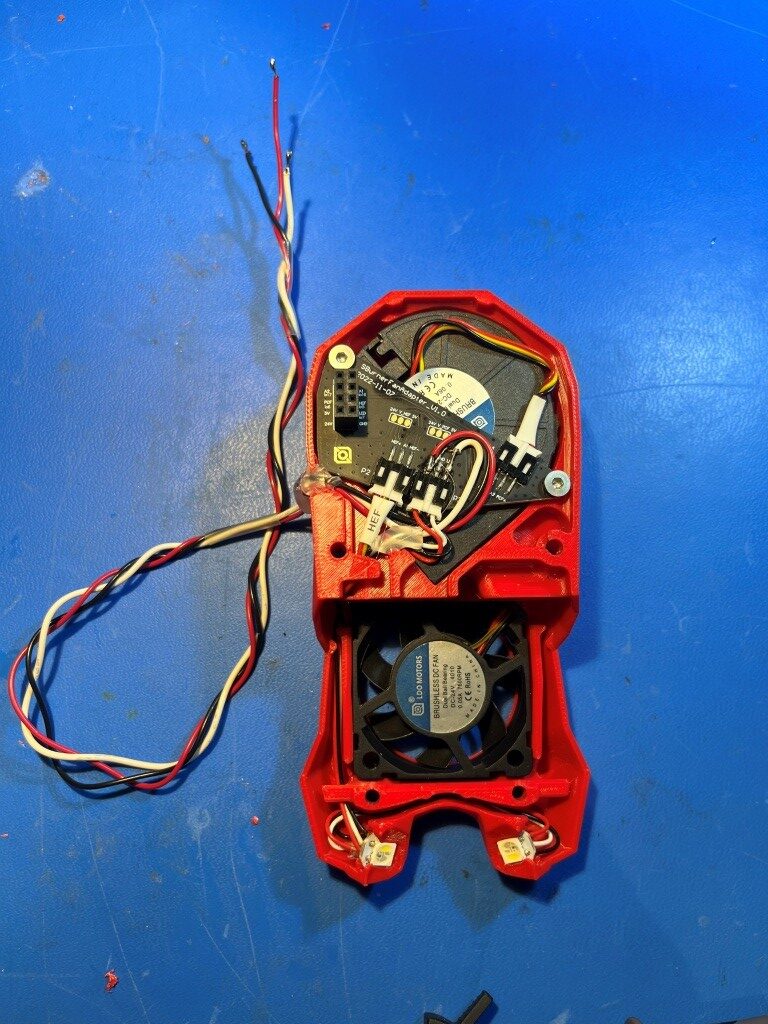
To start the troubleshooting process, I swapped just the front part of my two stealthburner toolheads. The T0 (grey) Neopixel installation works fine on the T1 (red) body, but the T1 (red) Neopixel installation does not work on the T0 (grey) body, indicating that the problem is isolated to the T1 (red) Neopixel installation.
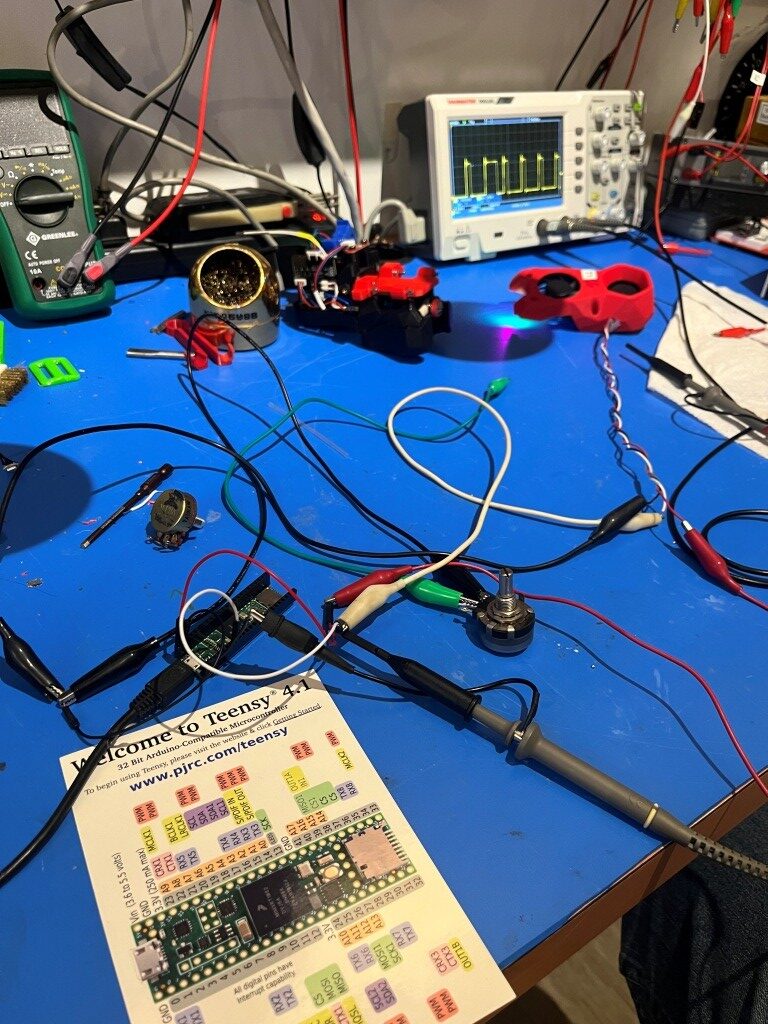
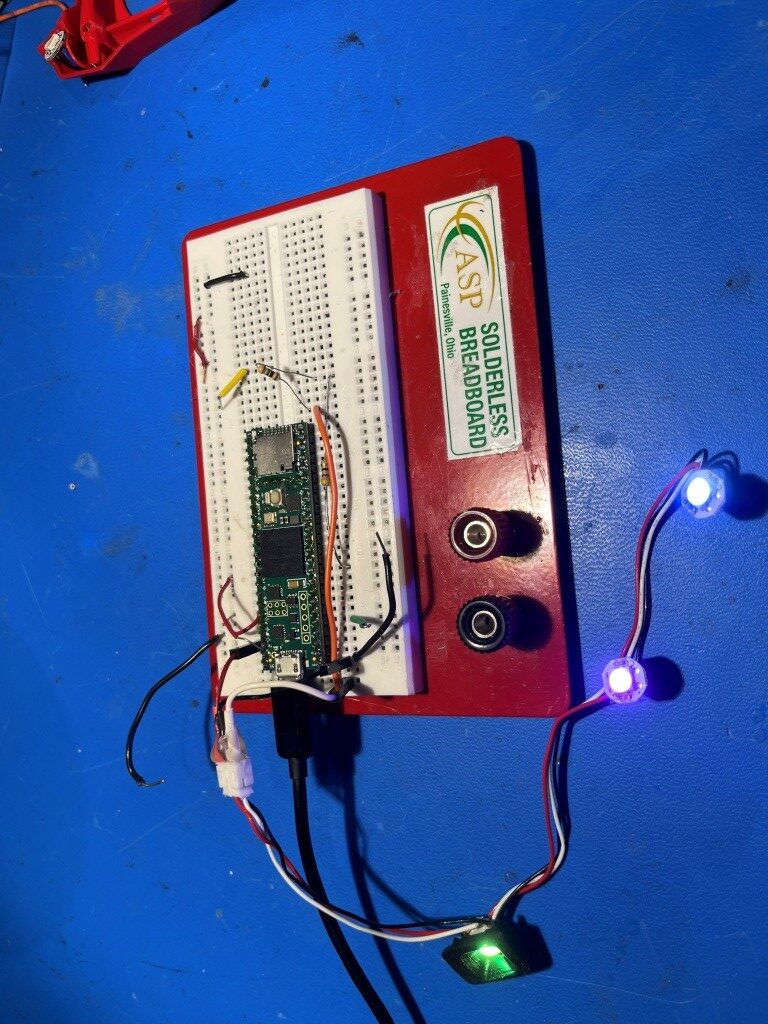
In a previous post I described connecting the string to a Teensy 4.1 using an AdaFruit Neopixel test program, so I dug out the Teensy 4.1 and the 3-pin 2.0mm male JST plug adaptor from this post, and connected the Teensy to the T1 (red) Neopixel string by disconnecting the Neopixel JST connector from the ‘SBurner Fan Adaptor V1’ and then connecting it to the Teensy via the 3-pin male JST, as shown in the following photo:

With this setup, the Neopixel string worked perfectly, so the problem is either in the Fan Adaptor board connector, or something else upstream from that. When I swapped just the front parts, I essentially eliminated everything upstream of the Fan Adaptor boar, and by exercising the NeoPixel string via the 3-pin JST connector I eliminated everything downstream of the Fan Adaptor module, leaving just the module itself. Plugged T1 (red) back into its toolhead 8-pin connector and everything worked! Came back this morning and turned on the printer; now the T1 LED’s are dead again.
It looks like this is one of those intermittent issues that just don’t go away. At this point I suspect that the 8-pin inter-board connector is the real issue, and I’m not sure there is anything to be done about it. If this is in fact the case, then it is the female half on the Fan Adaptor board that is faulty, as the T0 (gray) toolhead front module works fine when plugged into the T1 (red) main body.
22 March 2026 Update:
Still having problems with my T1 toolhead LED string; sometimes it will turn on when the printer powers up, but mostly not. As before, the T0 toolhead LED string works fine on the T1 toolhead, but the T0 string won’t work on either one. After consulting with Grok some more, I began to suspect the problem was in the female connector half of the two-PCB board arrangement that connects the toolhead body to the part that contains the two fans and the LED string, so I ordered a new set from West 3D.
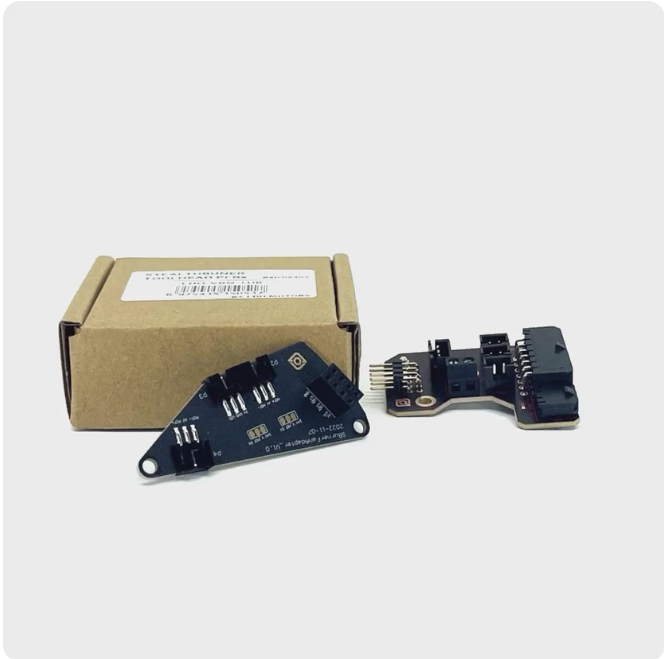
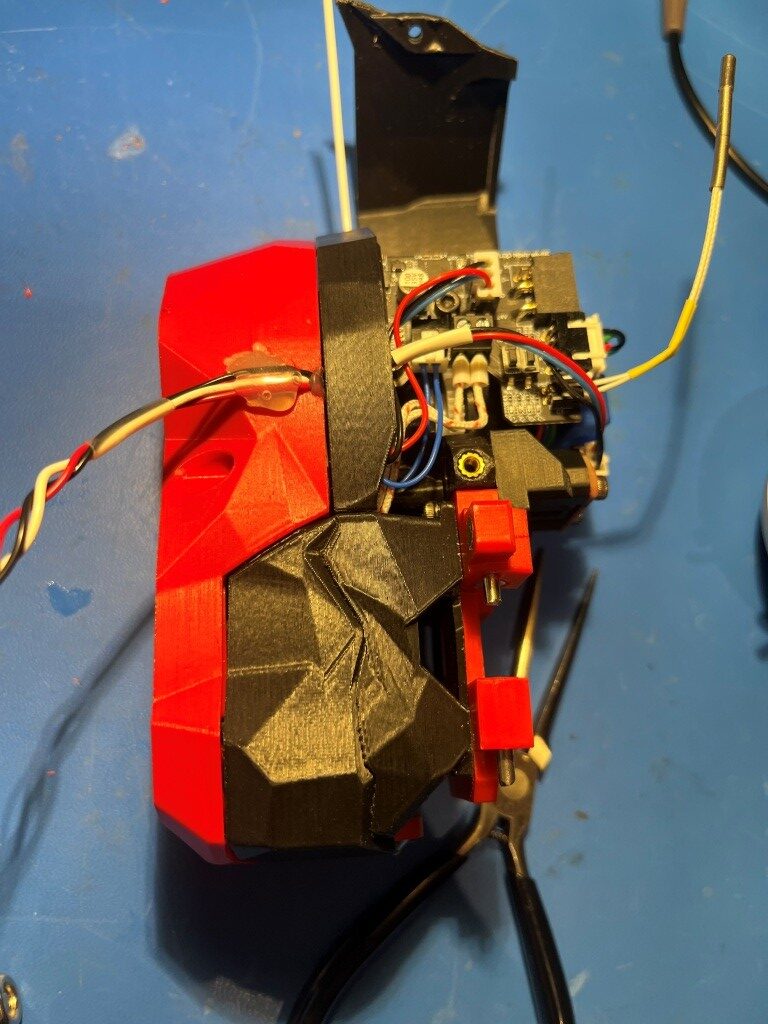
I was a more than a little miffed when I realized I had ordered the wrong part – this set of boards is for the CANbus umbilical configuration, but fortunately the ‘Fan Adaptor’ PCB (left-hand PCB in the above image) is identical in both versions. Unfortunately when I replaced the existing PCB with this one, the problem didn’t go away – bummer! At this point I had pretty much eliminated everything except possibly the LED string itself (although I have replaced it twice with no change in the symptoms. To reiterate the current situation:
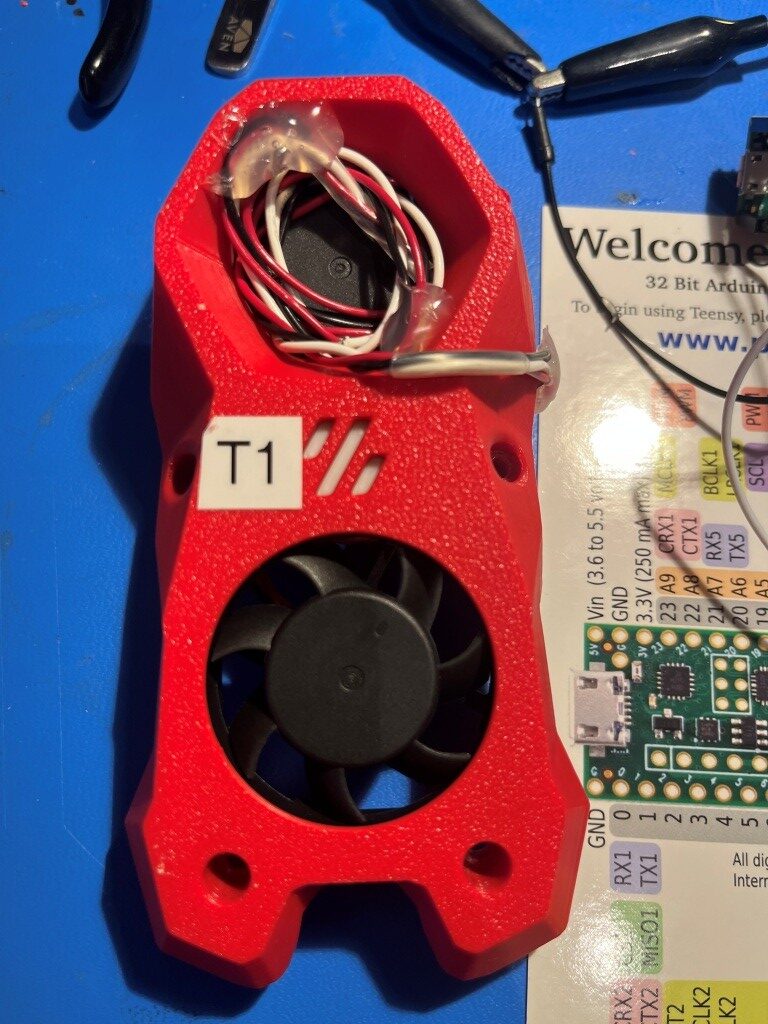
I have two Stealthburner toolheads each consisting of a body containing the extruder mechanics and the RP2040 driver PCB, and a ‘front half’ containing two cooling fans, the LED string and a daughter board that connects to the RP2040 PCB via an 8-pin push-on connector. The T0 ‘front half’ is colored gray, and the T1 ‘front half’ is colored red.
- The T0 (gray) front half LED string works fine when installed on either the T0 or T1 body, while the T1 (red) front half LED string doesn’t work when connected to either the T0 or T1 body. This eliminates the T1 body as the source of the problem
- Replacing the T1 (red) front half ‘Fan Adaptor’ PCB with the above brand-new item from West 3D did not change the symptoms. T1(gray) front half still works on both toolhead bodies but the T1 (red) front half doesn’t work on either. This eliminates the PCB connector as the culprit, leaving only the T1 LED string.
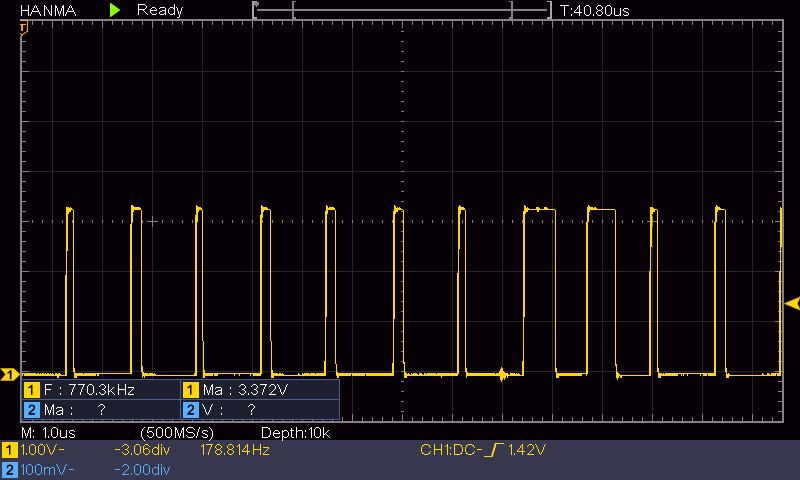
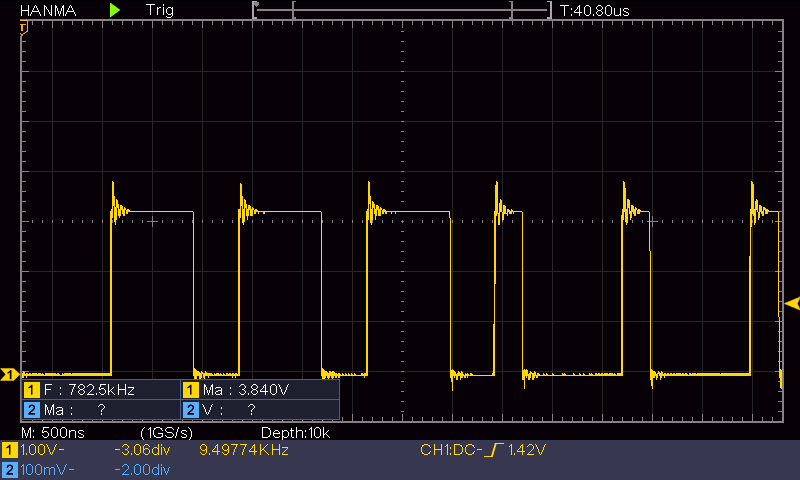
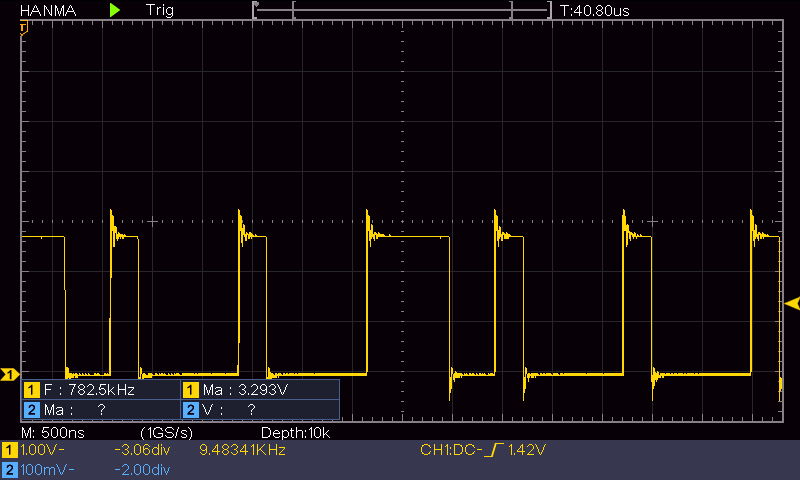
As noted in previous posts on this subject, there have been some issues in the past with intermittent LED strings, caused by some combination of using 3.3V signals from the RP2040 on LED strings meant for 5V and potential ringing on the data line, and Ton/Toff timing variations among different makes of Neopixel chips.
After some more consultation with Grok, I decided I needed a way to determine how well (or poorly) a particular LED string operated over a range of Ton/Toff values. I asked Grok to produce an Arduino program targeting a 600MHz Teensy 4.1 microcontroller to determine the actual operable timing range for a connected Neopixel LED string. Here’s the program Grok came up with (including some tweaks I made to allow for user comment capture during ‘sweep’ mode):
|
1 2 3 4 5 6 7 8 9 10 11 12 13 14 15 16 17 18 19 20 21 22 23 24 25 26 27 28 29 30 31 32 33 34 35 36 37 38 39 40 41 42 43 44 45 46 47 48 49 50 51 52 53 54 55 56 57 58 59 60 61 62 63 64 65 66 67 68 69 70 71 72 73 74 75 76 77 78 79 80 81 82 83 84 85 86 87 88 89 90 91 92 93 94 95 96 97 98 99 100 101 102 103 104 105 106 107 108 109 110 111 112 113 114 115 116 117 118 119 120 121 122 123 124 125 126 127 128 129 130 131 132 133 134 135 136 137 138 139 140 141 142 143 144 145 146 147 148 149 150 151 152 153 154 155 156 |
/* Name: NeoPixelTimingTester.ino Created: 3/21/2026 4:51:43 PM Author: FRANK_XPS_9530\Frank */ #include <Arduino.h> #define DATA_PIN 8 #define NUM_LEDS 3 // Timing (ns) — starting tolerant for your current string uint32_t t0h_ns = 400; uint32_t t1h_ns = 850; uint32_t reset_us = 80; void setup() { pinMode(DATA_PIN, OUTPUT); digitalWriteFast(DATA_PIN, LOW); // Long reset pulse on power-up (matches Adafruit best practices) delayMicroseconds(200); Serial.begin(115200); delay(500); Serial.println("=== Stealthburner NeoPixel Timing Test Jig v2 (fixed timing) ==="); printHelp(); } void printHelp() { Serial.println("Commands:"); Serial.println(" T0H <value> e.g. T0H 320"); Serial.println(" T1H <value> e.g. T1H 780"); Serial.println(" RESET <value> e.g. RESET 100"); Serial.println(" WHITE / RED / GREEN / BLUE / RAINBOW / CHECKER"); Serial.println(" SWEEP"); Serial.println("Current: T0H=" + String(t0h_ns) + " ns | T1H=" + String(t1h_ns) + " ns | Reset=" + String(reset_us) + " µs"); } void sendBit(bool isOne) { uint32_t high_ns = isOne ? t1h_ns : t0h_ns; digitalWriteFast(DATA_PIN, HIGH); delayNanoseconds(high_ns); digitalWriteFast(DATA_PIN, LOW); delayNanoseconds(180); // short low time (total bit ≈ 1.03–1.03 µs) } void sendPixel(uint32_t grbw) // GRBW order for Stealthburner SK6812 RGBW { for (int i = 31; i >= 0; i--) { sendBit(grbw & (1UL << i)); } } void setAll(uint32_t color) { for (int i = 0; i < NUM_LEDS; i++) { sendPixel(color); } delayMicroseconds(reset_us); } void loop() { if (Serial.available()) { String cmd = Serial.readStringUntil('\n'); cmd.trim(); cmd.toUpperCase(); if (cmd.startsWith("T0H ")) { t0h_ns = cmd.substring(4).toInt(); } else if (cmd.startsWith("T1H ")) { t1h_ns = cmd.substring(4).toInt(); } else if (cmd.startsWith("RESET ")) { reset_us = cmd.substring(6).toInt(); } else if (cmd == "WHITE") { setAll(0x000000FF); // full white channel Serial.println("→ All White"); } else if (cmd == "RED") { setAll(0x00FF0000); Serial.println("→ All Red"); } else if (cmd == "GREEN") { setAll(0xFF000000); Serial.println("→ All Green"); } else if (cmd == "BLUE") { setAll(0x0000FF00); Serial.println("→ All Blue"); } else if (cmd == "RAINBOW") { sendPixel(0xFF000000); sendPixel(0x00FF0000); sendPixel(0x0000FF00); delayMicroseconds(reset_us); Serial.println("→ Rainbow pattern"); } else if (cmd == "CHECKER") { setAll(0x00AA00AA); Serial.println("→ Checker stress pattern"); } else if (cmd == "SWEEP") { Serial.println("Starting T1H sweep (T0H fixed @ 400 ns)..."); uint32_t old_t0h = t0h_ns; t0h_ns = 400; for (uint32_t t = 450; t <= 950; t += 25) { t1h_ns = t; setAll(0x000000FF); Serial.printf("T1H = %d ns\n", t); //delay(400); while (Serial.available() == 0) { // Do nothing, just wait } // Read the input as a string String userInput = Serial.readStringUntil('\n'); userInput.trim(); // Remove spaces/newlines Serial.print("You entered: "); Serial.println(userInput); } t0h_ns = old_t0h; Serial.println("Sweep finished"); } else { Serial.println("Unknown command."); } printHelp(); } } |
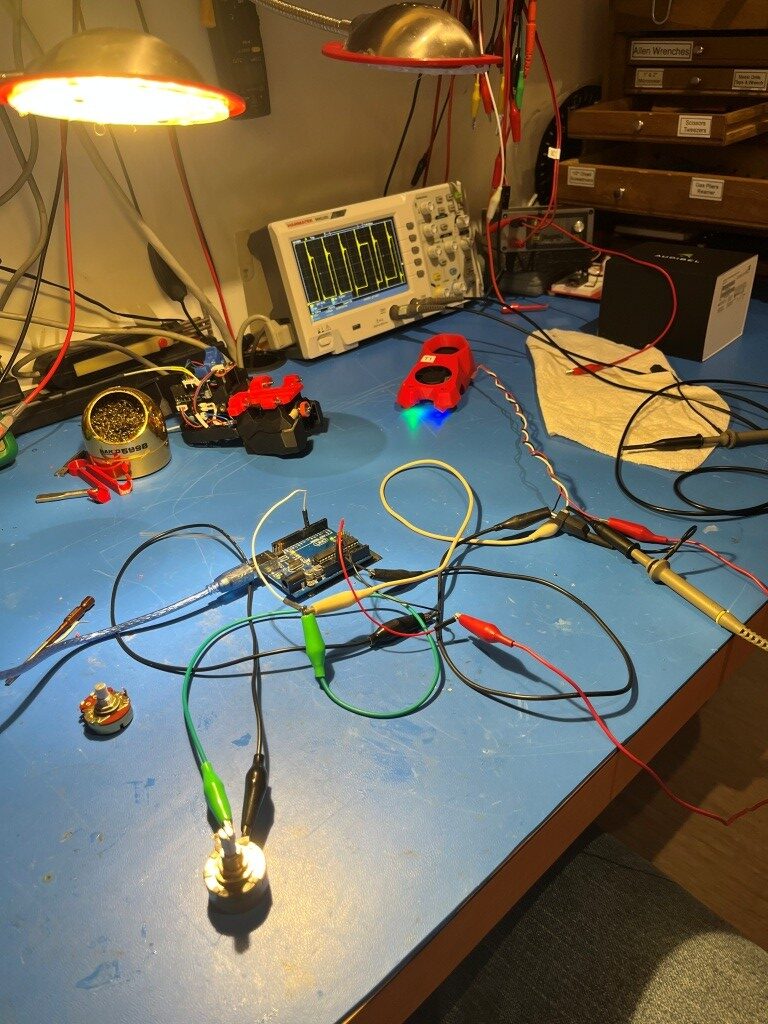
And here is a photo of the hardware setup:
When I performed a ‘sweep’ of the above LED string, I got the following output:
|
1 2 3 4 5 6 7 8 9 10 11 12 13 14 15 16 17 18 19 20 21 22 23 24 25 26 27 28 29 30 31 32 33 34 35 36 37 38 39 40 41 42 43 44 45 46 47 48 49 50 51 52 53 54 55 56 57 58 59 60 61 62 63 64 65 66 67 68 69 |
Opening port Port open === Stealthburner NeoPixel Timing Test Jig v2 (fixed timing) === Commands: T0H <value> e.g. T0H 320 T1H <value> e.g. T1H 780 RESET <value> e.g. RESET 100 WHITE / RED / GREEN / BLUE / RAINBOW / CHECKER SWEEP Current: T0H=400 ns | T1H=850 ns | Reset=80 µs → Rainbow pattern Commands: T0H <value> e.g. T0H 320 T1H <value> e.g. T1H 780 RESET <value> e.g. RESET 100 WHITE / RED / GREEN / BLUE / RAINBOW / CHECKER SWEEP Current: T0H=400 ns | T1H=850 ns | Reset=80 µs Starting T1H sweep (T0H fixed @ 400 ns)... T1H = 450 ns You entered: LED0 off, LED1 off, LED2 bright white T1H = 475 ns You entered: LED0 off, LED1 off, LED2 bright white T1H = 500 ns You entered: LED0 off, LED1 off, LED2 bright white T1H = 525 ns You entered: LED0 faint white, LED1 off, LED2 bright white T1H = 550 ns You entered: LED0 bright white, LED1 bright white, LED2 bright white T1H = 575 ns You entered: LED0 bright green, LED1 bright green, LED2 bright green T1H = 600 ns You entered: LED0 bright green/white, LED1 bright green, LED2 bright green/white T1H = 625 ns You entered: LED0 bright green/white, LED1 bright green/white, LED2 bright green/white T1H = 650 ns You entered: LED0 bright green/white, LED1 bright green/white, LED2 bright green/white T1H = 675 ns You entered: LED0 bright green/white, LED1 bright green/white, LED2 bright green/white T1H = 700 ns You entered: LED0 bright green/white, LED1 bright green/white, LED2 bright green/white T1H = 725 ns You entered: LED0 bright green/white, LED1 bright green/white, LED2 bright green/white T1H = 750 ns You entered: LED0 bright green/white, LED1 bright green/white, LED2 bright green/white T1H = 775 ns You entered: LED0 bright green/white, LED1 bright green/white, LED2 bright green/white T1H = 800 ns You entered: LED0 bright green/white, LED1 bright green/white, LED2 bright green/white T1H = 825 ns You entered: LED0 bright green/white, LED1 bright green/white, LED2 bright green/white T1H = 850 ns You entered: LED0 bright green/white, LED1 bright green/white, LED2 bright green/white T1H = 875 ns You entered: LED0 bright green/white, LED1 bright green/white, LED2 bright green/white T1H = 900 ns You entered: LED0 bright green/white, LED1 bright green/white, LED2 bright green/white T1H = 925 ns You entered: LED0 bright green/white, LED1 bright green/white, LED2 bright green/white T1H = 950 ns You entered: LED0 bright green/white, LED1 bright green/white, LED2 bright green/white Sweep finished Commands: T0H <value> e.g. T0H 320 T1H <value> e.g. T1H 780 RESET <value> e.g. RESET 100 WHITE / RED / GREEN / BLUE / RAINBOW / CHECKER SWEEP Current: T0H=400 ns | T1H=950 ns | Reset=80 µs |
According to Grok, this output shows a ‘good’ LED string, and sure ’nuff, when I re-installed this string into my T1(red) toolhead, darned if it didn’t work!
27 March 2026 Update:
It’s been several days now since I got my recalcitrant toolhead LED string working, and so far, so good. I have turned the printer on and off several times, and even made several prints (with T0 rather than T1, but both toolhead LED strings always light up when power is applied to the printer, and I have been able to exercise the T1 LED string using the printer control panel). In the meantime, based on Grok’s recommendation I ordered two more LED strings from Fabreeko, as they seem to have the gold standard reputation for Stealthburner LED strings. However, when they arrived, they looked identical to one I had gotten some time ago from Amazon as shown below
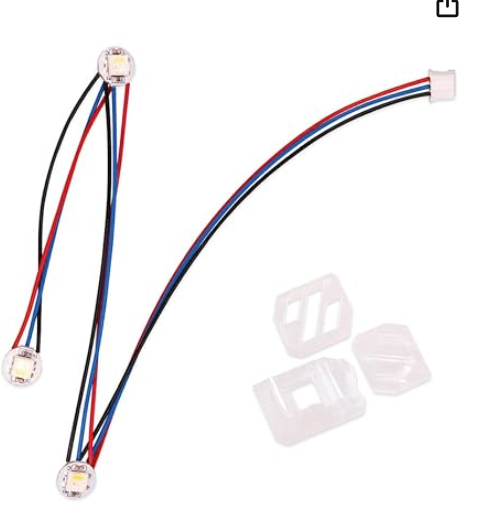
Cheap knock-offs from Amazon
and in fact had the same defect as the Amazon knockoffs – the GND and Data_In wires were reversed on the 3-pin JST. Not only that, but even after correcting the pin-reversal issue, they did not perform well (or even at all) when tested using Grok’s Tstart/Tstop sweep program. It was hard to avoid the suspicion that Fabreeko was simply buying their strings from Amazon and reselling them as their own. Needless to say I returned them for credit.
So, currently I have working NeoPixel strings on both T0 & T1 toolheads, but no backup if one fails (again), and no known-good ordering source. Perhaps Grok can guide me on this (although it was Grok that recommended Fabreeko).
All for now – stay tuned.
Frank