Posted 15 January 2023
I currently use two 3-element arrays of ST Micro’s VL53L0X ‘time of flight’ distance sensors to determine my robot’s orientation with respect to a nearby wall. In a reply to a recent post of mine on the ST Micro Forum, St Micro guru John Kvam suggested that a single VL53L5CX sensor might take the place of all three VL53L0X’s – wow!
So, I’m currently at a stopping place on my mainline robot work (managed to kill a Teensy 3.5, and new ones are a few days out), I decided to take some time to study how the VL53L5CX module performs in detecting the parallel orientation condition.
John was kind enough to send me some experimental code – albeit with the warning that ‘some study would be required’ to see how it all works, so I’ll be working my way through the example code while also looking through the V
I started this adventure by downloading the Sparkfun VL53L5CX library and looking at some of the examples. I was going to buy a couple of the SparkFun breakout boards as I like supporting their library development, but then I saw that I was going to have to pay about $11 (about 1/3 the cost of a single module) just for shipping! Now I know I’ve lost a mental step or two over the last few decades, but even I know that shipping a postage-stamp sized module can be accomplished via USPS for a dollar or two at the most, so I have some issues with a 10X profit margin just for shipping. Talk about ‘hidden fees’! So instead I purchased ST Micro’s eval kit (which contains 2ea modules) from DigiKey for about the price of one Sparkfun module, and shipping was about 1/4 the Sparkfun price.
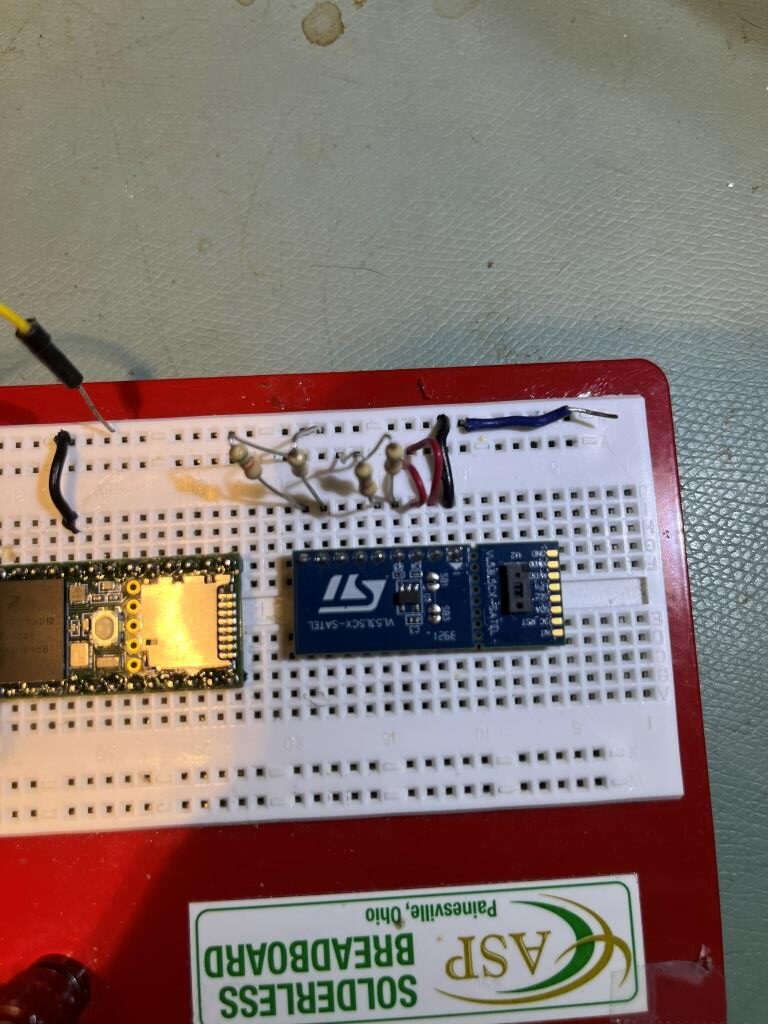
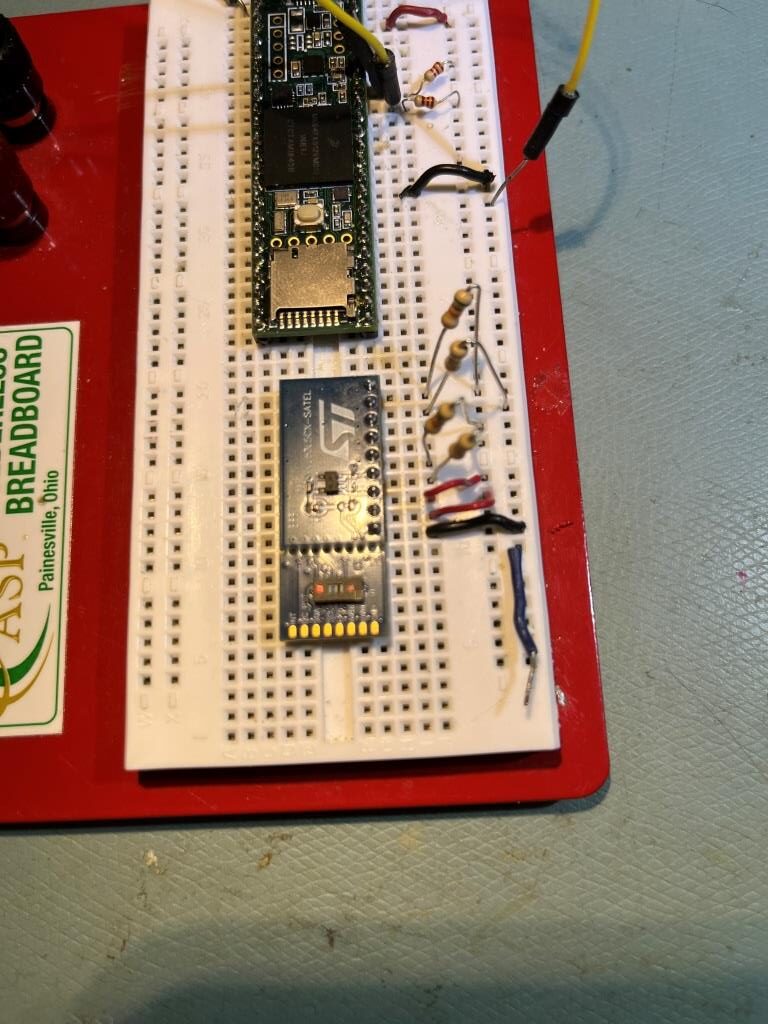
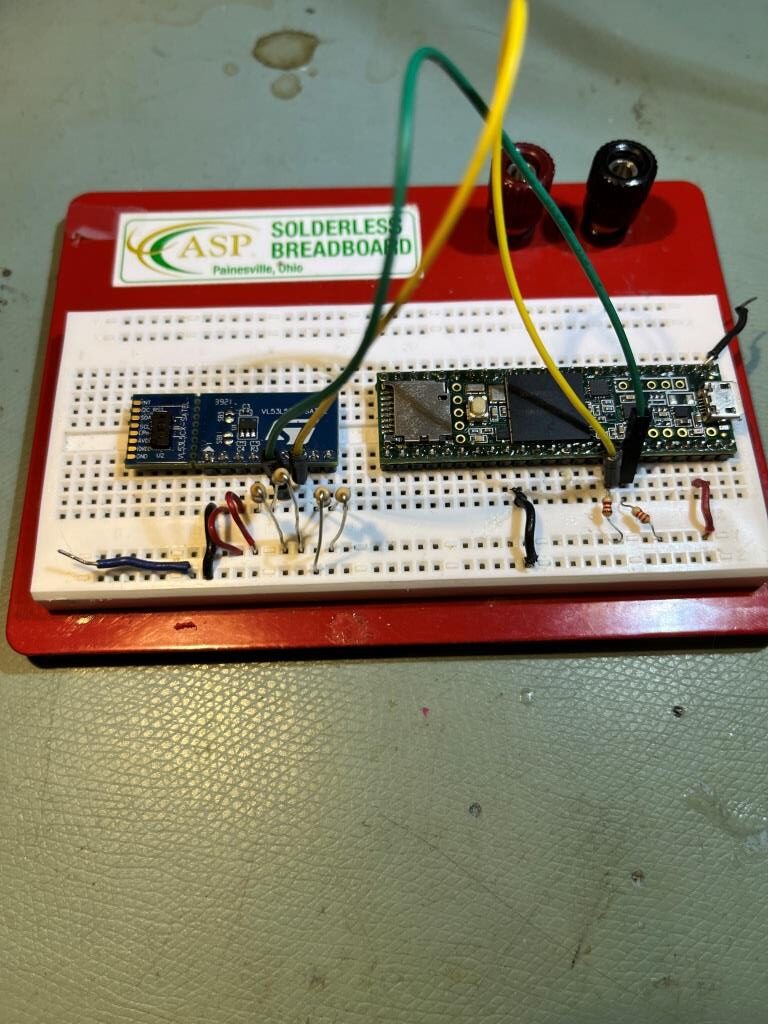
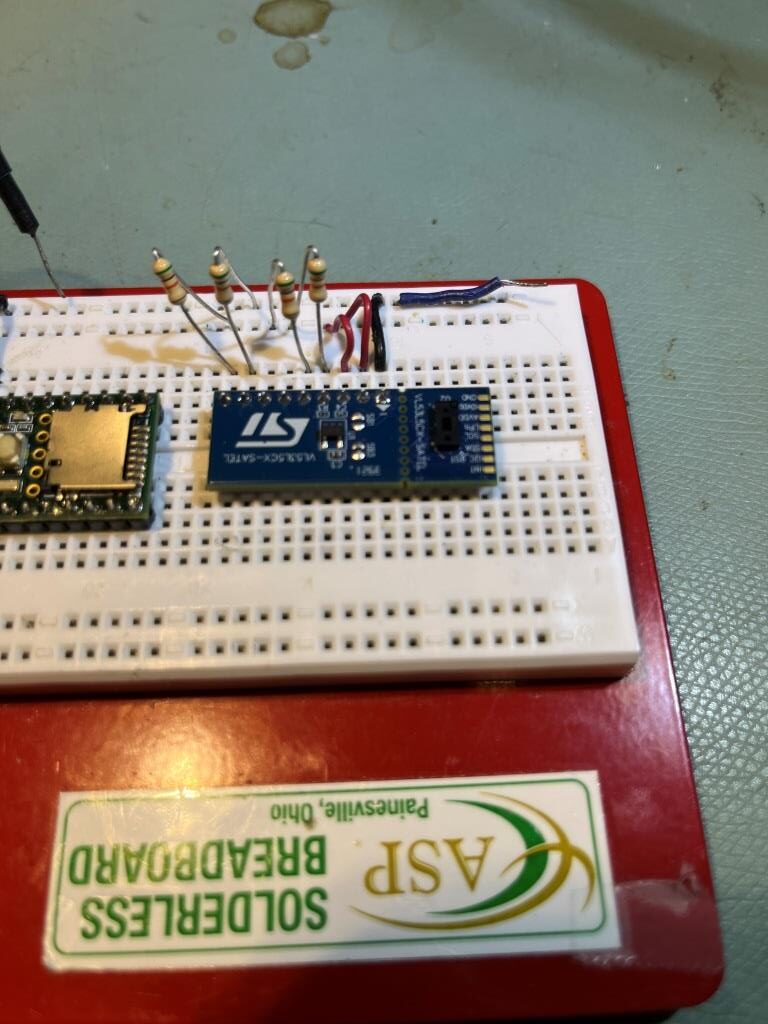
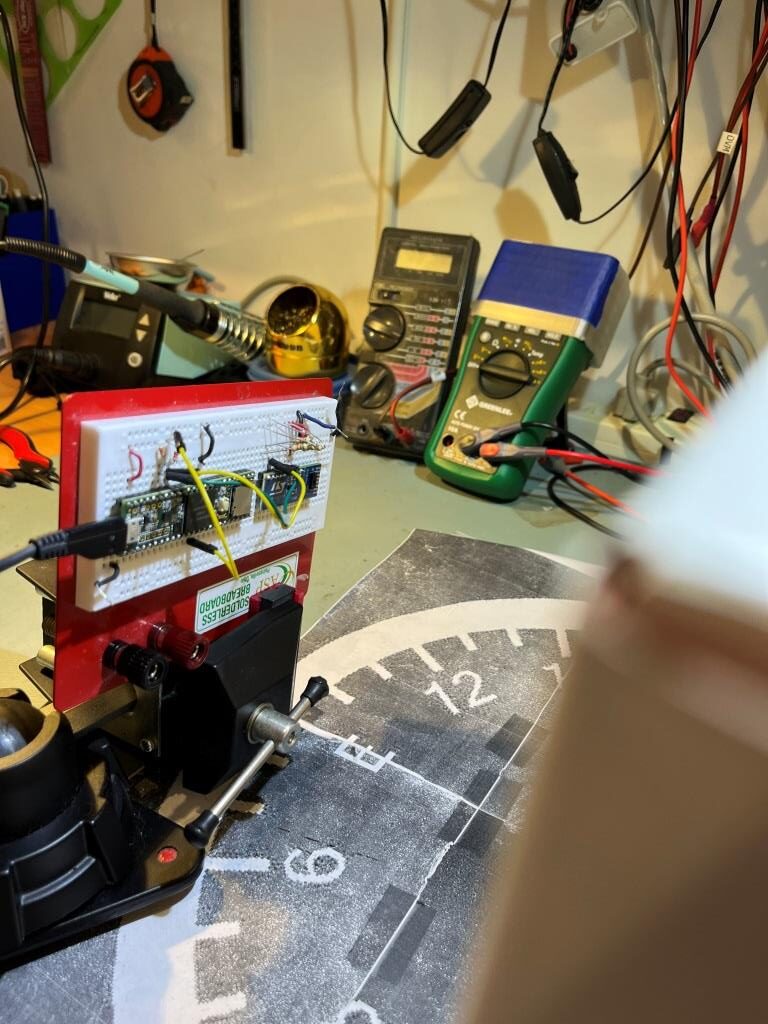
After receiving the modules, I hooked it up to a Teensy 3.5 as shown below. I wasn’t able to find any information about how to wire this unit to an Arduino (ST’s information assumes you have a NUCLEO board), so I had to kind of piece information together from multiple sources. I used Sparkfun’s schematic (I used 51K instead of 47K resistors) and connected PWREN (power enable) to 3.3V via a 51K.

Then I loaded Sparkfun’s Example1 code, which simply prints out the values from all 64 zones in a timed loop. Here is some representative output:
|
1 2 3 4 5 6 7 8 9 10 11 12 13 14 15 16 17 18 19 20 21 22 23 24 25 26 27 28 29 30 31 32 33 34 35 |
222 215 207 198 196 192 189 186 204 197 190 184 183 177 175 171 190 184 179 175 171 169 167 163 175 171 168 163 163 159 157 150 167 165 160 158 156 152 149 144 155 155 151 148 145 145 140 133 147 144 143 141 139 136 132 129 140 135 135 131 130 126 125 123 706 214 203 201 195 190 189 188 206 194 191 184 184 177 174 172 190 182 179 173 170 169 165 162 179 171 168 163 162 158 157 151 167 162 160 155 155 151 147 145 157 154 153 145 145 143 140 134 146 145 143 142 137 136 129 128 141 136 134 132 129 124 125 121 511 217 207 201 193 193 189 187 205 197 192 183 183 179 175 172 187 184 180 176 171 167 168 164 176 172 169 163 161 158 155 150 167 164 162 157 153 153 147 144 157 153 152 146 146 139 140 134 148 143 143 142 138 135 131 128 142 137 135 131 130 126 124 123 584 215 206 201 198 193 189 189 206 193 189 182 182 179 174 170 189 183 177 175 171 168 166 163 177 172 167 165 163 159 155 150 167 164 160 155 154 151 148 145 156 155 150 146 146 142 140 132 148 144 144 140 136 133 131 128 142 136 134 134 129 125 126 122 |
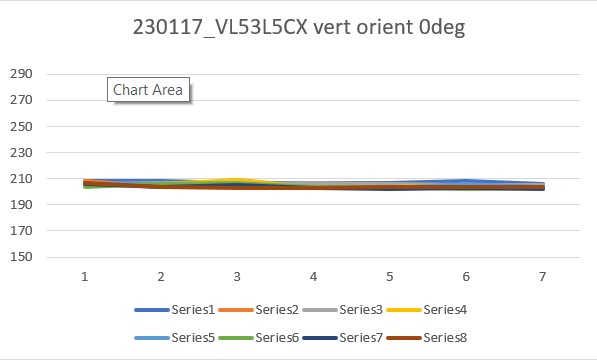
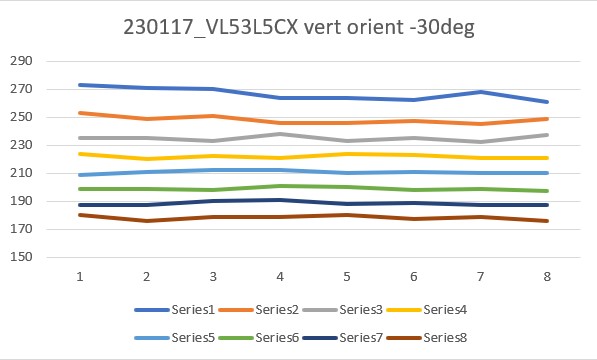
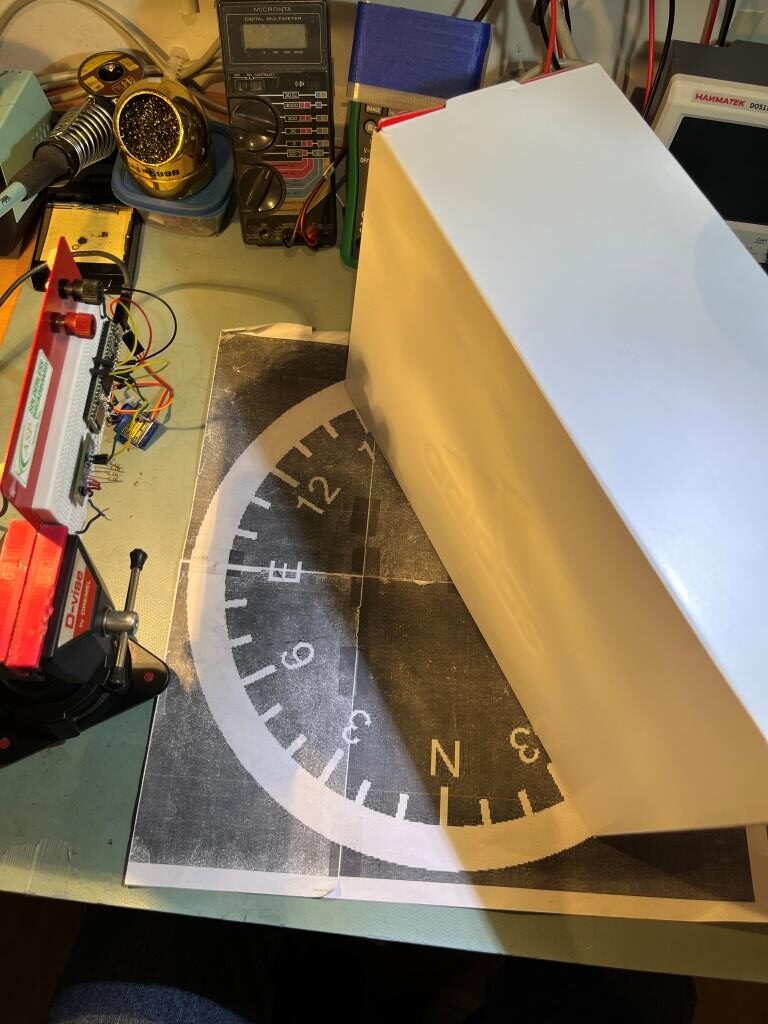
Then I set up an experiment with a nice white planar surface (the shoebox my recent B-ball shoes came in) at a distance of about 16cm, and observed the output for +30º, 0º (parallel), and -30º orientation conditions, as shown in the plots and photos below:
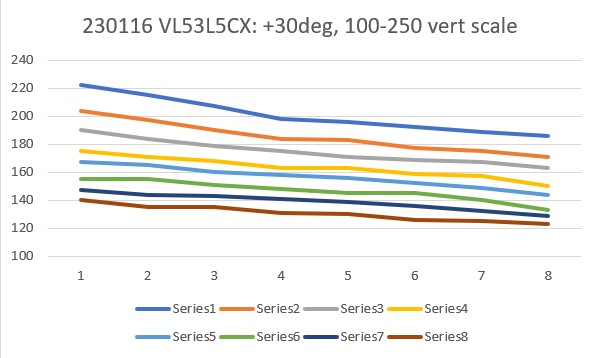
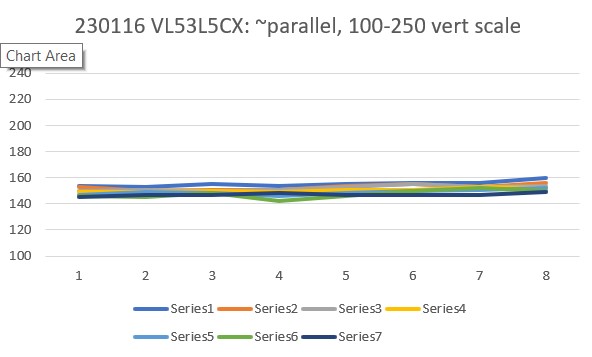
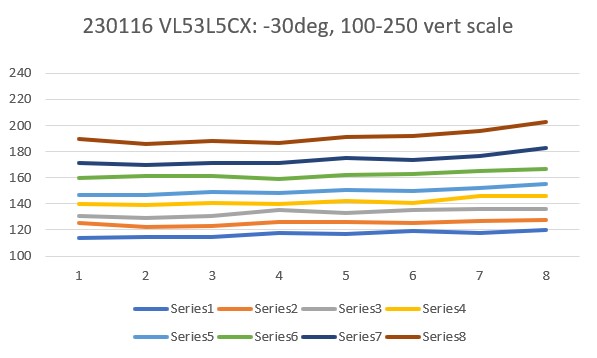
For comparison purposes, all three plots above were plotted on the same scale (100-250). Looking at the blue (Series1) and brown (Series8) lines in each of these plots, it appears that in the +30º orientation, all Series1 points are well above all Series8 plots, and in the -30º orientation the opposite is true – all Series8 points are well above all Series1 points. In the parallel case, all eight series points are crammed together between 140 & 160mm. The physical distance between the sensor and my ‘plane’ (shoebox) was measured at about 165mm, pretty close to the sensor values in the parallel case. So, it looks like it should be pretty easy to discern parallel, +30º, and -30º conditions, and probably reasonable to estimate the +/-10º and +/-20º cases as well.
18 January 2023 Update:
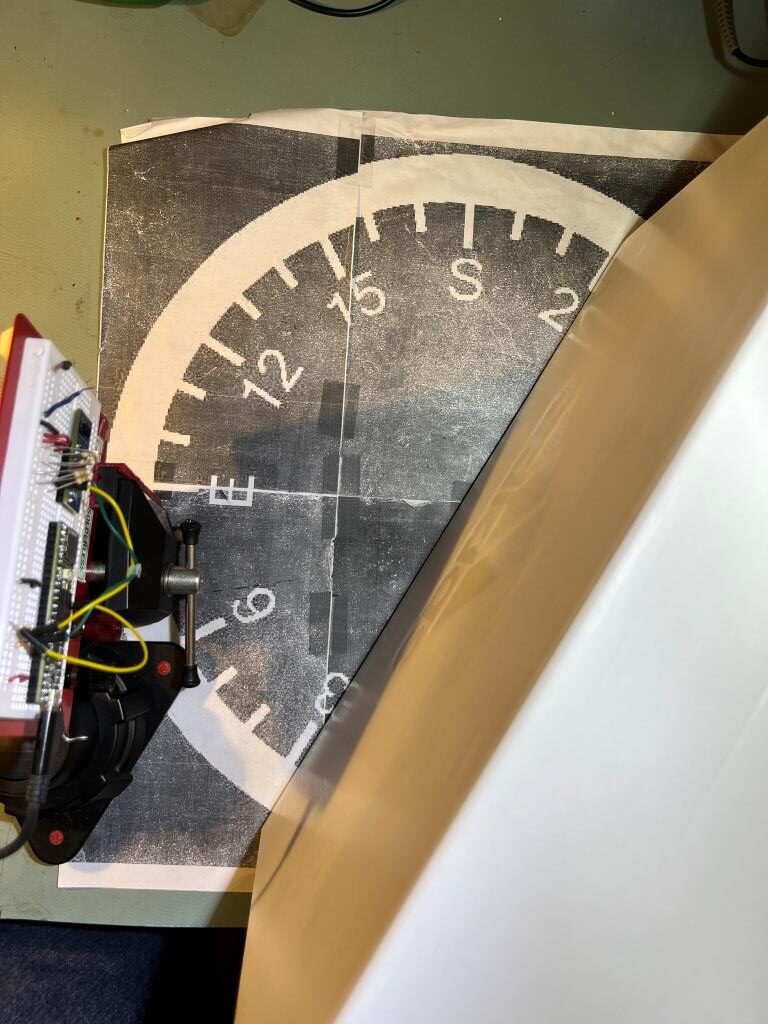
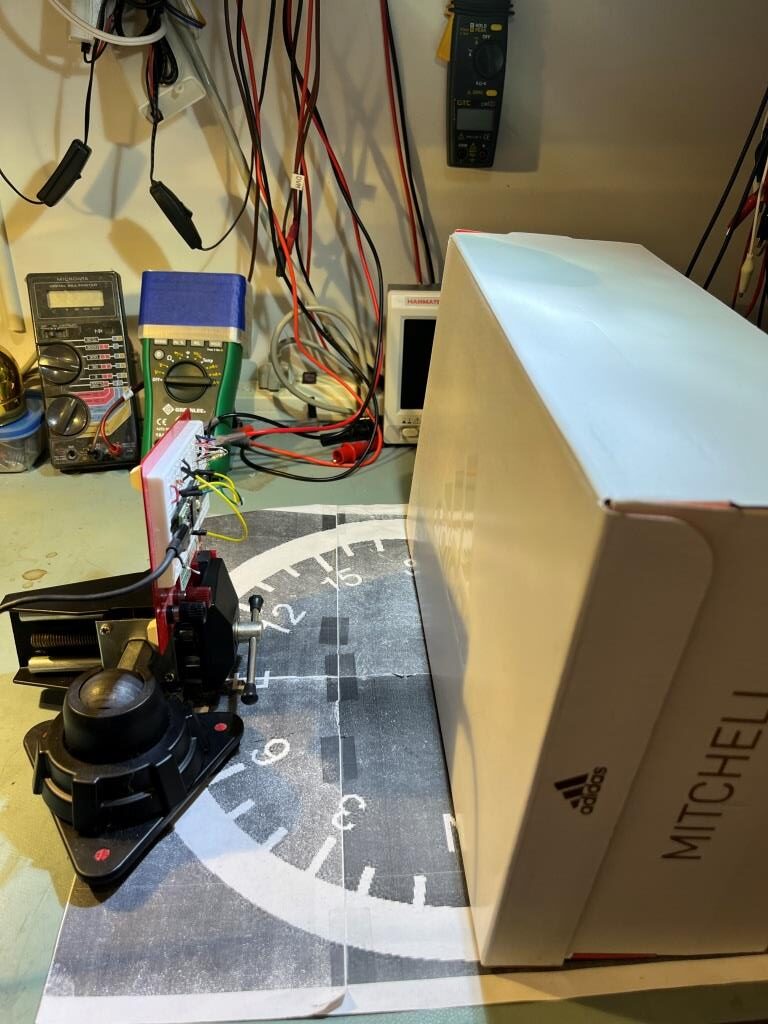
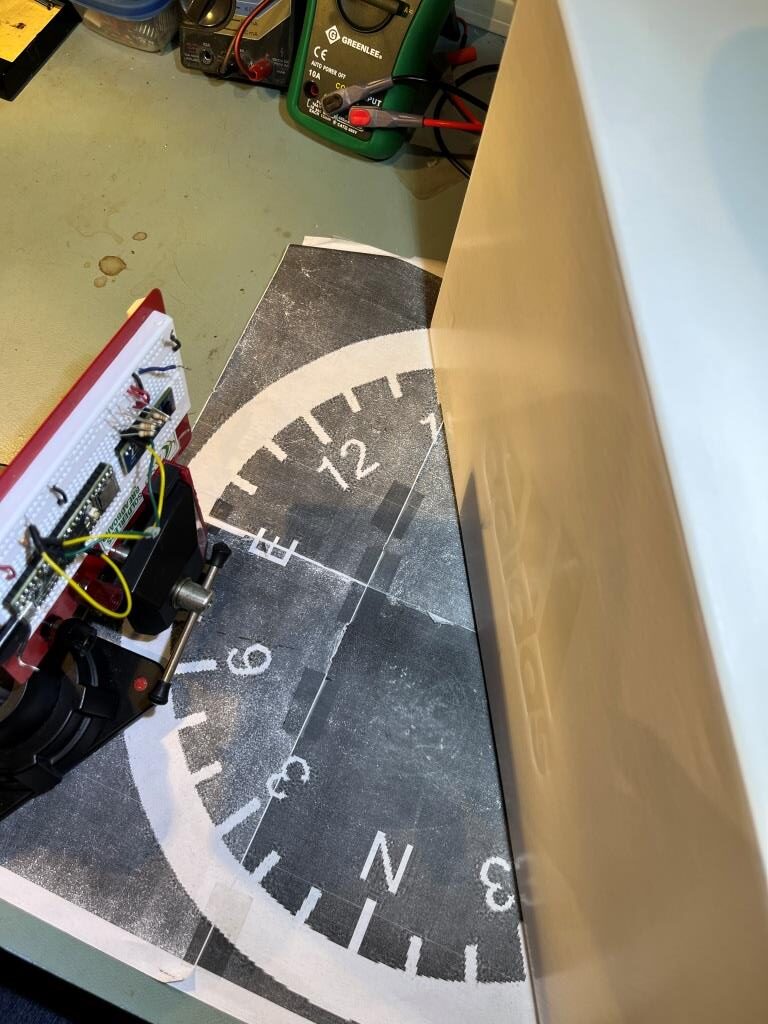
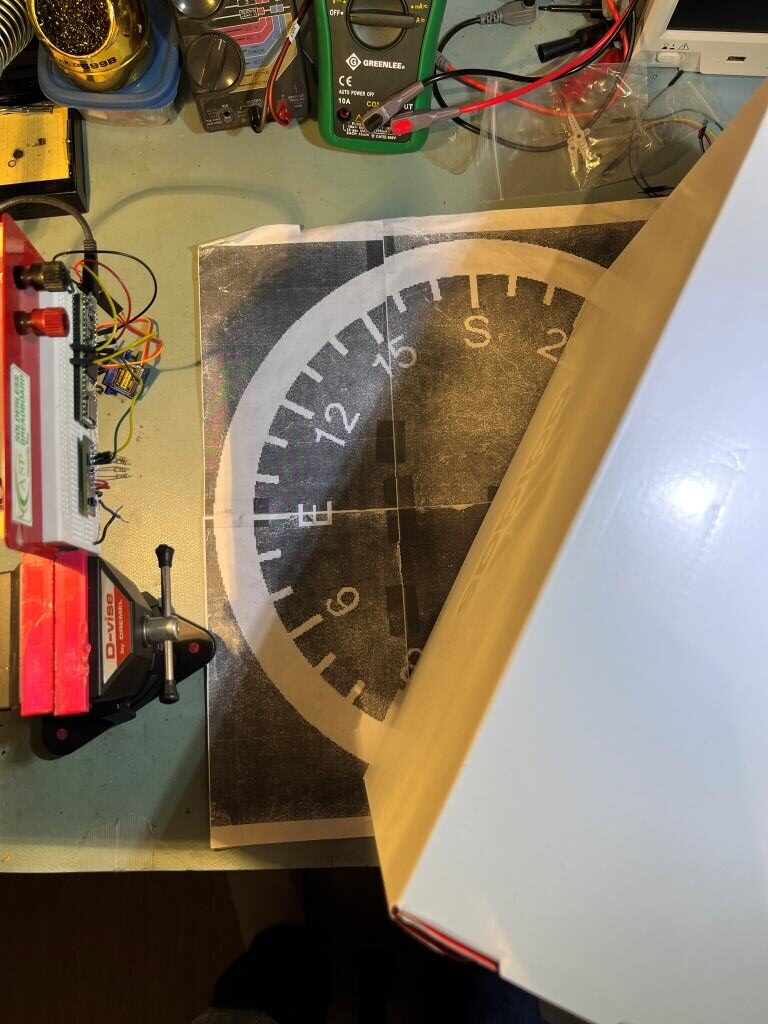
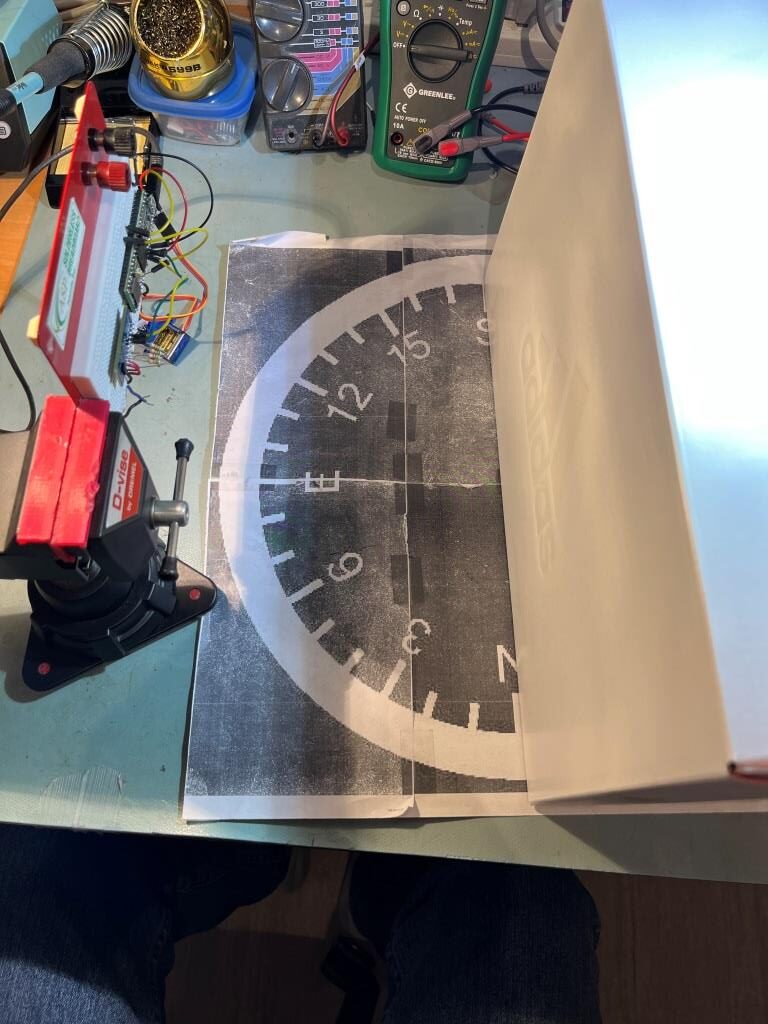
Today it occurred to me that I didn’t really know how the VL53L5CX sensor would respond to ‘wall’ angle changes when oriented in the ‘other’ direction (with the sensor oriented vertical to the floor instead of horizontally as it was above). So, I re-oriented the plugboard in my vise with the sensor mounted vertically, and redid the above experiments, with the results as shown below:
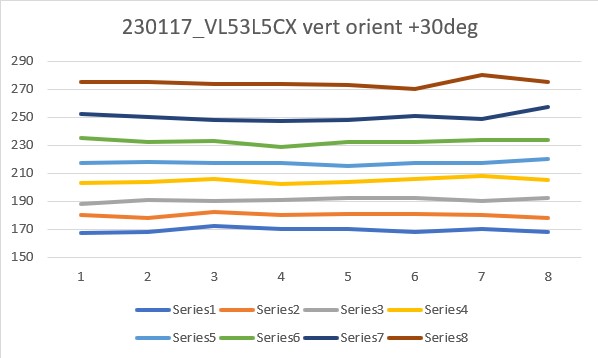
From the above results, it appears that the ‘sensor vertical’ case is more suited to plane orientation measurement than the ‘sensor horizontal’ one. Not sure why this is, but the data is pretty clear.
19 January 2023 Update:
In another email exchange with John Kvam, he wasn’t happy with the fact that the ‘sensor horizontal’ and ‘sensor vertical’ results were different, as the beam transmit/receive geometry is a square pyramid. He thinks some of the beam might be missing the top of the ‘wall’ or hitting the floor, distorting the results (presumably of the ‘horizontal sensor’ results, as the ‘vertical sensor’ results look pretty clean.
So, to address this question, I did another set of runs with the ‘resolution’ parameter set to “4×4” rather than the default “8×8”, and redid the experiments with both ‘horizontal’ and ‘vertical’ sensor orientation, with the following results:
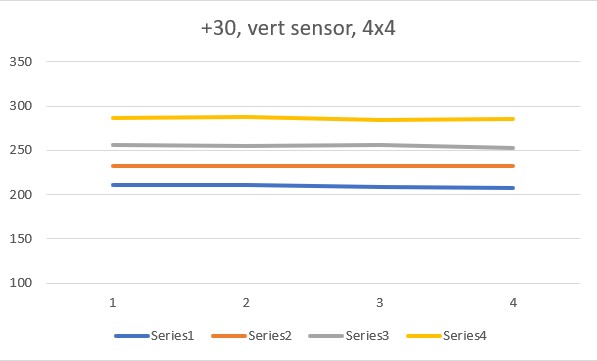

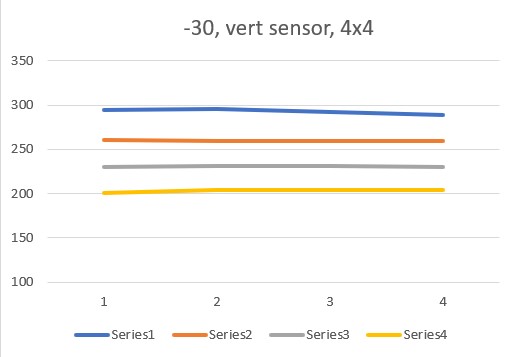
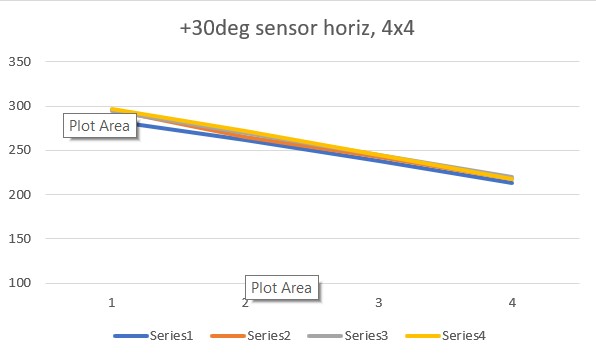
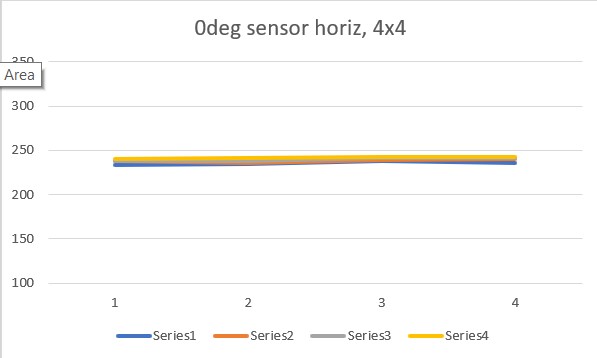
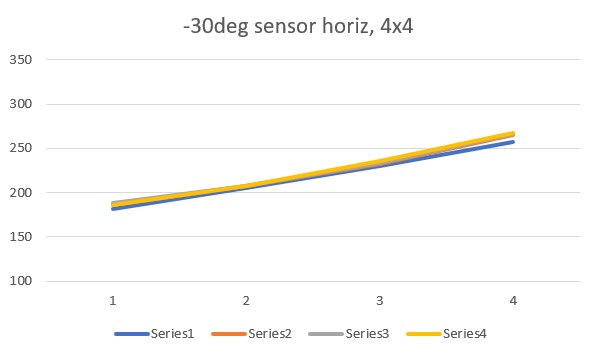
The ‘4×4’ plots above agree quite well with the original set of ‘8×8’ plots, in both shape and magnitude. However, they still show differences between the ‘horizontal’ and ‘vertical’ sensor orientations, which is not what John was expecting.
It occurred to me that the output from my little Sparkfun example is either a 4×4 or 8×8 array of sensor values, so I wasn’t sure what the ‘proper’ way of plotting this data was – I had just accepted Excel’s default which was to plot row by row. As an experiment, I tried switching the rows and columns, whereupon I got the following plots:
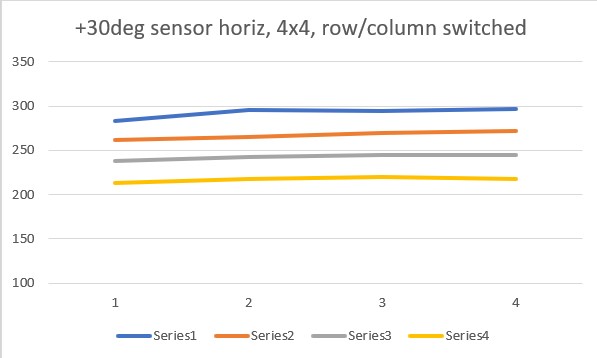
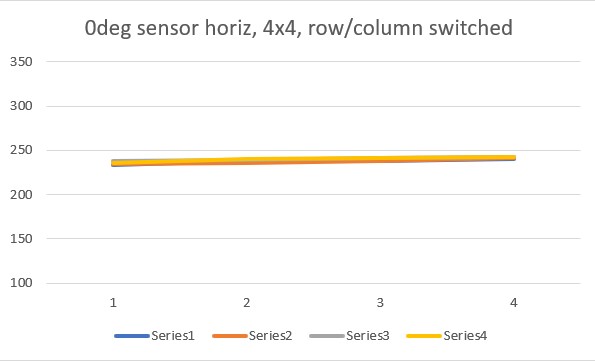
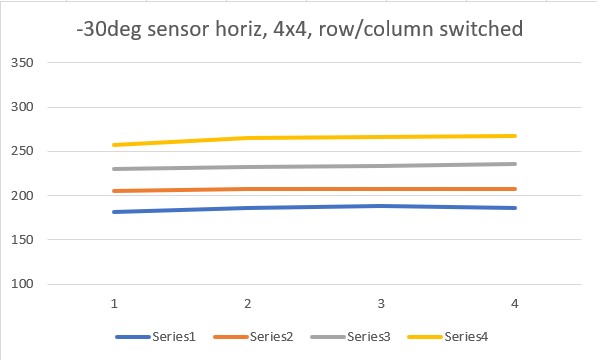
So it appears you can get the same result from both horizontal and vertical orientations, but you have to switch the row/column plotting order to get it. Another way to put it would be that you can select which plot behavior you want by selecting the row/column plotting order – interesting!
To recap this point, here’s a typical 4×4 output:
|
1 2 3 4 |
283 262 238 213 296 265 243 218 295 270 245 220 297 272 245 218 |
If this is plotted in normal row by row order, you get this plot:

But the same data, plotted in column by column order produces this plot:

Here’s the actual code that produces the output data:
|
1 2 3 4 5 6 7 8 9 10 11 12 13 14 15 16 17 18 19 20 21 22 23 24 25 26 27 28 29 30 31 32 33 34 35 36 37 38 39 40 41 42 43 44 45 46 47 48 49 50 51 52 53 54 55 56 57 58 |
#include <Wire.h> #include <SparkFun_VL53L5CX_Library.h> //http://librarymanager/All#SparkFun_VL53L5CX SparkFun_VL53L5CX myImager; VL53L5CX_ResultsData measurementData; // Result data class structure, 1356 byes of RAM int imageResolution = 0; //Used to pretty print output int imageWidth = 0; //Used to pretty print output void setup() { Serial.begin(115200); delay(1000); Serial.println("SparkFun VL53L5CX Imager Example"); Wire.begin(); //This resets to 100kHz I2C Serial.println("Initializing sensor board. This can take up to 10s. Please wait."); if (myImager.begin() == false) { Serial.println(F("Sensor not found - check your wiring. Freezing")); while (1); } //myImager.setResolution(8 * 8); //Enable all 64 pads myImager.setResolution(4 * 4); //01/18/23 rev to use 4x4 array imageResolution = myImager.getResolution(); //Query sensor for current resolution - either 4x4 or 8x8 imageWidth = sqrt(imageResolution); //Calculate printing width myImager.startRanging(); } void loop() { //Poll sensor for new data if (myImager.isDataReady() == true) { if (myImager.getRangingData(&measurementData)) //Read distance data into array { //The ST library returns the data transposed from zone mapping shown in datasheet //Pretty-print data with increasing y, decreasing x to reflect reality for (int y = 0; y <= imageWidth * (imageWidth - 1); y += imageWidth) { for (int x = imageWidth - 1; x >= 0; x--) { Serial.print("\t"); Serial.print(measurementData.distance_mm[x + y]); } Serial.println(); } Serial.println(); } } delay(5); //Small delay between polling } |
The line
|
1 |
if (myImager.getRangingData(&measurementData)) //Read distance data into array |
Reads the entire 4×4 or 8×8 array into memory, and then the doubly-indexed loop prints it out. This is all pretty straightforward, except for how the data is interpreted graphically. As the comments in the code indicate, the printout indexing arrangement is intended to flip the data to undo the physical transformation produced by the physical arrangement of sensor’s transmitter and receiver.
My use case, where all I want is the robot’s orientation angle w/r/t a nearby wall, I don’t really care if the data is transposed horizontally or vertically, as long as it stays the same from measurement to measurement. So, I’m beginning to think that I could simply select the array loading and/or plotting arrangement that gives me the ‘sloped line’ version, and derive the wall orientation from the slope of any of the 4 (or 8) lines
21 January 2023 Update:
After getting the SparkFun VL53L5CXA demo to work, I modified it to compare the first and last values from the first line of the 4×4 measurement array, and used the difference between these values to drive a small RC servo with an attached VL53L5CX module. Then I moved my ‘wall’ around to verify that the setup would, in fact, track the wall plane. Here’s the entire program:
|
1 2 3 4 5 6 7 8 9 10 11 12 13 14 15 16 17 18 19 20 21 22 23 24 25 26 27 28 29 30 31 32 33 34 35 36 37 38 39 40 41 42 43 44 45 46 47 48 49 50 51 52 53 54 55 56 57 58 59 60 61 62 63 64 65 66 67 68 69 70 71 72 73 74 75 76 77 78 79 80 81 82 83 84 85 86 87 88 89 90 91 92 93 94 95 96 97 98 99 100 101 102 103 104 105 106 107 108 109 110 111 112 113 114 115 116 117 118 119 120 121 122 123 124 |
/* Name: VL53L5CX_ParallelFind_V1.ino Created: 1/20/2023 8:04:48 PM Author: FRANKNEWXPS15\Frank Experiment to see if I can use a VL53L5CX to find the parallel orientation to a nearby wall Starts with the code from Sparkfun's VL53L5CX 'Example 1' demo program. Uses a VL53L5CX mounted horizontally on a servo motor. The program seeks to equalize sensor readings across a row. */ #include <Wire.h> #include <SparkFun_VL53L5CX_Library.h> //http://librarymanager/All#SparkFun_VL53L5CX #include <Servo.h> Servo myservo; // create servo object to control a servo // twelve servo objects can be created on most boards uint16_t servopos = 0;// variable to store the servo position SparkFun_VL53L5CX myImager; VL53L5CX_ResultsData measurementData; // Result data class structure, 1356 byes of RAM int imageResolution = 0; //Used to pretty print output int imageWidth = 0; //Used to pretty print output bool bAutoMode = true;//used to break out of manual positioning int16_t curServoPos = 0; int16_t newServoPos = 0; void setup() { Serial.begin(115200);//baud rate ignored by Teensy delay(1000); Serial.println("SparkFun VL53L5CX Imager Example"); Wire.begin(); //This resets to 100kHz I2C Serial.printf("%lu: Initializing sensor board. This can take up to 10s. Please wait\n", millis()); if (myImager.begin() == false) { Serial.println(F("Sensor not found - check your wiring. Freezing")); while (1); } Serial.printf("%lu: Sensor ready!\n", millis()); //myImager.setResolution(8 * 8); //Enable all 64 pads myImager.setResolution(4 * 4); //01/18/23 rev to use 4x4 array imageResolution = myImager.getResolution(); //Query sensor for current resolution - either 4x4 or 8x8 imageWidth = sqrt(imageResolution); //Calculate printing width myImager.startRanging(); myservo.attach(9); // attaches the servo on pin 9 to the servo object //myservo.write(servopos); // tell servo to go to position 0 delay(15); // waits 15ms for the servo to reach the position } void loop() { CheckForUserInput(); //Poll sensor for new data if (myImager.isDataReady() == true) { if (myImager.getRangingData(&measurementData)) //Read distance data into array { //The ST library returns the data transposed from zone mapping shown in datasheet //Pretty-print data with increasing y, decreasing x to reflect reality for (int y = 0; y <= imageWidth * (imageWidth - 1); y += imageWidth) { for (int x = imageWidth - 1; x >= 0; x--) { Serial.print("\t"); Serial.print(measurementData.distance_mm[x + y]); } Serial.println(); } Serial.println(); } } //now determine which way to move the servo to 'flatten' the line for (int x = imageWidth - 1; x >= 0; x--) { Serial.print("\t"); Serial.print(measurementData.distance_mm[x]); } Serial.print("\n"); //if( D[imageWidth - 1 + y=0] > D[0 + y=0] then must be '+' angle; rotate CCW //else rotate CW int16_t delta = measurementData.distance_mm[imageWidth - 1] - measurementData.distance_mm[0]; Serial.printf("first = %d, last = %d, delta = %d\n", measurementData.distance_mm[imageWidth - 1], measurementData.distance_mm[0], delta); if (delta > 0) { newServoPos -= 10; } else if (delta < 0) { newServoPos += 10; } //if delta == 0, no change Serial.printf("current pos = %d, delta = %d, new pos = %d\n",curServoPos, delta, newServoPos); Serial.printf("Writing %d to servo\n", newServoPos); myservo.write(newServoPos); curServoPos = newServoPos; delay(500); //Small delay between polling } |
And here is a short video showing the results:
In the above, the servo is moved in 10deg steps to attempt to zero out the difference between the first and last distance measurements from the first row of the 4×4 array. The loop timing (500mSec/loop) is very slow and the algorithm is a simple as it gets, but it appears that this very simple algorithm actually works pretty well.
Next steps are to reduce the loop delay, and reduce the servo step size from 10deg to 1deg, or even use a step size proportional to the error term. Here’s another short video showing the tracking behavior with a 30Hz ranging frequency and a slightly more aggressive servo positioning algorithm.
So it appears clear that the VL53L5CX can be used to track a nearby wall, at least in this servo-enabled configuration. The remaining question is, can I substitute my robot’s wheel motors in the place of the above RC servo and get the same sort of ‘parallel tracking’ behavior as shown above. If not, then I might still be able to use a single sensor per side by mounting it on a servo as in the above configuration. The servo-mounted configuration might even be better, as the sensor would remain broadside to the nearby wall, even if the robot wasn’t. This might facilitate better ‘move to desired left/right distance’ performance because no distance compensation for orientation would be required, and better wall offset tracking for the same reason.
20 March 2023 Update:
As one result of my recent ‘field’ tests with ‘WallE3_Complete_V2’ (see this post), I discovered that the maximum distance capability (approximately 120cm) of my VL53L0X sensors was marginal for some of the tracking cases. In particular, when the robot passes an open doorway on the tracking side, it attempts to switch to the ‘other’ wall, if it can find one. However, If the robot is tracking the near wall at a 40cm offset, and the other wall is more than 120cm further away (160cm total), then the robot may or may not ‘see’ the other wall during an ‘open doorway’ event. I could probably address this issue by setting the tracking offset to 50cm vs 40cm, but even that might still be marginal. This problem is exacerbated by any robot orientation changes while tracking, as even a few degrees of ‘off-perpendicular’ orientation could cause the distance to the other wall to fall outside the sensor range – bummer.
The real solution to the above problem is to get a better side-distance sensor, just as I did by changing from the Pulsed Light LIDAR front distance sensor to the Garmin LIDAR-Lite V4/LED one. For the VL53L0X side sensor, the logical choice is the VL53L5CX sensor; not only does the -5CX sensor have more range (200-400cm), but as I was able to demonstrate above, only one sensor per side is required for orientation sensing. The downside is it will require quite a bit of reconfiguration of the second deck, both in terms of hardware and software – ugh!
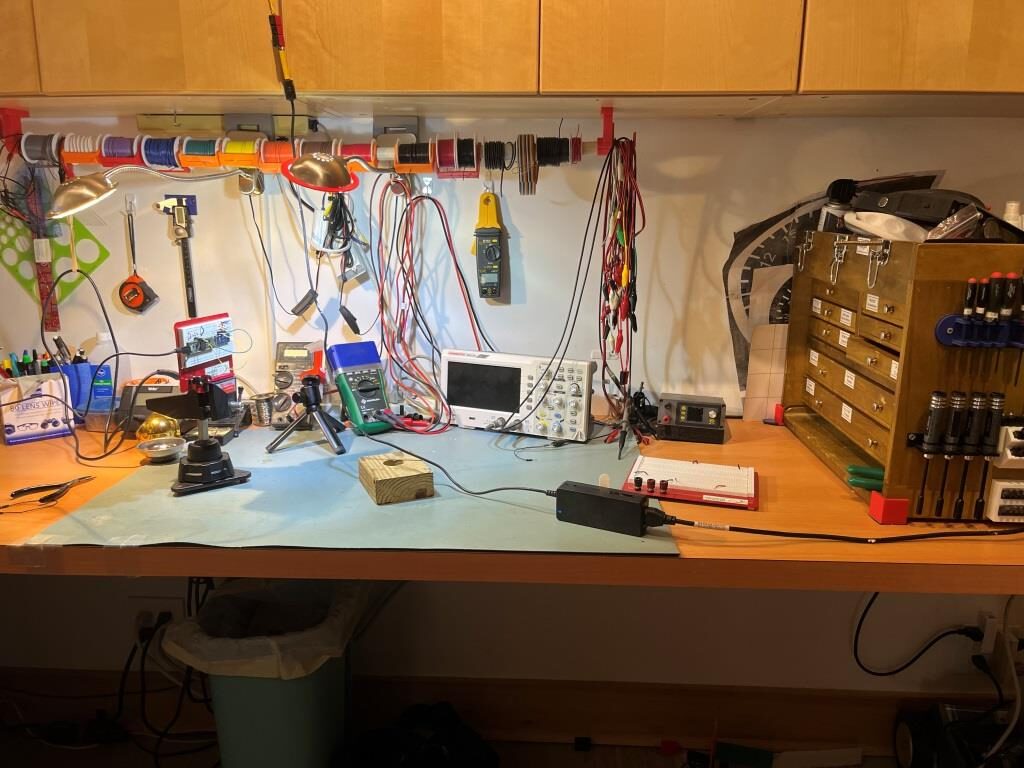
To confirm the distance specs for the VL53L5CX sensor, I reconstructed the above circuit from my and made some tests to measure the maximum distance, as shown below:
Unfortunately, the tests showed that I wasn’t really going to get any additional range out of the VL53L5CX unit, and in addition range determination would be complicated by the fact that the field-of-view for the VL53L5CX is much broader than for the VL53L0X. This would mean that when mounted on WallE3’s second deck, the sensor would ‘see’ the floor as well as the target wall, giving skewed readings across the array. I think I would still be able to figure that out (i.e. only look at the SPADS on the bottom or top, whichever corresponds to ‘not floor’) but still a PITA. The big problem though, is that I no longer think the -5CX would be enough better to justify the expense (time and money and aggravation) of changing from the -0X. Bummer!
More to follow, stay tuned
Frank